How-Tos
Cummins Inc. has provided these tips for businesses and individuals on using power generators and ensuring that they will run properly if needed.
Before your trip, Cummins urges RVers to:
- Make sure the oil is clean and has been changed recently
- Ensure there is an adequate, fresh fuel supply
- Ensure the fluids are full and the batteries are charged
- Test the generator now, before the need arises
On an ongoing basis, Cummins offers the following generator maintenance tips:
Daily, you or a qualified individual should:
- Check coolant heater
- Check coolant level
- Check oil level
- Check fuel level
- Check charge-air piping
Weekly, you or a qualified individual should:
- Check/clean air cleaner
- Check battery charger
- Drain fuel filter
- Drain water from fuel tank
Monthly, you or a qualified individual should:
- Drain water from fuel tank
- Check coolant concentration
- Check drive belt tension
- Drain exhaust condensate
- Check starting batteries
Every six months, you or a qualified individual should:
- Change oil and filter
- Change coolant filter
- Clean crankcase breather
- Change air cleaner element
- Check radiator hoses
- Change fuel filters
Quick Tips for Maintaining your RV
Regular Maintenance Reaps Rewards in RV Enjoyment
A regularly maintained RV can deliver reliable performance and provide years of trouble-free travel enjoyment. Heavy use of your RV and unusual temperatures or humidity may require more frequent maintenance than use under normal conditions. Below are basic guidelines for RV maintenance. Please refer to your owner's manual for more specific information.
Air Conditioner(s)
Remove and clean filter with warm water and soap. Dry and reinstall.
Axles and Suspension
Inspect frequently. Check bolts and nuts for proper torque.
Battery
Every 30 days, fill battery with water and clean top and connections with club soda or baking soda and water to remove acid.
Body
Wash regularly with mild soap and lukewarm water. Apply automotive wax at least once a year.
Brakes
Inspect every six months and service as necessary.
Follow regular chassis maintenance guidelines recommended by manufacturer.
Counter Tops
Clean with mild detergent.
Fabrics
Vacuum and brush away loose dirt; clean spills and stains while fresh. Follow fabric cleaning codes when applicable.
Floor Covering
Clean as necessary. Avoid heavy moisture that can enter and damage your floor. Never damp mop parqyet flooring with water. Vacuum carpeting clean.
Frames
Inspect painted surfaces regularly for damage and rust. Remove rust and touch up with rust preventative paint annually.
Furnace
Make sure external exhaust vent is clean and clear of obstructions.
Hinges
Inspect and lubricate with light household oil periodically.
Hitch/Coupler and fifth wheel Plate
Inspect prior to each trip and lubricate every 90 days.
Jacks
Inspect manual jacks prior to each trip; lubricate every 90 days. Inspect power jacks prior to each trip and lubricate annually. Periodically apply a small amount of WD-40 or similar lubricant at friction points of stabilizing jacks.
Locks and Latches
Inspect regularly. Periodically lubricate with graphite.
LP System
Be sure all LP gas orifices and vents are clean before using.
Lug Nuts
Check for proper torque.
Pigtail Contacts
Inspect and coat with WD-40 -every 90 days.
Refrigerator
Make sure upper and lower exterior vents are clean and clear of obstructions. Inspect and clean flue baffle. Clean interior regularly.
Roof, Body and Underbelly
Inspect for structural integrity every 90 days.
Rubber Roof
Clean your roof four times annually. See your owner's manual for details.
safety chains Chains
Inspect for damage prior to each trip, replace if weakened.
Sealant and Joints
Periodically inspect all exterior seals, moldings and joints for proper sealing.
Shades, Blinds and Valances
Vacuum or wipe with a damp cloth.
Steps
Inspect annually, remove rust. Lubricate moving parts.
Tires
Check air pressure and tread wear regularly and prior to each trip.
TV Antenna
Periodically lubricate exterior moving parts.
Vents
Inspect and clean annually; lightly oil moving parts.
Vinyl Ceiling/Wall Panels
Clean with mild soap and damp sponge as needed.
Water Heater
Keep control compartment clean. Make sure burner tube and exhaust is clear of debris.
Wheel Bearings
Clean and re-pack at least once per year (towables).
Windows
Clean dirt and debris from window tracks and weep holes.
Wood Cabinetry
Protect and clean regularly using non-silicone wood polish.
Note: Always refer to your owner's manual for complete information about properly maintaining your specific RV.
Remember safely first! Always buckle your seat belts! Have a safe and enjoyable trip!
Quick tips for properly distributing weight in your RV
Proper loading and weight distribution makes a big difference. Proper RV loading and weight distribution is critical to your safety and driving pleasure. Be sure to evenly distribute cargo from side to side and front to back. Whenever possible, weigh your unit prior to each trip to assure proper weight balance. Your owner's manual will give you complete details for your specific type of RV. Here are some general tips:
Loading
Placement
Heavy items should be stored as centrally as possible, on or near the floor, and should be secured with nets or bungee cords so they can not move during travel.
Interior Drawers
Do not overload large drawers with heavy pots and pans; this can cause drawer guides to bend. Instead, distribute these items evenly in drawers and use lightweight items such as paper goods or towels as filler.
Overhead Cabinets
Only lightweight items should be stored in overhead cabinets.
Seating
Be sure your passengers sit in seats that are designed for occupancy during transit. Be sure to buckle-up! Do not allow people to sit in seats tagged "not for occupancy while vehicle is in motion."
Plan Ahead
Be sure to leave space and weight allowance for souvenirs you may purchase during your travels.
Fuel Economy
A properly loaded RV helps conserve fuel and prevents excessive wear on your chassis or tow vehicle.
Weighing Your Unit
After your unit is properly loaded, have it weighed before every trip (if possible) for maximum safety and drivability. You can do this at a grain elevator, sand or gravel dealer or government weighing station. There may be a small fee for this service. Check your yellow pages for the location nearest you.
Always refer to your owner's manual for complete information on proper loading and weighing procedures.
General Information
Fifth Wheels
The pin box weight is not included when considering axle weights. Remember that 20-30% of your fifth wheel overall weight is carried by the tow vehicle.
Travel Trailers
The hitch typically carries 10-15% of the weight of a travel trailer.
Motorhomes
If you tow a vehicle with your motorhome and that vehicle weighs more than 2,500 pounds, it should have a braking system that is independent from your motorhome's braking system.
Weight Definitions
Travel Trailer/Fifth Wheels
GVWR (Gross Vehicle Weight Rating) is the maximum permissible weight of the trailer/fifth-wheel when separated from the tow vehicle.
UVW (Unloaded Vehicle Weight) is the total weight of the trailer/fifth-wheel as manufactured at the factory when separated from the tow vehicle. If applicable, it includes full generator fuel, oil and coolants.
CCC (Cargo Carrying Capacity) is equal to GVWR minus each of the following: UVW, full fresh (potable) water weight (including water heater), and full LP gas weight. Dealer installed equipment will reduce Cargo Carrying Capacity.
Motorhomes
GVWR (Gross Vehicle Weight Rating) is the maximum permissible weight of a fully loaded motorhome.
UVW (Unloaded Vehicle Weight) is the weight of a motorhome as manufactured at the factory with full fuel, engine oil and coolants.
CCC (Cargo Carrying Capacity) is equal to GVWR minus each of the following: UVW, full fresh (potable) water weight (including water heater), full LP gas weight and SCWR. Dealer installed equipment and towed vehicle tongue weight will reduce Cargo Carrying Capacity.
SCWR (Sleeping Capacity Weight Rating) is the manufacturer's designated number of sleeping positions multiplied by 154 pounds (70 kilograms).
Note: Water weighs 8.3 pounds (3,8 kilograms) per gallon. LP gas weighs 4.5 pounds (2 kilograms) per gallon.
PLEASE CONSULT YOUR OWNER'S MANUAL FOR SPECIFIC WEIGHING INSTRUCTIONS AND TOWING GUIDELINES.
RV Driving Basics
Understanding the ride and handling characteristics of your RV is essential for a safe and enjoyable trip. Because these characteristics can vary unit to unit, always take the time to test drive your new RV to establish a comfort level. Because loading and weight distribution are critical elements in ride and handling, be sure you are following the recommended guidelines found in your owner's manuals. A short trip or "dry run" in your fully loaded RV is also recommended.
Motorhomes and Towables
Proper Speed
Under ideal road and weather conditions, your RV is designed to travel at legal highway speeds. Under less than ideal conditions, good common sense applies; operate your vehicle at a reduced speed. Please be a safe and sensible driver; never exceed posted legal speed limits.
Clearance
Be sure to read clearance height signs as you approach overpasses and drive-through windows. Also, be on the look out for over hanging tree branches or similar obstructions that can damage your vehicle's roof or roof mounted accessories. Your dealer can provide you with the clearance specifications for your unit.
Pulling Into Traffic
Be sure to allow for the extra length of your motorhome or tow vehicle/trailer combination when pulling into traffic. Double check for oncoming vehicles in all directions and signal before entering the traffic flow. Allow yourself enough time to accelerate slowly and smoothly.
Passing
Additional time and distance are required to pass safely when towing or driving an RV. Wait until the road is completely clear of oncoming traffic. Check your mirrors and always signal lane changes before passing other vehicles or returning to your original lane. Pass smoothly and avoid sudden maneuvers while passing.
Seatbelts
Help protect yourself and your family by ALWAYS wearing seatbelts. During travel, sit only in belted locations.
Grades
When climbing a steep grade, reduce your speed and shift the transmission to a lower gear. Be sure to practice good road manners and drive in the far right lane so drivers approaching from the rear can safely pass your RV. When you are traveling downhill, shift into a lower gear and reduce your speed to assist braking on long or steep downgrades. For rear diesel motorhome driving, light steady braking is best. If so equipped, use your exhaust brake as needed.
Backing
It is extremely important to practice backing in an empty parking lot before you hit the road if you have never backed a trailer or motorhome. Always back your RV slowly and station someone beside the unit to guide you.
Turning
Compensate for the length of your RV by pulling several feet ahead before turning. This will help you avoid hitting curbs or other obstructions.
Swaying or Fishtailing
If this happens while you ore towing a vehicle, accelerate slightly and then gradually slow down. If your unit still sways, and you are not driving in high winds, safely pull off the road and check the following:
Towables
- Height of equalizer hitch
- Distribution of cargo
- Tire pressure
- Tow vehicle front end alignment and suspension
Motorhomes
- Towing equipment
- Distribution of cargo
- Tire pressure
- Motorhome front end alignment and suspension
If you tow a vehicle with your motorhome that weighs more than 2500 pounds, it should have a braking system that is independent from your motorhome's braking system. Should you begin to sway or fishtail, apply your trailer brakes (or the brakes of the vehicle you are towing) first. This helps pull the tow vehicle straight.
Braking
Always allow a safe distance to stop and pay close attention to road conditions at all times. Make sure you compensate for adverse conditions.
Always refer to your owner's manual for complete information on proper driving and towing of your specific RV.
Remember safety first!
Always buckle your seat belts!
Have a safe and enjoyable trip!
Quick checks for preparing to travel.
By Mark Polk, RV Education 101
Trip Preparation Essentials
For a trouble free trip, always take a few minutes to make sure you are properly prepared to hit the road. Your owners manual will give you complete details for your specific RV, however, here are some general "quickchecks":
- Check all fluid levels (engine oil, transmission fluid, coolant, washer fluid, etc.) Refer to the Chassis Owners Manual for details.
- Tires should be checked for proper inflation. Look for damage or unusual wear patterns. Do not travel on worn or damaged tires! See your dealer.
- Check wheel lug torque. Specifications can be found in your owners manual.
- Check the fluid level in your chassis batteries. Make sure post connections are tight and clean.
Interior
- monitor panel for desired levels. Always travel with empty tanks (unless dry camping).
- Secure all loose items. Make sure all drawers and doors are properly closed.
- Secure shower door for travel (if applicable).
- Start generator to confirm operation from inside. Make sure A/C, microwave, lights, outlets, etc. all function properly.
- Confirm LP appliance start-up and operations (refrigerator, stove, hot water heater). Run refrigerator at least 24 hours prior
- to departure.
- Check water pump operation.
- Make sure antenna booster switch is turned off.
- Make sure all window and roof vents are closed.
- Check for proper operation of slide out room. Secure with travel lock (if provided).
- Check for proper operation of leveling jacks.
- Test LP and CO2 detectors. Check batteries in smoke alarm and test.
- Check complete dash operations, if applicable, (gauges, temperature control, back-up camera, etc.)
- Adjust pilot seat and exterior mirrors.
- Make sure you have your Owner Information Guide with you.
Exterior
- Check all lights for proper operation (headlights, tail lights, turn signals, running lights, etc.).
- Adjust exterior mirrors to assure clear vision.
- Check hydraulic fluid level(s) (if applicable). Make sure leveling jacks are fully retracted
- Check air suspension bags for proper inflation {refer to owners manual for correct pressures).
- Check coach battery fluid levels.
- Check windshield wiper operation.
- Close and lock all exterior compartment doors.
- Make sure awnings are in the travel/lock position.
- Make sure the antenna and/or satellite dish are in travel (down) position.
- Check generator oil level. Start it from outside to assure proper operation.
- Make sure all termination system valves are closed and outlet cap is secured.
- Secure range vent flap for travel.
- Properly store shore connections (power cord, water hose, etc.).
- Complete a walk-around to assure that you are ready to hit the road. Retract entry steps.
By Mark Polk, RV Education 101
Quick checklist for do-it-yourself winterizing and spring start up.
Winterization and Spring Start-Up Checklist
Proper storage and start up practices are critical to trouble free, long term operation and performance from your RV. The following checklists represent a simple outline of the primary items that should be checked for proper storage and start up. ALWAYS refer to your owner's manuals for specific procedures and checks that should be followed.
Winter
Fresh Water System
- Drain all water lines
- Empty water heater
- Close bypass valves on back of water heater
- Drain fresh water storage tank
- Empty toilet
- Drain shower hose
- Pump RV antifreeze through system
Waster Water System
- Pour antifreeze in "P" traps
- Flush and clean all holding tanks
- Inspect termination valves
- Lube valves
LP System
- Turn off all appliances completely
- Tank service valve off
- Plug service valve outlet
- Cap POL fitting
- Remove/store LP cylinders
- Clean and cover regulator
- Disarm LP leak detector
Water Heater
- Turn completely off
- Cover opening
Furnace
- Cover intake/exhaust vents
Refrigerator
- Turn completely off
- Clean and dry inside
- Block door open
- Cover exterior vent opening
- Install screen on roof vent
Range
- Turn completely off
- Clean and dry
Battery Systems
- Disconnect all betteries and tape off ends of wire with electrical tape
- Fill and charge batteries before storage
120 Volt AC System
- Unplug and store shore line
generator
- Add Stable to gas supply according to directions on package. Run genset for 1/2 hour to get Stable into genset
- Clean exterior of generator
- Block off exhaust
Roof
- Check seams
- Reseal as necessary
Roof Air Conditioner
- Install cover
Windows
- Check sealants and reseal as necessary
Awnings
- Clean and dry
Tires
- Inspect
- Apply protectant
- Cover
Motorhome Specifics
- Fill gas tanks and add Stable as directed
- Check engine coolant strength and add if necessary
- Check windshield washer fluid
Wash exterior of your RV and cover with tarp if needed.
Spring
Roof
- Inspect sealants and reseal if necessary
Windows
- Uncover and open to air out
Battery Systems
- Reinstall and reconnect batteries
- Clean contacts and tighten terminals
- Check electrolyte level
- Charge fully
- Verify voltage inside coach
- Reinstall dry cell batteries in safety systems
120 Volt AC System
- Inspect shoreline cord/clean contacts
- Verify polarity
- Test GFI
Fresh Water System
- Sanitize fresh water tank
- Pump fresh water through system
- Drain and refill tank
- Add freshener
Waste Water System
- Check operation of termination valves
- Drain and flush tanks
- Add chemical
- Inspect flexible sewer hose
- Replace seals if necessary
LP System
- Inspect LP cylinders
- Connect regulator assembly
- Leak test fitting
Water Heater
- Uncover vents
- Blow out burner area
Refrigerator
- Uncover vents
- Insure free flow of air
- Blow out burner area
Furnace
- Uncover intake/exhaust vents
- Vacuum around combustion chamber inside
- Clean wall thermostat contacts
Range
- Clean
Open LP Service Valve
- Light one stove burner
- Light all other appliances and let cycle
- Activate LP leak detector
Roof Air Conditioner
- Clean filters
- Remove cover
- Inspect condenser fins
Generator
- Change oil and replace all filters
- Lube throttle pivot points
- Clean plugs and reinstall
- Open tailpipe
- Clean exterior of unit
- Test unit
- Apply air conditioner load
Motorhome Specifics
- Check all fluid levels
- Fill windshield washer bottle
travel trailer Specifics
- Inspect brakes
- Check operation of Breakaway Switch
- Check axle bearing condition
- Under Coach Area
- Check all items
- Tie up loose wires, etc.
- Clear cobwebs
Miscellaneous To Do
- Wash exterior
- Lube compartment locks
- Test all lights, running gear, etc.
- Inflate tires as necessary
- Check lug nut torque
- Insure that fire extinguisher is ready
- Test drive coach
By Mark Polk, RV Education 101
There are lots of things to do and to see in the wintertime; beautiful winter scenery, snow skiing, hunting, riding snowmobiles and much more.
There are lots of things to do and to see in the wintertime; beautiful winter scenery, snow skiing, hunting, riding snowmobiles and much more. It's no wonder so many people enjoy using their RV's year round. When winter approaches each year I get numerous e-mails requesting information about using RV's in cold temperatures. One reason I haven't written on this subject in the past is because it would require more than just a short article to thoroughly cover this topic. Another reason for not writing about this in the past is that there are no guarantees that your RV can or will be 100% protected from the harsh winter elements by following written advice on the subject.
What I can do is offer you some suggestions and ideas that will help to protect your RV if you plan to use it during the cold winter months. I just can't guarantee that it will be 100% protected. These suggestions and ideas are for short term winter camping in your RV. If you plan to take extended RV trips in cold weather there are many other precautions and measures that need to be considered, like using insulated skirting around the bottom of the RV for example.
Note: What we will be concentrating on is how to protect your RV during cold weather camping. It is extremely important that you also understand how to protect yourself and other campers in cold temperatures.
One of the first considerations for cold weather RVing is if you will be traveling in temperatures below freezing. If this is the case, and there is water in the RV water system, your plumbing lines or water heater tank could freeze, resulting in costly repair bills, not to mention ruining your winter wonderland RV trip. To avoid this from happening I travel with the water system winterized. It is actually much easier to winterize an RV than most people think it is, and it's not very expensive either. I have winterized and de-winterized our RV as many as four times in one winter.
Note: Check out our RV Winterizing and Storing DVD with Printed Checklist it instructs you on how easy it is to properly prepare and protect your RV for winter storage. It will teach you how to winterize your RV, by yourself, and save money, especially if you enjoy using your RV during the winter months.
The good news is it is still possible to use the bathroom facilities when you are traveling with the RV winterized. We take one gallon jugs filled with water to use in the toilet, and if your holding tanks are not heated you can put some RV antifreeze in the holding tanks to prevent the contents from freezing. Add the RV antifreeze (1-2 gallons) through the toilet for the Black Water holding tank and down the shower or tub drain for the Gray Water tank. The antifreeze will also protect the shower or tub P-trap which is usually located below floor level. The amount of antifreeze required for the holding tanks will be based on the size of the tanks, and it will be necessary to add more RV antifreeze as waste Water is added to the tanks to prevent the antifreeze from being diluted.
Don't allow the holding tanks to fill completely, before emptying them, during cold weather camping. This will reduce the chance of freezing, resulting in damage to the holding tanks. Take bottled water along for drinking and other needs like cooking, washing up and brushing your teeth when the RV is winterized. We have a five gallon jug that we always take on trips, filled with tap water from our house, for our pet¡¦s drinking water and our other needs. This comes in handy when the RV is winterized.
When we arrive at our destination I try to select a site that will be exposed to the sun throughout the day, but also where there is some type of wind break available. Position the RV on the site so the front or rear will be facing the brunt of any wind, not the side of the RV. If there is an electrical hook-up I de-winterize the water system so we can use everything. All of the water lines in our motorhome are above floor level, in a heated space, so we don¡¦t need to be too concerned about the water system freezing as long as the RV has heat. We leave the water heater turned on whenever the water heater tank is full so there is no chance of it freezing. Some water heaters operate off of LP gas and electricity. Keep in mind if it's in the electric mode it will use 9 to 13 amps.
It's important that you know where all of the plumbing on your RV is located. Some RVs have heat ducts going to the basement storage areas where the water system is exposed to outside temperatures, but many RVs do not. If portions of the RV water system are below floor level, in areas that are not heated, it is possible for it to freeze and damage the water lines. If you are hooked up to an external water supply one option is to leave a faucet in the RV dripping, to keep the water moving, and decrease the possibility of water lines freezing. Another option is to use heat tape to protect the exposed water lines. Heat tape can be purchased at most hardware or building supply stores. Make sure it is suitable for the types of water lines in your RV, and if you plan to use it on a water hose.
If it is extremely cold outside and the possibility exists that the outside water supply could freeze, or if the campground water supply is shut off for the winter, I fill our fresh water holding tank and use it for all of our water requirements. Again, keep in mind where your fresh water tank is located; ours is above floor level in a heated area. If the campgrounds shower facilities are still open it¡¦s a good idea to use them to avoid the gray water holding tank from filling so quickly. In this situation it might be in your best interest to keep the RV winterized and just use the campgrounds facilities.
The best source for heat is to use the RVs forced air furnace. There are a couple of things you need to be aware of when you use the RV furnace. First of all it will consume more LP gas than any of the other LP gas fired appliances. The LP tank or cylinders should be full before leaving on your trip, and you will need to monitor the LP gas supply carefully during your stay. Second, if you are not plugged into an electrical supply the furnace fan can quickly drain the auxiliary battery(s). Batteries that are not fully charged in cold temperatures can freeze resulting in not being able to use the RV furnace. I recommend that you plan your stay where you have access to an electrical supply when camping in cold weather. When we are plugged into electricity we set the forced air furnace on a low setting, around 55 degrees, and supplement the heat with a thermostatically controlled ceramic heater. These heaters work extremely well and you don¡¦t need to be concerned about a fire or carbon monoxide.
Caution: Carbon monoxide is deadly. You cannot see it, taste it or smell it. Never use your range burners or oven as a source of heat. If your RV is not equipped with a carbon monoxide detector you should purchase a battery operated model designed for use in RV's. Always test the carbon monoxide detector for proper operation before each trip.
You also need to be aware of the symptoms of carbon monoxide poisoning:
- Dizziness
- Vomiting
- Nausea
- Muscular twitching
- Intense headache
- Throbbing in the temples
- Weakness and sleepiness
- Inability to think coherently If you or anybody else experiences any of these symptoms get to fresh air immediately and if the symptoms persist seek medical attention. For more information on carbon monoxide poisoning go to http://www.carbonmonoxidekills.com
If you will be camping where you don't have access to an electrical hook-up one option is to use a generator. A generator can keep the RV batteries topped off and allow you to use the RV furnace. You will need to have a sufficient supply of fuel on hand for the generator. If it¡¦s a portable generator make sure the exhaust is directed away from the area where you are camping. Regardless of the type of generator always make sure the exhaust system is in proper operating condition and the carbon monoxide detector is working properly.
Here are a few more cold weather RV tips in no particular order: - Do not store any water hoses with water in them. If you need to use it, it will probably be frozen. You can take it inside to thaw out if need be, or use a hair dryer.
- Covering the windows with curtains, drapes or almost anything will help to hold some of the heat in. It helps to cover overhead vent openings too.
- It may be necessary to take military type showers to keep from filling the gray water tank so quickly. Heat up some water, take the water and a tall glass and enjoy your shower.
- Leave cabinets or drawers open where water lines are located to allow heat to circulate around plumbing.
- Block off sections of the RV you won¡¦t be using with blankets or sheets. The more heat where you are the better.
- Try to avoid opening the entry door as much as possible.
- Oh and don't forget the electric blanket. It can be a lifesaver at night.
Tip: If you haven't purchased your RV yet and you know you will be using an RV in cold weather make sure to include an artic package option when you buy it. Some packages include higher R-factor insulation, enclosed Underbelly, heated holding tanks, dual pane windows and more.
By Mark Polk, RV Education 101
Awnings are a great feature to have on your RV. There are several different types of RV awnings and they serve different purposes. There are window and door awnings that provide shade and keep rain away from your RV windows or entry door. There are slide-out awnings that protect the slide-out roof from debris and water. And there are patio awnings that provide us with shade when we want to sit and enjoy the outdoors. The awnings on your RV will provide years of reliable trouble free operation, if you take the time to do a little preventive maintenance and cleaning.
The fabric used on awnings is made from vinyl or acrylic. Some awnings have an aluminum or vinyl wrap-around weather guard that protects the awning fabric when it's in the travel position. When you open the awning for the first time each year, or if it has been stored for a while, you will need to inspect the awning fabric for any signs of mildew or stains. Vinyl awnings will mildew. If the awning fabric is fairly clean, normal cleaning can be accomplished with a soft brush and mild soap and water. Do not use oil based or abrasive cleaners. Clean and thoroughly rinse both sides of the awning.
For more difficult stains, or mildew, there are after market commercial cleaners made just for awning fabrics. One method that seems to work well is to spray the inside and outside of the awning fabric with the appropriate cleaner, then roll it up and let it sit for several minutes. This distributes the cleaner over the entire surface of the awning fabric and allows the cleaner time to work. Open the awning and thoroughly rinse both sides of the fabric. It may be necessary to scrub stubborn stains with a brush before rinsing.
Note: Carefully follow all awning and cleaner manufacturer directions.
You can clean the awning hardware with the same cleaner you use to wash the RV. Now you can inspect the awning fabric for any tears or excessive wear. Talk to your RV dealer about what materials to use to repair or patch the awning fabric. Do not store the awning when the fabric is wet. Allow enough time for it to dry completely, on both sides, before storing the awning. While the awning is out, inspect the awning hardware. The bottom awning brackets support most of the load from the awning. Check the lag screws in the awning brackets for secure mounting. Inspect the arm pivot holes for any enlarged holes or broken rivets in the handles. Check for a warped roller tube. If the roller tube is warped it will be noticeable when you roll the awning out. Inspect the awning end caps for secure mounting and broken rivets. Make sure the awning rail is securely mounted to the side of the RV. Have any damaged or broken parts repaired before using the awning.
Caution: Never attempt to remove the awning end caps. Spring tension can result in serious injury.
In addition to cleaning and inspecting your awning there are a few things to keep in mind when using the awning. Always lower one end of the awning to allow for water runoff. The weight from water pooling on the awning fabric can cause extensive and costly damage. Any wind gusts over 20 miles per hour can also cause extensive damage to the awning and to the RV. Never leave the awning out unattended. If everyone is leaving the campsite, store the awning in the travel position. When you go to bed, store the awning. Even when you are at the campsite, you should use awning tie downs to prevent any sudden damage caused by high wind gusts or a sudden storm. You have the option to position the awning arms straight down and stake them to the ground, but you will get better support if they're attached to the bottom awning brackets on the side of the RV. Remember, it is much easier to prevent damage to your awning than it is to repair it.
Awning Tip: Check with your RV insurance provider to make sure your RV awning is covered in the event of any damage. Some insurance companies require separate insurance coverage on the awning.
By Mark Polk, RV Education 101
Did you know that there are close to 20,000 reported RV fires each year? A large percentage of these fires are transmission related fires on motor homes. Automatic transmission fluid leaking from the transmission can ignite, and quickly spread if it contacts any portion of the exhaust system. Before traveling in your RV inspect the underside for any signs of fluid leaking. Have any potential leaks checked out and repaired immediately.
Over 25% of RV fires are caused by shorts in the 12-volt electrical system. Not only do you need a fire extinguisher, but you need to inspect it before each trip to make sure it is charged. Look to see if the arrow is pointing in the green area in the sight gauge. If it reads empty or needs charging replace it or have it recharged immediately. If it's a dry powder type fire extinguisher the arrow pointing in the green doesn't always guarantee that it will work. Every month you should turn dry powder extinguishers upside down, tap on the bottom of the extinguisher and shake it so the powder that settled on the bottom is released.
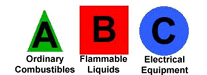
There are four different types, or classes of fire extinguishers, A,B, C, and D, and each type is for a specific type of fire.
Class A extinguishers are used for fires caused by ordinary combustibles like paper and wood.
Class B extinguishers are used for fires caused by flammable liquids like grease, gasoline and oil.
Class C extinguishers are used for fires caused by electrical equipment.
Class D extinguishers are used for fires on flammable metals and often they are specific for the type of metal it is.
Some fire extinguishers have multi class ratings like, AB, BC or ABC which means one fire extinguisher can be used to put out different types of fires. The National Fire Protection Agency rules that RV's must have a “BC” rated fire extinguisher near the exit. “BC” rated fire extinguishers are used for flammable liquids and gasses like grease, gasoline and oil, and for electrical fires.Many RV fires that happen inside an RV are type A fires caused by common combustibles like paper. This is why, in my opinion you need more than one fire extinguisher for your RV.
In addition to keeping a BC or ABC type fire extinguisher inside the RV, it's a good idea to keep a BC type fire extinguisher in an outside storage compartment where it is easily accessible. If you tow a trailer keep a BC or ABC type fire extinguisher in the tow vehicle too.
Having these fire extinguishers available is a great idea but they are worthless if you and the other people traveling in the RV don't know what type of fire they are used for and how to properly use them. Get everybody who will be in the RV together, and make sure they understand the different types of fire extinguishers you have and where they are located in the event of an emergency.
The old style labeling for fire extinguishers, to designate what type of fire they are used for was with the letter A, B,C or D
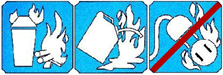
Newer style labeling for fire extinguishers includes a picture designating the type of fire it is used for.

If it can be used for multiple types of fires it will show the pictures for the types of fires it can be used for and it will have a red diagonal line through the picture of what it cannot be used for.
Once everybody understands the different types of fire extinguishers the next step is to teach everybody how to properly use a fire extinguisher. There are many different types and sizes of fire extinguishers, but for the most part they all work the same way. Teach everybody to remember the word PASS. This is an easy way to remember how to use a fire extinguisher, especially during an emergency. PASS stands for Pull, Aim, Squeeze and Sweep.
Pull the pin located at the top of the fire extinguisher.
Aim the nozzle at the base of the fire.
Squeeze the handle, standing approximately 8 feet away from the fire. Release the handle if you want it to stop.
Sweep the nozzle back and forth at the base of the fire until it is out. Observe the fire to make sure it does not re-ignite.
Last but certainly not least you need to have an emergency escape plan. The National Fire Protection agency requires that RV's have emergency escape windows. Make sure everybody knows where the escape window is located and how to use it. It's a good idea to practice using it so you are familiar with how to get out of the RV in case of an emergency. You should have an escape plan for the front of the RV and the rear of the RV.
Most important, do not risk your personal safety,or the safety of others, attempting to put a fire out. The first step is to get everybodyout of the RV and away from the fire safely. Have somebody call 911 for help, and if you can't extinguish the fire within the first minute or so let the professionals put it out.
By Mark Polk, RV Education 101
It's easy to let your guard down sometimes and to forget that not everybody you encounter is as honest and law abiding as you might be. This is an excerpt from my Checklists for RVers E-book to help keep your guard up and travel safe in your RV.
For one minute, try to think the way a criminal would think. If you were at a rest stop looking for your next target or victim, what would you look for? Let's pretend for a moment that you were going to target a vehicle. Which would be more appealing, a car whose owner stopped for a quick bathroom break or an expensive looking Class A motor home, whose owners are out walking their dogs? I don't have the mind of a criminal but this is an easy choice. That expensive looking RV probably has expensive contents inside like, jewelry, cameras, and a laptop computer.
Plan your trip, travel safe and enjoy your RV experiences. Remember, getting there is half the fun!
- Okay, we have come to the conclusion that we, the RVers, are the prime target for the criminal mind, so what can we do to protect ourselves? That's what this RV security checklist is for; to give you some ideas on how to protect yourself and you're personal belongings when you're traveling in your RV.
- Don't stay overnight at a rest stop. Rest stops attract criminals. If you stop at a rest stop it should only be for a short break and then back on the road. Lock the RV and take turns using the facilities, always leaving someone in or close to the RV. Always be on the look out for anything or anyone that looks suspicious. Keep your cell phone handy in case you need it and don't open the door for anybody, unless you know who it is.
- Rest stops aren't the only place you need to be concerned about. Every time you stop to refuel there are certain precautions you need to take. It's easy to be vulnerable to a thief at a gas station or a truck stop. I have a bad habit of leaving my wallet on the console of our Class C motor home. The door isn't locked and your spouse is taking advantage of the time to walk the dogs. This is how quick it can happen. Get in the habit of locking the doors whenever you or someone else is not physically in the RV.
- Most robberies occur at night and most travel related robberies occur at rest stops, gas stations, convenience stores and ATM machines. Try to schedule most of your stops during daylight hours, and whenever you stop be aware of your surroundings. If something doesn't look right leave.
- Wal-Mart or other parking lots where you might stop to get a few hours of sleep can present security problems too. You should always park in a well lit area and the entry door of the RV should be facing where most of the activity is. A thief prefers to work where it is dark and where it is least likely to draw any attention. Close your curtains or blinds so it's not possible for someone to look inside. Don't open the door for anybody unless you know who it is. If it's a security guard ask for identification before you open the door.
- As much as we would like to believe that campgrounds are 100% safe and secure don't let your guard down. You don't need to be paranoid, just use some common sense. Don't leave expensive equipment lying around unsecured. Vehicle tow bars, hitches, bicycles and other items need to be under lock and key.
- Keep any valuables inside the RV secured and out of sight. It's a good idea to purchase a small fire proof safe to store valuables and important paperwork in. The safe might protect your valuables from the hazards of a fire but it will still need to be stored in a secure, out of the way place,inside the RV.
- Always lock the RV when you're not physically at the campsite. Do not store valuable equipment in outside storage compartments. Believe it or not,a vast majority of RV's use the same exact key as yours for outside storage compartments. If you store valuables, like golf clubs, fishing gear or tools in the outside compartments you may want to have the locks changed.
- Before you leave on a trip make sure your Emergency Roadside Service Plan is current. In the unfortunate event that you breakdown on the road try to pull off in as safe a place as possible and call for help immediately. Stay with the RV until help arrives.
- It's unfortunate that we live in a day and age where we need to take these added measures to protect ourselves. I don't want you to feel like everybody you meet during your travels is a thief or has bad intentions. Just use common sense and be aware of what is going on around you.
After doing some research on RV insurance claims I discovered what one insurance company listed as the top five RV insurance claims filed by RVers. Today we're going to discuss what these claims are and how you can avoid them.
Claim #1
This insurance company stated that it receives at least 400 claims each year involving fires around the back of the refrigerator that are caused by leaking Propane lines. If you're using your refrigerator in the LP gas mode, with an open flame, you definitely don't want a leaking LP gas line.
How to avoid it
To avoid becoming a statistic I recommend that you take your RV to an authorized RV repair facility annually and have the entire LP gas system checked. RV technicians have the proper equipment to check the system for leaks and to make sure the LP gas pressure is adjusted properly.
You, the owner, can periodically inspect for LP gas leaks. To do this turn the main gas supply on, but do not light any pilot lights or other burners. Take abottle of approved LP leak detector solution and dab around all gas fittings. If there is a leak the small bubbles will grow into larger bubbles. Tighten the fitting and repeat the leak test. If the problem persists turn the LP gas supply off and take it to an RV repair center to have it checked out and repaired.
Claim #2
The next claim the insurance company listed was RV's hitting gas station overhangs and bridges. RVers forget or don't know the height of their RV and enter areas that don't have enough overhead clearance.
How to avoid it
The first step is to measure the height of the RV from the ground to the highest point, usually the top off the air conditioner. Manufacturer brochures often times include this information. Check the footnotes to make sure it includes optional equipment like the air conditioner. For safety measures add an additional six inches to the overall height. Write this information down and post it in the RV or tow vehicle where it can be easily seen and will serve as a constant reminder for you. When you exit the interstate to refuel select an exit that has several fuel stations so you can pick one that is easy to navigate,and has plenty of overhead clearance. If you travel on roads less traveled be sure and check clearances on all overhead bridges before attempting to go under them.
Claim #3
The insurance company lumped retracting the RV steps and awnings together in this claim. Traveling with the Awning properly secured is one concern and stowing your awning in bad weather is another concern. Since the claim was not very specific about the awning I will address both issues.
How to avoid it
When I worked for an RV dealership I saw the end result of not retracting the steps on more than one occasion. It's easy to forget the RV steps when you are getting ready go on a trip or leave a campground. I have two ways to avoid this from happening to you. First you should always use a pre-trip checklist anytime you plan to move the RV. Second you should always walk around the entire RV a second time just before pulling out. You'll be amazed at some of the things you missed the first time you walked around the RV. I have a very thorough pre-trip checklist available in my “Checklists for RVers” e-book.
The first thing we'll cover concerning the awning is stowing it properly for travel. Make sure the awning is properly stowed against the side of the RV and the roller tube lock mechanism is in the retract position. Make sure the awning arm travel locks are latched and tighten the black knobs on the back of the awning arms. The awning makes your RV six inches wider and you must always keep this in mind when you are traveling. I have seen many cases where the awning roller tube and fabric gets damaged by hitting or rubbing on something and the awning arms get damaged by catching on something. When navigating in close quarters, such as at a campground, use a spotter or a ground guide to make sure you have enough clearance to avoid damage to the awning.
I'm not sure if the insurance company gets more claims for travel related damage to the awning or storm related damage. I think I have seen more awning damage caused by rain, wind and storms. You should always lower one end of the awning to allow for water run off. The weight from water pooling on the awning fabric can cause extensive and costly damage. Any wind over 20 miles per hour can also cause extensive damage to the awning and to the RV. Never leave the awning out unattended. If everyone is leaving the campsite, store the awning in the travel position. When you go to bed, store the awning in the travel position. Even when you are at the campsite, you should use awning tie downs to prevent any sudden damage caused by a high wind gust or a storm that moves in quickly.
Claim #4
The next claim the insurance company listed was for damage caused by tire blowouts. I have seen extensive damage to RVs caused by tire blowouts. Tire blowouts on RVs are caused by overloaded tires, under inflated tires, old tires and tires damaged by the ozone and UV rays.
How to avoid it
Just like the axles on your RV, tires have load ratings too. The maximum ratings are molded into the side of the tires. You need to have your fully loadedRV weighed to ensure that the tires are not overloaded. The only way to know if a tire is overloaded is to find scales where you can weigh individual wheel positions in addition to the overall weight, and the axle weights.
Another leading cause of tire failure is under inflated tires. The load rating for a tire is only accurate if the tire is properly inflated. Under inflated tires cause extreme heat build up that leads to tire failure. The appearance of the tire can look normal but the internal damage is not visible and the tire can fail at any time without warning. If you find any tire 20 percent or more below the correct inflation pressure have it removed, demounted and inspected. Driving on a tire that is 20 percent or more under inflated can cause serious, permanent damage to the tire that may not be visible.
Ideally you should check tire inflation, and adjust it if required, everyday that you move or drive your RV. If you can't get into the habit of doing it on a daily basis you need to make it a point to check all tires weekly, at a minimum when you're traveling. You always want to check the tires when they are cold, meaning that you don't drive or move the RV before checking inflation pressure. The only way to correctly measure the inflation pressure in your tires is with a quality inflation pressure gauge. Don't ever depend on your eyes to check tire inflation. There can be as much as 20 PSI difference between tires that look the same. You need to invest in an accurate inflation pressure gauge. You should get one with a double, angled foot. This makes it much easier to check the outer tire of a dual set.
The age of your tires is another factor that contributes to tire failure. If your tires are more than seven years old they should be replaced. All tires manufactured in the United States have a DOT number. You might have to look on the inside sidewalls to find it. The last three or four digits in the DOT number identify how old the tire is. Older tires used three digits. The first two identify the week of the year that the tire was built and the third identifies the year. Newer tires use four digits. Again the first two digits are the week of the year and the last two identify the year. For example 1006 is the 10th week of the year, and 06 is the year 2006. If you question the age of your tires, especially on a used RV, and you can't find the DOT number have them inspected by a qualified tire center.
Ozone in the air and UV rays from the sun shorten the life of your tires. It's not uncommon to see RV tires with low mileage and plenty of tread that are ruined by the damaging effects of ozone and UV rays. Ozone in the air causes tires to dry rot and deteriorate. UV rays from the sun make it happen quicker. This is especially true of the tires sidewall. Inspect your tires for checking or cracks in the sidewalls. If you notice any damage the tires should beinspected by a professional. To protect your tires from sun damage keep them covered with covers that will block out the sunlight when not in use.
Claim #5
Number five in the top five RV claims was for damage caused by rodent infestation. When RVs are stored for the winter it's not uncommon for mice and squirrels to make their winter home in the RV. These animals are notorious for chewing through vehicle wiring and plastic and rubber lines, debilitating the entire vehicle.
How to avoid it
I don't know if there is any proven, full proof method for keeping these rodents out of your RV but there is a long list of ways people have tried. I will list some of these ideas that you can try to keep these unwanted guests away from your RV.
- Possibly the most important step is to try and prevent mice and other rodents from being able to access your RV. This can be difficult because they can enter the RV through some very small areas. Start by inspecting the underside of your RV for any gaps or holes. Fill these gaps using silicone or expanding foam. A word of caution, if you never used expanding foam before you should experiment with it on something other than your RV first. When it dries it can expand a great deal more than you expect. Next, open drawers and cabinet doors inside your RV. Look in all of the corners and crevices, especially where plumbing and wiring enter the RV. If you can see any daylight mice can get in. Fill these areas with silicone or foam.
- Remove all food from the RV when it's being stored and thoroughly clean it to remove any remnants of food that might attract mice and other rodents.
- If at all possible try to park or store your RV on a solid surface like pavement or concrete. Try to avoid grass, fields or wooded areas.
- If it's a motorized RV start it every week to run any squirrels off that may be making the engine compartment into a home for the winter. This is where a lot of chewing damage occurs.
- If you don't mind the smell of mothballs scatter them throughout areas of the RV to include storage compartments and the underside. I have been told that mothballs will work for a while but eventually rodents will get used to the smell and it will no longer deter them.
- Others say the alternative to mothballs is dryer sheets, like Bounce. People swear they work and the smell is much more pleasant. The problem with dryer sheets is once they dry out they are not really effective.
- If you are close to where your RV is being stored you may want to use conventional mouse traps and check for mice every few days. The only problem with traps is the bait can actually attract mice. I don't recommend any type of poison. It can take several days for the poison to work and the mice will usually die somewhere that you can't find them. If this happens you may never get rid of the smell. If you do use poison make sure pets can't get to the areas where you put it.
- I have talked to RVers who suggest you spray some type of insect spray (that contains mint oils) around the tires to discourage mice. The only problemI see with this is you would need to do it every few days if the RV is stored outside.
- There are numerous ultrasonic pest controllers on the market. Some even offer money back guarantees. Again, I have talked to some people who swear by them and others who insist they don't work. I have never tried this method.
After a great deal of research on this topic I have come to the conclusion that the only way to really keep rodents away is to get rid of the rodent's altogether. Continue to set traps for mice until they are gone and in the case of squirrels it may be necessary to trap and relocate them if there is no other method available to get rid of them.
I was surprised that damage to TV antennas did not make it in the top five RV claims. I have seen many TV antennas and RV roofs damaged by forgetting to lower the TV antenna. The damage isn't just from the antenna hitting something when it's in the raised position; it's also because the antenna cannotwithstand the force from highway speeds when it's in the raised position. There are a couple of ways to avoid damage to your TV antenna. One is to stick to the trusty pre-trip checklist before you move the RV. Another way is hang the motor home or tow vehicle starting key, or something like a piece of colorful ribbon on the TV antenna handle whenever it's in the raised position. This will serve as a reminder to lower the antenna before you move the RV.
Armed with this advice, hopefully you can avoid becoming a statistic in the top five RV insurance claims. Be safe and have a great time exploring this wonderful country in your RV.
I guess because I work in the RV Industry and around RVs almost everyday I take some things for granted. One of those things is RV terminology. When you hear these terms everyday you just assume that everybody understands them. It would not be uncommon for a typical conversation between two RVers at the campground to go something like this.
“Hi my name's Fred. Nice rig you got there.” “Thanks Fred, I'm Joe. It's a new pusher my wife and I just got. This is our maiden voyage with it.” Fred replied, “We still have our Class C, it works better for us with the kids. I told my wife we'd upgrade when we're empty nesters and can go full timing.” Joe said, “Well I've seen some Class A's that aren't as nice as that, you have two slides and a full basement.” “We don't have any complaints, it's 29 feet long and with the triton V10 it has plenty of power. I do wish the holding tanks were bigger, it seems like I'm dumping them all the time.” Joe said, “We had the same problem with our fiver we traded in. I told the wife this time we're getting bigger holding tanks, pass through storage, 50-amp service and filon with aluminum frame construction. No more stick and tin for us. I couldn't keep up with the black streaks.” Fred said, “I know what you mean. Fiberglass sidewalls are the only way to go, but I'm a little concerned about delamination. My neighbor's Class A is only four years old and it's already delaminating.” Joe replied, “That crossed my mind too. You really need to keep an eye out for any water damage. When we bought the new motor home I had a 20 X 40 foot shelter built to store it under and keep it out of the elements. I'm not sure which is worse, what I paid for the shelter or paying to have some delamination repaired.” “Hey Joe, is that the Dinghy you tow behind your motor home?” “Yes, we just got that too.” Fred said, “I didn't know you could tow that model with all four wheels on the ground.” Joe replied, “That's why we got it. I didn't want to use a dolly and it only weighs 2,800 pounds. With the motor home fully loaded we can tow it and not worry about exceeding our Gross Combined Weight Rating ( GCWR).” Fred asked, “Did you have to make any driveline modifications to tow it with all four wheels on the ground?” Joe said, “No, and there are no speed or distance restrictions.” “Well Joe it was nice meeting you, I better finish with the campground hook ups.” “Nice meeting you Fred. Why don't you and your wife stop by later.” “We'll do that.”
Now, for an RVer with some experience this conversation makes perfectly good sense, but for the new RVer it may be a bit confusing. To help clear things up I'd like to offer some common RV terms that you will encounter during your RVing experiences.
30 Amp, 120-volt electrical system - Most RVs are designed with 30 Amp, 120 Volt electrical systems, and some of the larger RVs with more appliances and two roof A/Cs use a 50 Amp, 120 Volt electrical system. What this basically means is, for everything to operate properly the manufacturer intends the RV to have a 30 or 50 Amp electrical service supplied to the RV.
(A)
Aluminum Frame Construction -When the RV framing is made of aluminum as opposed to wood.
Artic Package - An RV that is equipped with additional insulation and heated holding tanks for winter camping.
Awning - A canvas or vinyl covering mounted to the side of an RV that provides shade. Some awnings are retractable and use a spring-loaded roller tube. Other awnings must be rolled out by hand and are supported by poles, rope tie downs and stakes.
Axle Ratio - The number of times the drive shaft must turn to turn the axle one time. If you have a 3.73:1 axle ratio the drive shaft turns 3.73 times for each full turn of the axle. The higher the numeric value of the axle ratio the better the vehicle will tow, and the higher the numeric value the more gas you will use.
(B)
Backup Monitor - A monitor located in the driver's view that is attached to a small camera on the back of a motor home. It is used to assist in backing the motor home and to monitor what is happening behind you while you are traveling.
Ball & Ball Mount - Hitch balls have three basic measurements, the ball diameter, the shank diameter and the shank length. Ball diameter sizes come in 1 7/8”, 2” and 2 5/16”. The ball size must be the right size for the coupler on the trailer you are towing, and be rated to tow the trailers GVWR. The ball mount is the removable portion of the hitch that slides into the hitch Receiver. For Weight Carrying (WC) hitches it may be necessary to find a ball mount with a drop or rise to help level the trailer when its hooked up to the tow vehicle. An adjustable ball mount is used for heavier trailer applications. Adjustable ball mounts allow the ball to be raised, lowered or tilted to compensate for trailer tongue weight and to attain proper height adjustments. Adjustable ball mounts are normally used with Weight Distributing (WD) hitches.
Basement Storage - Storage compartments or storage area located below the floor of the motor home. You access the storage from outside. Some storage areas are referred to as pass through storage, which means it goes from one side of the RV to the other with no dividers, and can be accessed from either side.
Black Water Holding Tank - A tank mounted under the RV that collects water and waste from the toilet. When the tank is ¾ or more full it is emptied or dumped into an approved dump station or campground sewer. The black water tank is treated with chemicals to control odor and assist in breaking down waste.
Brake Controller - An electronic controller that is normally mounted under the dashboard of the tow vehicle, but within hands reach of the driver. The controller is designed to activate the trailer brakes when the tow vehicle brakes are applied. It also has a manual over ride that can be used to activate the trailer brakes without using the vehicle brakes.
Break-away Switch - A switch that is wired into the trailers brake system. It is attached from the trailer to the tow vehicle by a cable lanyard. In the event that the trailer and vehicle separate the cable pulls a pin from the switch and the trailer brakes are activated. The switch must have a 12-volt source to operate.
Bumper Pull - A term used to describe towing a travel trailer or pop-up, also referred to as a pull behind.
(C)
Cab over - The portion of a class C motor home that extends over the vehicle cab. It is usually designed as a bed.
Campground Hook-Ups - When you hook-up or connect your RV to the campground electric, water and sewer utilities. This would be considered a full hook-up. Some campgrounds may only offer one or two of these connections.
Cargo Carrying Capacity ( CCC): is the maximum permissible weight of personal belongings and cargo that can be added to the RV. CCC is equal or less than GVWR minus UVW, full fresh water weight, and full LP gas weight.
City Water Connection - A water connection, on the outside of the RV, that is used when you have an external water supply, such as at a campground. A potable water hose is used to connect the water supply to the city water connector on the RV.
Class A or Type A motor home - They are the largest of the motorized RV's ranging in size from 25 to 45 feet. Commonly referred to as a conventional motor home they are the ones you see that look similar to a bus, and depending on the price they can be equipped with features like washers and dryers, multiple slide out rooms, satellite dishes, home entertainment systems and much more.
Class B or Type B motor home - They are the smallest of motorized RV's ranging in size from16 to 20 feet. They are conversion vans that have been modified and equipped with sleeping, eating and bathroom facilities and amenities found in other RVs in a compact size.
Class C or Type C motor home - They are also referred to as mini-motor homes and are built on a cutaway van chassis. They range in size from 20 to 31 feet.
Converter - An electrical device that converts 120-volt AC power into 12-volt DC power. With the exception of the roof air conditioner, microwave, TV and the electric mode of the refrigerator almost everything in an RV operates on 12-volt DC power supplied by a battery. When you're plugged in to a 120-volt electrical source the converter changes the 120-volts AC to 12-volts DC so everything can operate without draining the battery(s). The converter also has a battery charger that will keep the battery(s) topped off when you are plugged in to a 120-volt power source.
Coupler - Located on the front of the trailer A-frame the coupler attaches the trailer to the ball on the hitch.
(D)
Deep Cycle Battery - Often referred to as the auxiliary battery(s) or house battery, it is used to supply 12-volt DC power to the appliances and accessories in the RV. Unlike an automotive starting battery they are designed to hold a charge longer and be discharged repeatedly. The RV battery(s) is charged when the motor home is running, or in the case of a trailer, when the tow vehicle is running, if a charge line was wired in to the trailer plug. It is also charged when the RV is plugged in to a 120-volt power source and by an onboard generator.
Delamination - When the filon, (fiberglass panel) separates from the luan backing used to construct fiberglass sidewalls on an RV. This is usually caused by water damage.
Demand Water Pump - The onboard water system that operates off of a 12-volt demand pump. When you have potable water in your fresh water holding tank and the pump is turned on it pressurizes the onboard water system. When you open a faucet and the water pressure drops the pump cycles on and off to maintain a constant pressure.
Diesel Pusher - A motor home with a rear mounted diesel engine. Often times referred to as a pusher.
Dinghy - A term used for the vehicle you are towing behind the motor home. Dry Camping - Camping in an RV without any utility hook-ups (water, electric, sewer). You can still use all 12-volt appliances and accessories as long as the deep cycle battery(s) has a charge. You can also use the onboard water system with the 12-volt demand pump and if you have a generator you can use the 120-volt appliances and recharge the auxiliary battery(s). This is what makes an RV fully self-contained.
Dry Weight - Dry Weight (DW) or Unloaded Vehicle Weight (UVW) is the actual weight of the RV as built at the factory. The DW does not include passengers, cargo, fresh water, LP gas, fuel or after market accessories.
DSI- Direct Spark Ignition (DSI), is a system used to ignite the burner on a Propane appliance with the touch of a button. It is commonly used on RV refrigerators, furnaces and on some water heaters.
Ducted A/C and Heat- When the A/C and heat is supplied throughout the RV using a ducting system. A/C is ducted in the ceiling and the heat is ducted in the floor.
Dually - A pickup truck with two tires on each side of the rear axle.
Dump outlet -Where both holding tanks terminate into one main outlet. This is where you connect the RV sewer hose to dump or empty the gray and black water holding tanks.
Dump Station - An area designated and approved for dumping or emptying your gray and black water holding tanks.
(E)
Electric brakes - Trailer brakes are electric and are activated when the tow vehicle brakes are applied by means of a brake controller installed in the tow vehicle.
Empty Nester - When all of the children are finally out of the house.
Equalizing Hitch - An equalizing hitch, or weight distributing hitch uses additional hardware (spring bars and brackets) to distribute a percentage of the trailer's tongue weight to the axles on the tow vehicle and the axles on the trailer. Trailer tongue weight should be 10 to 15 percent of the loaded trailer weight.
(F)
fifth wheel Trailer - A trailer with a raised front that extends over the bed of a pickup truck. A special hitch is mounted in the bed of the truck , over the rear axle, to tow a fifth wheel trailer.
Filon - A type of fiberglass sheeting used on RVs with fiberglass sidewall construction. Fiver - Another term used for a fifth wheel trailer.
Folding Camping Trailer - Also known as a pop-up or tent trailer. They are the smallest of RV's with collapsible ends and sides for ease of towing and storage.
Fresh Water Fill -An opening on the outside of the RV where you can fill the fresh water holding tank with potable water to use when you are traveling or dry camping.
Fresh Water Holding Tank - A tank mounted under or in the RV that stores potable water for use while traveling or dry camping. To pressurize the system and use the water in the holding tank you turn the 12-volt demand pump on.
Full Hook-Up - A full hook-up means you connect the RV to the campground electric, water and sewer facilities. In addition to this it can also include cable TV and phone line connections.
Full-Timers / Full-Timing - Terms used for RVers that live and travel in their RV full time. Some full timers sell everything and live in their RVs 100% of the time. Other full timers that spend the majority of their time on extended RV trips choose to maintain a house or residence they can return to in between trips.
(G)
Generator - Commonly used on motor homes a generator produces 120-volt AC power. A generator allows you to use 120-volt appliances when you are not plugged into an external electrical source. Generators are rated in kilowatts. For example a 5 KW generator is 5,000 watts.
Genset - A short term for a generator set.
Gray Water Holding Tank - A tank mounted under the RV that collects wastewater from the sinks and shower. When you dump or empty your holding tanks you should always dump the black tank first, and then dump the gray tank. This will assist in rinsing out the flexible sewer hose. Gross Axle Weight Rating (GAWR): Is the maximum allowable weight that an axle is designed to support. The tow vehicle and trailer each have GAWRs.
Gross Combined Weight Rating (GCWR): The maximum permissible weight of the tow vehicle and trailer combined when both are fully loaded for travel.
Gross Vehicle Weight Rating (GVWR): is the maximum permissible weight of the vehicle when fully loaded for travel. The tow vehicle and the trailer each have GVWRs.
Gross Vehicle Weight or Gross Trailer Weight (GVW), (GTW): This is not a rating; this is the actual weight of the tow vehicle or trailer when they are fully loaded for travel.
(H)
Heat Strip - An electric heating element in a roof mounted air conditioner. These are usually used on pop-ups or other trailers that do not have a furnace. A heat strip will take the chill off, but is not designed to actually heat the trailer.
Hitch Receiver - The hitch receiver is mounted to the frame of the tow vehicle. The ball mount slides into the receiver. There are five classes of hitch receivers based on the maximum amount of weight the receiver can handle.
Hitch Weight - Hitch weight or Tongue Weight (TW) is the amount of weight pressing down on the vehicle's hitch from the coupler of the trailer when the trailer is fully loaded for travel. For trailers that weigh over 2,000 pounds TW should be 10 to 15 percent of the loaded trailer weight. For fifth wheel trailers hitch weight should be 15 to 20 percent of the loaded trailer weight. Hydraulic Leveling Jacks - Used for leveling an RV, typically a Class A motor home, they are leveling jacks that operate using hydraulics and are controlled by levers or a touch pad normally located near the drivers seat.
(I)
Inverter - An electrical device that changes12-volt DC power into 120-volt AC power. It is used to power 120-volt appliances or electronics such as a microwave or TV when you don't have access to an external 120-volt power source. The amount of power that is available depends on the storage capacity of your battery(s) and the wattage rating for the inverter.
(K)
Kilowatts - Power generators are rated in kilowatts. Each kilowatt equals 1,000 watts.
(L)
LP Gas - Liquid propane or liquefied petroleum is the gas used for RV appliances. Typically it is used for the range burners, oven, water heater and the LP gas mode of the refrigerator. LP gas is stored in cylinders or bottles on trailers and in tanks mounted to the frame of motor homes.
´LP Gas Leak detector - LP gas leak detectors are audible alarms that warn you of a potential gas leak. They are normally located close to the floor level of the RV because LP gas is heavier than air and will settle towards the floor.
(M)
MH - Abbreviation for Motor Home.
Monitor Panel - Allows you to check or monitor the fluid levels in the gray, black and fresh water holding tanks. You can also check the condition of the auxiliary battery(s) and on some monitor panels the propane level.
(N)
NADA Book - The RV edition of the National Automobile Dealers Association (NADA) book is used by RV dealers to determine used RV values.
(O)
OEM - Abbreviation for Original Equipment Manufacturer
Overhang - The portion of the motor home that extends from the rear axle to the rear of the motor home.
(P)
Park Model - An RV trailer designed to be taken to a location such as a campground or resort area and set up permanently. A park model trailer has more household type features and amenities than a travel trailer.
Pilot Flame- The pilot flame is a small flame used to light the main burner of an LP gas fired appliance. The pilot flame heats a thermocouple control that opens the flow of gas to the burner.
Porpoising - A term used to describe the up and down movement of an RV when traveling.
Portable Toilet or Porta Potty - A portable RV toilet with a fairly small water tank and holding tank. When the holding tank is full it can be removed and emptied at a dump station.
Pull Through Site - A campground site that requires no backing. The site is designed for you to drive or pull through.
(R)
Refer - A short term for your RV refrigerator.
Regulator - LP gas regulators control or regulate the LP gas flow through all appliances, and maintain the proper operating pressure in the LP gas system.
Rig - A term RVers use for their RV.
RV - Abbreviation for Recreation Vehicle. A Recreation Vehicle combines transportation and living quarters for recreation, camping, and travel. They can be classified in two basic groups, motorized RVs and towable RVs. Motorized RVs include Class A, Class B and Class C motor homes. Towables include pop-ups, travel trailers, fifth wheels and truck campers.
RVDA - Recreation Vehicle Dealers Association
RVIA - Recreation Vehicle Industry Association
(S)
Safety Chains - Safety chains are used on trailers in case of a hitch failure. One end of the chain is attached to the trailers A-frame, and the other end to a permanent fixture on the tow vehicle, normally the receiver. The chains are crossed “X” to form a saddle that would prevent the coupler from contacting the road surface in the event of a separation.
Screen Room - A screened in enclosure that attaches to the exterior of an RV. They provide protection from insects and rain. Screen rooms are most commonly used with pop-ups.
Sewer hose - A flexible hose that attaches to the RV sewer outlet and the campground sewer used to dump or empty holding tanks. You should have a 10' and 20' hose available with necessary sewer hose attachments.
Sewer hose donut - A plastic or rubber ring used to get a good seal between the sewer hose and the campground sewer connection. Sewer hose donuts are required at many campgrounds.
Shore Power - Shore power is a term used for plugging the RV in to an external 120-volt power source such as at a campground.
Slide-In - A truck camper that slides in to the bed of a pickup truck. Slide-Out - A section of the RV that slides out to provide you with additional living space. Some RVs have multiple slide outs.
Slider Hitch - A 5th wheel hitch used with short wheel base pickup trucks. With short wheel base trucks the front of the 5th wheel trailer can make contact with the cab of the truck when turning to sharp. A slider hitch has two positions. One for normal driving conditions and one for maneuvering where turns are required.
Snowbird -RVers that head south for the winter.
Stabilizer Jacks - Jacks that are used on the corners of an RV to stabilize it when it is set up at the campground. Some are mounted to the frame of the RV and others are portable. Stabilizer jacks are not designed to level the trailer
Stick and Tin - An RV with wood framing and corrugated aluminum exterior.
Surge Brakes - A hydraulic braking system used on some lightweight trailers. Surge brakes activate when the trailer surges or pushes against the hitch ball when slowing down.
Sway Control - A device used to help control trailer sway. There are two basic types of add on sway control, friction and cam action.
(T)
Tag Axle - A non-drive axle located behind the rear drive axle that is used to support the weight of the RVs overhang.
Three Way Refrigerator - An RV refrigerator that can operate off of 12-volt DC, 120-volt AC and LP gas.
Toad - Another term used for the vehicle towed behind a motor home. Also called a dinghy. Tongue Jack - The jack mounted on the A frame of the trailer that supports the front of the trailer and is used to raise and lower the trailer when hitching and unhitching.
Tongue Weight -Tongue Weight or Hitch Weight is the amount of weight pressing down on the vehicle's hitch from the coupler of the trailer when the trailer is fully loaded for travel. For trailers that weigh over 2,000 pounds TW should be 10 to 15 percent of the loaded trailer weight. Tote tank - A portable tank used to dump the contents of a holding tank in to and then transport it to a dump station to be emptied.
Tow Bar - A tow bar is used to connect a towed vehicle to a motor home when the vehicle is towed with all four wheels on the ground.
Tow Dolly - A trailer used to tow a vehicle behind a motor home when the vehicle cannot be towed with all four wheels on the ground. Two of the vehicles wheels are on the tow dolly and two are on the road surface.
Toy Hauler - An RV that has a ramp door on the back and cargo space to load motorcycles, ATVs or other toys inside.
Transmission Oil Cooler - A small heat exchanger or radiator designed to protect your transmission from overheating. Automatic transmission fluid circulates through the oil cooler and is cooled by the airflow. Travel Trailer - An RV that is towed by a car, van, or pickup, by means of a hitch. Travel Trailers are a popular choice among RVers because of the wide array of floor plans available. Whether it's for two people or eight you can find a model that will suit your needs. They range in size from 15 to 37 feet and offer all the comforts of home. They can be unhitched from the tow vehicle when you arrive at your destination.
Truck Camper - Truck campers are campers loaded onto the bed of a pickup truck. The tailgate is removed and the truck camper is attached to the truck with tie-downs. This makes for a very versatile RV that can access back roads and remote areas other RVs can't get to.
TT - Abbreviation for travel trailer.
TV - Abbreviation for tow vehicle.
(W)
Water Pressure Regulator - A water pressure regulator is used to prevent too much water pressure from entering the RV and damaging the plumbing system. You attach the pressure regulator to the campground water supply and then attach one end of your drinking hose to the regulator and the other end to the city water inlet on the RV.
Weight Carrying Hitch - When all of the tongue weight of the trailer is supported by the hitch itself. WC hitches are normally used for lighter trailer applications. Too much weight directly on the hitch can affect the steering and handling of the tow vehicle.
Weight Distributing Hitch - when additional hardware is used to distribute a percentage of the trailers tongue weight to the axles of the tow vehicle and the axles of the trailer. WD hitches are used to tow heavier trailers and allow the tow vehicle to handle better. Also referred to as an equalizing hitch.
Wheelbase - The distance between the centerlines of the primary axles of a vehicle.
Wide Body - An RV that is wider than 8'. The majority of RVs are 8' wide. A wide body RV is usually 8' 6” wide.
Well that about does it. This list is not all-inclusive, but if you learn these terms you will soon be talking RV talk.
By Mark Polk, RV Education 101
The snow has arrived in many parts of the country and before you know it Christmas will be here and then another New Year. What does this mean to RVers? Well, besides shoveling sidewalks and last minute Christmas shopping it means parking the RV until next spring.
Most of us have already winterized our RVers so we won't have any problems with it next spring, but did you really prepare your RV for several months of storage? Many of us don't think about it, but the storing portion is just as important as winterizing the water system. Actually winterizing your RV encompasses much more than protecting the water system from freezing temperatures. It's just that we're under the impression that winterizing means to put that pink non-toxic antifreeze through our water system and everything will be okay.
When I produced our winterizing video I included an entire section on properly storing the RV. Video Details It's important that we consider things like batteries, ventilation, the condition of sealants, mice, and fuel system protection just to mention a few. This is an excerpt taken from my “Checklists for RVers” e-book.
So, let's look at some things we should do in addition to winterizing our RV water system. The storage procedures are divided into two sections, the coach storage and the chassis storage. Follow the steps below that apply to your RV:
Part 1 (Coach Storage)
- Store your unit under a covered area if possible. If not, avoid parking under trees or in areas where grass and weeds will grow.
- If you choose to buy a cover for the RV, be sure it is made of a breathable material. This will help in preventing mold and mildew.
- Chock the wheels front and rear. Leave the parking brake off. If you 're storing a Pop Up angle the tongue downward to assist in snow and water run off.
- Inflate the tires to the manufacturer's recommended max cold pressure. Cover the tires to protect them from the harmful ultraviolet rays. Place something between the tires and the ground. Make sure whatever you use is larger than the actual foot print of the tire.
- If you do not remove the tires for long-term storage periodically move the vehicle to prevent flat spots on the tires.
- Close all of the window blinds to avoid sun exposure to the carpet, drapes and upholstery.
- Wash the exterior of the unit and clean the interior thoroughly.
- Make sure the Awning fabric is clean and dry before storing.
- On a Pop Up make absolutely sure the fabric is clean and dry before storing. This is a good time to check for tears, and repair the fabric.
- Inspect all roof seams, body seams and window sealant for cracks and openings. Water can get in the smallest openings so really inspect all sealants. Consult your dealer for sealants compatible with these materials.
- Service all locks with a graphite spray lubricant. Lubricate all hinges and moving parts with WD 40.
- Turn all LP gas appliances off. Turn the main LP gas supply valve off. If you're storing a Pop Up or travel trailer make sure the LP gas regulator is covered.
- Remove the fuse for the LP gas leak detector while the unit is in storage. This will prevent the batteries from discharging. Don't forget to replace it next spring.
- Insects are attracted to the odorant that is added to LP gas. To prevent mud daubers and wasps from building nests in and around your gas appliances, cover the refrigerator vent, the furnace vent and the water heater vent.
- Inspect the underside of the unit thoroughly. Look for anywhere that mice or other rodents can get it, and seal as necessary.
- Strategically place mouse and ant traps in and around the unit. Avoid using mouse poison inside the RV. Many RVers recommend using dryer sheets like Bounce to keep mice out.
- Remove all perishables and anything that can freeze.
- Leave doors, drawers and cabinets open.
- Remove all consumables that would attract mice and other rodents.
- Defrost the freezer compartment and clean the refrigerator. Leave the refrigerator doors open and place some baking soda inside to absorb odors.
- lean the air conditioner filters, and cover the air conditioner.
- Turn off the main breaker and unplug all appliances.
- Remove dry cell batteries in clocks, flashlights and other items.
- The use of Max
x Air products will provide the airflow and ventilation required during storage while keeping the elements out.
Storing Your RV Part 2 (Chassis Storage)
To start with if you put your RV in storage it's a good idea to remove the batteries and put them in storage too. This is quite simple to do. When you're removing the batteries always remember to remove the negative terminal first. Clean the batteries with a 50/50 mixture of baking soda and water if necessary. Store the batteries in a cool dry place but not where they could freeze. Batteries in storage will loose their charge. Check the state of charge every month and charge batteries that are at or below 80% state of charge.
- Check and fill the water levels in all batteries that are not maintenance free. Check the electrolyte level and add distilled water if necessary.
- Charge all batteries as required. A discharged or partially charged battery will freeze much faster than a charged battery.
- Remove and clean all battery terminals and posts. Spray the terminals with terminal dressing to protect against corrosion.
- If you plan to start the unit while in storage, and to periodically plug the unit into shore power leave the batteries in the unit. Plugging it into shore power once a month for about eight hours will keep the coach batteries topped off.
- If you put the unit in long-term storage ; remove and store the batteries where they will not freeze. In either case keep the batteries charged.
- During short-term storage, start the unit monthly and run it with the dash air on for at least 30 minutes.
- If you don't plan on starting the unit, or won't be able to start it, buy some fogging oil from a marine supply store to protect the cylinder walls. When the unit is parked where it will be stored, spray the fogging oil into the engine intake downstream from the air filter with the engine at an idle. Complete the same steps on the generator. Follow the manufacturer's directions. DO NOT USE THIS PRODUCT IN A DIESEL ENGINE
- Fill the fuel tank prior to storage and add a fuel stabilizer. Run the engine and the generator long enough for the stabilizer to get through the system. Follow the manufacturer 's directions.
- If the unit is not in long-term storage exercise the generator at least 2 hours each month. Run the generator at 3/4 rated load. Consult your generator set owners manual for rated loads.
- Change the oil and oil filter on the engine and the generator prior to storage. Acids accumulate in used oil and can corrode engine bearings.
- Check the engine radiator for the proper concentration of antifreeze. Consult your owner's manual for the correct type of engine antifreeze. Drain, flush and refill the system every 2 to 3 years.
- Drain the windshield washer reservoir or add the appropriate antifreeze solution to prevent it from freezing.
- Perform
full chassis lubrication prior to storage.
Now your RV is truly winterized and hopefully you won't experience any problems when you perform your spring maintenance checks next year.
By Mark Polk, RV Education 101
At the end of your camping season you drain the water system, winterize the RV and put it in storage for the winter. One problem with this is that on most RV's when you drain the fresh water holding tank there is still some water left in the tank. Let's say you do manage to drain all of the water out of the tank. There is still moisture in the water system. Just imagine what can grow in that moist tank and in the water lines while it sits for three or four months. I'd rather not think about it.
This is the water tank that you drink from and the water you use to wash dishes and take showers with. We cannot assume that it will stay safe and fresh like the water system in our home. Contaminated water is extremely dangerous. We not only have to deal with a water system that hasn't been used for sometime, but when we travel in the RV we hook our water system up to a different water source every time we stop to spend the night some where. We hook up to city water, well water, and eventually contaminated water. You've probably heard people say don't drink the water if you go to Mexico. Well that can be true anywhere. We stopped at a campground one night just to get a few hours of sleep and I didn't bother to use the water filter. The water coming out of the faucet was cloudy and had small particles suspended in it.
There are no guarantees that any water is completely safe for us to drink, but if we take certain precautions we can keep our RV water system safe to use. So where do we start? First of all you should always use a white non-toxic drinking hose. Hoses not labeled safe for drinking can contribute to lead and other dangerous chemicals getting in the water. Use the white non-toxic hose for hooking up to the water source and take along a green or black garden hose for all other uses like flushing out holding tanks or washing the RV. When you're not using the drinking hose roll it up and connect the two ends together. This will keep dirt and other debris from getting in the hose. The next time you use the hose, run some water through it before hooking it up to the RV.
Next you need to filter the water going into the RV with a high quality filtration system. Water filters do not purify the water but they can control and remove bacteria, lead and other dangerous contaminants found in drinking water. In our “Easy RV Upgrades” video we demonstrate installing and using Hydrolife water filters. Video Details
Hydrolife filters use a filter media called KDF. It uses electro chemical oxidation reduction to neutralize harmful chemicals and bacteria. It also uses carbon to reduce pesticides, fungicides and other organic contaminates. You basically have two choices on how to filter your RV water system. You can install an inline water filter directly to the water line that you drink from, or you can filter all of the water going into the RV. I prefer to filter all of the water going into the RV. This helps to protect the entire water system and even filters the shower water to help prevent any skin irritation.
Possibly the most important step you can take is to keep the fresh water system sanitized.
This is an excerpt from my “Checklists for RVers” e-book.
At a minimum you should sanitize the system every spring when you take the RV out of storage and any time you notice stale water or an odor. It's really quite simple to do. You can start by draining the water heater. Go to the outside compartment where the water heater is located. The drain plug is usually located in the bottom left hand corner. Remove the plug and open the pressure relief valve on top of the water heater to assist in draining. CAUTION:NEVER drain the water heater when it's hot or under pressure. Next you need to locate the low point water line drains. It may take a while to find them, but I assure you they are there. There will be one for the hot and one for the cold water lines. This is the lowest point in the water system. Open these and let the water drain out. Now, find the drain for the fresh water holding tank and drain all of the water from it. At this point you can turn the water pump on for a moment to force any remaining water out. Do not let the pump continue to run once the water stops draining. Close all of the drains.
What we have accomplished so far was to evacuate the majority of water from the system. Now take a quarter cup of house hold bleach for every fifteen gallons of water that your fresh water tank holds. Mix the bleach, with water, into a one-gallon container and pour it into the fresh water holding tank. Fill the fresh water tank almost completely full of water. Turn the water pump on, open all hot and cold faucets and run the water until you smell the bleach at each faucet. Close the faucets. If it's possible drive the RV or pull the trailer so the water can move around to assist in cleaning the entire tank. Let it sit for at least 12 hours. Drain the entire system again and re-fill the fresh water tank with potable water. Open all of the faucets and run the water until you no longer smell any bleach. It may be necessary to repeat this process again to eliminate all signs of bleach from the water system. Once this is done it is safe to use your water system.
If you follow these simple steps you can rest assured that the fresh water system in your RV truly is fresh.
By Mark Polk, RV Education 101
Yaw, more commonly known as sway in the RV industry, is a bad word for trailer owners. The definition of yaw or sway is a side-to-side movement. Nothing will ruin the way you feel about camping faster than the first time you experience trailer sway.
You have tent camped for years and now you decide it's time to move up to a pop-up. You go to your local dealership and find a pop-up with the perfect floor plan for you and your family. The sales person knows that it will be close to the maximum weight that your vehicle can tow. He really needs a sale because things have been slow. Rather than risk losing the sale he decides not to explain the added expense of the proper hitch work to safely tow your new trailer.
You're all packed up for a weekend getaway. You made all of your pre-trip checks and you're ready to go. You load the most precious cargo you have, your family, into your tow vehicle and head out on a new venture. Everything is fine when you leave the house. You take the on ramp to the interstate. You're cruising at the speed limit enjoying the music on the radio. Suddenly out of nowhere a transfer truck going twenty miles over the speed limit is passing you as if you're sitting still. The pop-up is pulled into the draft created by the truck. In an attempt to correct this totally unexpected event you over steer and the trailer begins to go the opposite direction. Not really sure what to do you hit the brakes and turn the steering wheel to the left, then to the right. Now, that one-ton trailer behind your sport utility vehicle is veering sharply from side to side and begins to affect what little control you have over the vehicle. The results are catastrophic.
Ok, since this is just an article, let's start over and fix this before you even realize there is a potential problem. You purchased your pop-up from a reputable local RV dealership. At the risk of losing the sale your sales person explains that you will require some specialized hitch work to pull your new trailer safely. You are a bit skeptical, feeling like they just want more of your money. Besides, your father never needed any of this stuff. He just hooked the trailer unto the ball and went.
You decide to give the sales person the benefit of doubt and listen for a minute. He shows you in his book that your tow vehicle is rated to tow a maximum of 3,500 pounds. Then he explains what you must factor in to that tow rating. It includes the weight of your new camper, any after market accessories, like the roof mounted air conditioner and battery the dealership is going to install, all of the cargo and personal belongings that you load in the trailer and in the tow vehicle, and the weight of the passengers in the vehicle. Now all of the sudden the sales person has your undivided attention. You had no idea that all of this had to be considered.
He shows you the weight label on your new trailer. The unloaded vehicle weight (UVW) is 2,100 pounds. The air conditioner weighs 100 pounds and the deep cycle battery weighs 50 pounds. To be safe he estimates that you will carry about 300 pounds of cargo, and then adds another 300 pounds for your wife and two children. You are amazed how fast things add up. Now you have 2,850 pounds instead of the 2100 pounds that you thought it was. It isn't over yet. Your sales person starts to explain that every state has different requirements on how much a trailer can weigh before it requires trailer brakes. In your state the weight is 3,000 lbs., but your dealership has brakes installed on any trailer they order that weighs over 2,000 pounds. He explains that even though your vehicle is rated to tow 3,500 pounds the brakes on the vehicle were designed to safely stop the vehicles weight, not an additional ton and a half being pulled behind it. He takes you to the parts department and shows you a Brake Controller and explains that this is what activates the trailer brakes and the dealership will install it when they do the wiring for the trailer lights. You like the features that he explained about the brake controller. The fact that you can manually adjust the amount of braking action so that when you hit the brake pedal the tow vehicle and the trailer work together to stop the weight in a reasonable amount of time. What you really like is the part he explained about the manual override lever that activates the trailer brakes without using the vehicle brakes. He said if you're on a steep grade and you don't want to prematurely wear out the vehicle brakes you slowly slide the lever and the trailer brakes will slow you down. But what really sold you on it was when he explained that if the trailer starts to sway you could gently move the lever, activating the trailer brakes, to help straighten the trailer out. He went on to explain that trailer sway is one of the biggest potential problems that you can encounter while towing a trailer. He points out some of the factors that contribute to trailer sway.
- Incorrect tire inflation
- Improper weight distribution hitch adjustments
- No Sway Control on the trailer
- Crosswinds
- A transfer truck passing from the rear of the trailer
- Descending inclines
- Towing speeds
- Tow vehicle not properly matched for the trailer
- Improper loading, overloading and poor weight distribution
- First and foremost poor trailer design contributes to trailer sway. When there is too much weight behind the trailers axles causing the tongue weight to be less than 10% of the trailers weight it has a natural tendency to sway.
He took the time to explain that for the trailer to pull properly the manufacturer recommends that the tongue weight resting on the Ball Mount mount should be 10 to 15% of the total trailer weight. He said if it is more than 15% they have what is called a weight distribution hitch that takes the additional tongue weight and distributes it to the axles on the tow vehicle and the trailer where it should be, and if it is less than 10% when you load your cargo you distribute it to add some additional weight on the tongue. He looked up the pop-up you were buying in the brochure and the tongue weight was 305 pounds. With the air conditioner installed and your cargo loaded you would be between the 10 to 15% range. He explained that a weight distribution hitch was more commonly used with heavier trailers and in some cases with pop-ups depending on the tow vehicle, but in this case it would not be required.
The next thing he asked was if your vehicle had a Receiver. You reply, do you mean a hitch? He explains that the part that is bolted to the vehicle is called a receiver, and he shows you a chart that has several different classes of receivers depending on the amount of weight you will be towing. The class II receiver was rated for 3,500 lb. gross trailer weight and 300 lb. max tongue weight. For a small difference in price he recommended a class III receiver rated for 5,000 lb. gross trailer weight and 500 lb. max tongue weight since your trailers tongue weight exceeded 300 lbs.
With that done he said let me show you the one component that our dealership strongly recommends to anyone purchasing a pop-up. He walked over and picked up a part from the shelf. This is called a friction sway control. We mount one end of it to the ball mount and the other end to the tongue on the camper. You adjust the amount of friction by turning the lever clockwise for more friction and counter clockwise for less friction. He explained that you turn it in 1/8” increments until you get it adjusted where you feel comfortable. This will not totally eliminate sway, but once the forces of sway are in motion it will dampen the sway and help you control it when you're towing your camper.
Well, he said, that about does it. For less than 10% of the price of the pop-up you can get all of the hitch work done and ensure that your family is safe when you go on a trip. At this point you're convinced that the sales person has your best interest in mind and was not just trying to make more money.
You're all packed up for the first weekend getaway with your new pop-up. You make all of the pre-trip checks that the dealership explained to you and you're ready to go. You load the most precious cargo you have, your family, into your vehicle and head out on a new venture. You take the on ramp to the interstate. You're cruising at the speed limit enjoying the music on the radio. Suddenly out of nowhere a transfer truck going twenty miles over the speed limit passes you as if I you're sitting still. You feel a slight movement behind you. It was just enough to remind you that you're pulling the pop-up. You look at you're watch and tell the family that you should be at the campground in a couple of hours.
Knowing how to react when a trailer begins to sway can be the difference between your safety and disaster. To learn more about controlling trailer sway check out my “Trailer Towing, Weights, Hitch Work & Backing DVD” and e-book. Video Details
By Mark Polk, RV Education 101
I receive a lot of questions and concerns about the RV electrical system. Most people ask me if I can explain the RV electrical system in simple to understand terms. The electrical system in your RV can seem complex and confusing until you have a basic understanding of how it works. Your RV actually has three separate electrical systems. It has a 12-volt DC automotive system, a 12-volt DC coach system, and a 120 volt AC coach system. We are primarily concerned with the 12-volt DC and 120 volt AC coach systems. The RV electrical system is also covered in our RV Education 101 training videos and DVDs.
12 Volt DC or direct current is electricity supplied by the RV batteries. DC electricity flows in one direction, from negative to positive. 12 volt DC electricity is stored in the RV batteries and supplies power for components, devices and appliances that operate off of 12 Volts. 120 Volt AC or alternating current is the same electricity used in your household. AC electricity reverses or alternates direction 60 times per second, or 60 hertz. 120 volt AC electricity supplies power to all of the 120 volt appliances and electronic equipment in your RV.
The majority of campgrounds you go to will provide you with an external 120 volt electrical source to plug into. Your RV has a heavy-duty power cord that is normally about 20 to 25 feet long. Depending on the type of RV you have, or purchase, it will either be a 30 Amp or 50 Amp electrical system. When you plug into the proper campground electrical source it will supply power throughout your RV. You must have a 120 Volt AC power source if you are going to use the microwave, roof air conditioner, the refrigerator in the electric mode and the 120 Volt electrical outlets.
For the most part everything else in the RV works off of 12-volt DC power. When you're plugged in at the campground the 120 volt AC current is converted to 12-volt DC current, by the RV's Converter, for the items in the RV that work off of 12-volts. Some of these items are the overhead lights, the furnace fan, the fan over the range, the vent fan in the bathroom, the water pump, LP gas leak detector, stereo, and the refrigerator when it's in the LP gas mode. If you look at the RV's power distribution panel you will see circuit breakers like you have in your house for the 120-volt AC side, and automotive style blade fuses for the 12-volt DC side.
If you're not plugged into an external power source you can still use the 12-volt DC system if you have a 12-volt deep cycle battery or batteries on your unit. As long as the battery or batteries are charged you can use everything in the RV except the microwave, roof air conditioner, the refrigerator in the electric mode and the electrical outlets.
If you have a motor home, or if you're going to purchase a motor home, it will have a battery for the 12 volt automotive system and an auxiliary battery or batteries for the 12 volt coach system. The coach battery is charged whenever the motor home is running; the generator is running, or when it's plugged into an external electrical source.
For a thorough understanding of how your batteries work, how to maintain your batteries and how to test and store your batteries check out my Deep Cycle Battery Care and Maintenance for RVs and Boats
Motor homes also provide an additional source of 120 volt AC power with an onboard power generator. This unique feature offers you the convenience of 120-volt AC power whenever you need it, making the unit fully self-contained. AC power generators are rated in kilowatts. One Kilowatt equals 1000 watts so a 4KW generator would be capable of producing 4000 watts. The fuel supply for the generator comes directly from the motor home fuel tank. The system is designed so that when the fuel tank gets to a 1/4 tank the generator will stop running so it doesn't use all of the fuel in the motor home. Some motor homes have an automatic switch over from an external power supply to the generator. Other motor homes require you to plug the motor home power cord into a generator receptacle on the motor home to use the generator.
I have always been an advocate of monitoring the AC line voltage coming into your RV. Campground electricity can fluctuate a great deal. If you don't know what the voltage is coming into your RV, you risk damaging thousands of dollars worth of electrical appliances and electronic equipment.
Every RVer should invest in some type of digital voltmeter that plugs directly into a 120 volt outlet in your RV. There are several types available and they are inexpensive compared to the repair costs for damaged electrical equipment and appliances. I recommend one that can test campground polarity, measure AC line voltage and if you have a generator measure AC frequency.
You should always test the campground wiring for improperly wired circuits before you plug your RV in. Once this is done plug the voltmeter into any 120-volt outlet in the RV where it will be easy to monitor the AC voltage during your camping trip. By monitoring the AC voltage throughout your trip you can protect thousands of dollars worth of electrical equipment and appliances in your RV. If AC voltage drops below 105-volts or goes above 130-volts you should turn electronic equipment and appliances off until the power is restored.
When you use your generator set the digital meter so it will measure or count the AC frequency output of the generator. Frequency is the number of times that electricity alternates per second. U.S. appliances are designed to operate at 60 cycles per second, or 60 hertz. When you use your generator the governor in the generator must hold the speed constant at, or close to 60 hertz from no load on the generator to a full load. Depending on the load placed on the generator, AC voltage can range from 105 to 135 volts and the frequency can range from 58 to 63 hertz. The meter will let you know when the generator is not operating within the proper ranges and you can have it checked out and repaired before any damage occurs.
If it's possible you should try to avoid using an extension cord when making electrical connections at the campground. The gauges of the wire used in standard household extension cords are not suitable for RV electrical hook-ups. Eventually you will be put in a situation where you will need to use an extension cord. It's a good idea to purchase an RV extension cord that is compatible to the electrical system of your RV. If you do purchase an extension cord somewhere else it should be 10-guage wire and always use as short of an extension cord as possible.
There are RV electrical adapters that will go from your RV type plug and size down to household type outlets, and adapters that go from household type outlets to all types of campground RV connections. It's nice to have these adapters on hand when you need them, but you must exercise caution and use common sense when you use them. If you have a 30-amp system and you have to use a 50-amp service use your RV electrical system exactly the same way you do when you're plugged into a 30-amp service. In other words don't try to run anymore than you normally would.
On the other hand if your RV is a 30-amp or 50-amp system and you use an adapter to plug the RV into a 15 or 20-amp outlet you severely limit what you can operate in the RV. In this situation you should only use the appliances or electronic equipment that are absolutely necessary. The air conditioner alone can draw 15 to 16 Amps when the compressor engages. If you try to use the air conditioner and have other appliances or electronic equipment on you risk damaging those items. If you place too much of a demand on these electrical adapters, or use them for extended periods of time they can overheat and melt resulting in damage to the RV power cord or the electrical system.
Even when you're plugged in to the proper service for your RV you still need to be selective about what you are using. If you try to use too much the RV will let you know by tripping a breaker in the distribution box and hopefully no harm will be done. The RV also has what is called a Ground Fault Circuit Interrupter or GFCI. This is designed to protect you in the event that you plug something into a receptacle and there is moisture or water present. The GFCI will trip automatically. Several outlets can be wired on the GFCI circuit, so if you ever plug something into an outlet and it doesn't work check the GFCI to see if it needs to be reset.
There are a couple of simple formulas that may be helpful in calculating how much electricity you can safely use in your RV. Check the data plate on the appliance or electronic equipment you are using and apply the formula that works.
By Mark Polk, RV Education 101
It's that time of the year. Time to take your RV out of storage, give it a good once over and plan your first trip of the season. Time to get away from the office, the phones, the daily routine, and spend some quality time with your family and friends. Time to have some fun!
We all know how fun it is to load up the RV and leave on a trip, but what's happening back home while you're away? Is it obvious that nobody is home? Are you advertising the fact that nobody is home? Some not so honest people look for certain signs when they are deciding whose house to burglarize next. To make sure your entire trip is fun, to include returning home with everything intact, I would like to offer some simple suggestions to protect yourself from these not so honest people when you're away. This checklist is from my “Checklists for RVers” e-book.
- Stop your mail or arrange for somebody to pick it up every couple days, or make mail-forwarding arrangements.
- Stop your newspaper
- Cut your grass and make arrangements for somebody to maintain it while you're away.
- Water all plants and make arrangements for somebody to water plants if it will be necessary.
- In the winter make arrangements to have walkways shoveled if it snows.
- Give a spare key to a neighbor you trust.
- Give a neighbor or friend your contact information.
- Call your home security system company and give them a point of contact if the alarm is set off.
- Check outside lighting and replace any bad bulbs.
- Ask a neighbor or friend to check your residence periodically. Have them check the operation of the furnace or air conditioning and make sure that timers and lights are working.
- Speaking of light timers, if you don't have any (on / off) light timers get some and install them on a few lamps in your house. I also use one for the front porch light. Set them to automatically turn lights on and off at various times during the night.
- Unplug all major appliances like TV's, stereos and computers.
- Turn the water heater breaker off or pilot light off.
- Have all trash picked up.
- Check your answering machine and change the message if necessary. Turn off the ringer on all telephones
- Close and lock all windows and doors. Close window blinds.
- Lock garage doors and windows.
- Leave a car in the driveway, but make sure the doors are locked. If you're taking your car ask a neighbor to park a car in your driveway if possible.
- Lock all valuables and important papers in a safe place such as a safe deposit box or home safe.
- Make sure all personal and home insurance policies are up to date.
- Double-check all doors and windows.
- Activate the alarm system.
- If you're going on an extended camping trip have a gardening service maintain your property. It makes it look much more lived in.
- Go and have fun.
There is no guarantee that your home and personal belongings will always be protected while you're away, but by following these simple steps you stand a much better chance of finding things the way you left them when you return from your trip.
By Mark Polk, RV Education 101
I received an email from an RVer questioning the need for a supplemental brake system on the vehicle they tow behind their RV. I responded to the email by stating that in most cases it's the law that requires brakes on the towed vehicle or trailer, but the most important reason is for your safety and the safety of others.
Most U.S. States and Canadian Provinces have their own laws on the requirement for brakes on a towed trailer. The word trailer also applies to avehicle being towed behind a motor home. These laws are normally based on the amount of weight being towed. Not only is it illegal to exceed any weight limits without brakes, but your insurance company may not cover you in the event of an accident involving a trailer with no braking system. Again, the most important reason is for your safety and the safety of others. For a complete list of braking laws for the U.S. and Canada go to here.
The brakes on a tow vehicle or motor home are designed by the vehicle manufacturer to stop the weight of that particular vehicle, not the additional weight being towed behind it. This additional weight adds a substantial increase to the distance required to stop safely.
Travel trailers and 5th wheels come equipped with electric brakes and RV dealers educate the RV consumer on the requirements for adding an electronic brake control to the tow vehicle. Some Pop-ups are ordered with brakes and some without. Again, this is often times based on the braking laws for the state you live in. My advice is if you're going to purchase a pop-up get one that has brakes.
The real culprit for disregarding braking laws is a motor home towing a vehicle behind it. Most people assume that because of the size of the motor home there is no need for a supplemental brake system on the towed vehicle and many RV dealers fail to communicate the requirement for a supplemental braking system.
Tests performed on a flat stretch of dry pavement have shown that an unhitched motor home traveling at a speed of 50 mph needed an average of 132 feet of braking distance to reach a complete stop. Under the same speed and surface conditions, but with the added weight of a small car in tow, the stopping distance of the motor home expands to an average of 209 feet. A significant distance! In an identical test performed using the Roadmaster BrakeMaster™, the coach and towed car averaged a stopping distance of 137 feet. That's a mere 5 feet more than the unhitched stopping average.
I for one was guilty of towing a vehicle without a braking system for quite some time. A close call, while driving through a major city during rush hour, suddenly educated me on how important it is. Another thing that surprises people is how much the vehicle they're towing actually weighs. Take your towed vehicle to a set of scales and have it weighed. Make sure it has everything in it that will be in it when you are towing it. After you weigh it double check to make sure the Receiver on the motor home is rated to tow that amount of weight and that you aren't exceeding any of the motor home weight ratings like the Gross Combined Weight Rating (GCWR). The GCWR is the maximum permissible weight of the fully loaded motor home and the fully loaded towed vehicle combined. Most RV chassis manufacturers base their GCWR on the assumption that a supplemental brake system is being used.
There are many different types of supplemental braking systems available on the market today. These types include surge, hydraulic, air and vacuum. Some are simple and some are more complex. Regardless of the brake system that best suits your individual needs the important thing is that you have one. There are many reasons to have a braking system on your towed vehicle.
- It's the law
- It can void your vehicle warranty
- It can void your insurance
- It will reduce wear and tear on RV brakes and other components
- Liability
But, most importantly it SAFELY reduces the stopping distance and helps to protect you, your loved ones and the safety of others.
By Mark Polk, RV Education 101
Today we're going to be discussing something near and dear to all of us, especially RV owners. How can you improve your fuel economy? The 99 cents a gallon days are long gone. With gas prices exceeding $3 a gallon, it is in our best interest to save as much fuel as possible. It took a while but as with everything else you eventually accept the fact that higher fuel prices are here to stay.
I for one am not going to let sky rocketing fuel prices change my plans for using and enjoying our RV. So, with that said and a motor home that averages 7 to 8 miles to a gallon I am forced to find ways to save on fuel rather than waiting and hoping that fuel prices will go down. After a little research I was surprised to learn how easy it can be to improve our fuel economy. Whether you're towing a trailer or driving a motor home there are many ways to improve fuel economy. By performing some simple maintenance procedures and changing our driving habits a little we can save a significant amount of fuel.
One shocking discovery was that for each 5mph you go over 60mph is equivalent to paying 10 cents more per gallon. So if you're traveling down the Interstate at 75 mph add 30 cents to the price on the pump! Wow, that can add up quick.
So how can we improve our fuel economy?
- Talk to other RVers that have a motor home or tow vehicle and trailer similar to yours. Compare gas mileage. If there is a significant difference compare notes and try to determine what makes the difference.
- Something as simple as a clean air filter can improve your fuel economy up to 10%.
- Checking and adjusting your tire pressure to the proper pressure can increase fuel economy by 3%, not to mention preventing premature tire wear and failures or blowouts caused by over or under-inflated tires. Tires can look normal when they are seriously under-inflated. Use a quality air pressure guage and check your tires when they're cold, before traveling more than one mile.
- Excessive idling wastes fuel. If you're going to be sitting still for more than a couple of minutes shut the engine off.
- Using overdrive whenever you can saves fuel by decreasing the engines speed.
- Using the cruise control whenever possible saves fuel because it keeps the vehicle at a constant speed rather than variable speeds. This applies when you are driving on a relatively flat surface. Keep in mind the over 60 mph rule applies here too.
- Keeping the vehicle tuned up and in top running condition saves fuel. A poorly tuned engine can lower fuel economy by 10 to 20%.
- Poor emissions and / or a faulty oxygen sensor can cause a 40% reduction in fuel economy. Can you believe that? A 40% REDUCTION.
- Following the recommended service and maintenance schedules will save you fuel.
- Using the recommended grade of motor oil will increase fuel economy by 1 to 2%.
- Using synthetic oils will increase fuel economy by 2 or more percent.
- Speeding and rapid acceleration reduces fuel economy anywhere from 5 to 33% depending on your individual driving habits.
- Added weight that you don't need reduces fuel economy significantly. We're all guilty of this one!
- Only using the dash air conditioner when it is absolutely necessary will save a significant amount of fuel.
- Use regular gas unless your owner's manual specifies a higher octane gas. You're just throwing money away when you pay the extra money for premium fuel.
By Mark Polk, RV Education 101
When I was young, my friends and I would go tent camping at our favorite spot in the rolling hills of Pennsylvania. It is where I learned the art of fly-fishing for trout, trapping muskrats and hunting whitetail deer. To this day just the thought of those camping trips bring back wonderful childhood memories. Not only are the memories good, the lessons I learned have lasted a lifetime.
My one friend's father would go with us on many of our camping excursions. When he was a young man he spent several years working for a logging company. We would load up in his old 4X4 truck armed with chainsaws, axes, wedges and logging chains and head out in search of fallen trees and logs that would later be used to build our spectacular bonfires. Each and every time we went out to do this he made us inspect the logging chains and cables before we would skid the logs out of the woods behind the truck. He told us to inspect where the hooks attached to the chains and inspect the chains length for the weakest link. I was shocked at the number of times we discovered a link that was cracked or broken. He explained what the results could be if a chain or cable broke under tension.
I have applied the weakest link lesson many times since then. During my time in the Army I was in charge of some very large maintenance operations. We would go on countless recovery missions to upright vehicles that rolled over, or to tow a sixty-ton M1 tank back to the maintenance facility. We would inspect and re-inspect the riggings, looking for the weakest link, before attempting to recover these vehicles. Since retiring from the military my passion has been with RV's and once again I realized the importance of the weakest link lesson.
Every weight rating on an RV is based on the weakest link in the system. The tires on your RV are by far the most important and most neglected link in the system. I can't begin to tell you how many times I've heard people say that the tires on their RV were defective, or my tires only had 12,000 miles on them when I had a blowout. In the majority of cases the truth of the matter is that tire maintenance has been neglected. The only thing between your RV and the road surface is your tires and the air that is in them. This is the weakest link.
What are some of the leading causes of premature tire failure?
- Overloading the tires
- Under inflated tires
- Ozone and UV rays
- Age of the tires
- Rotating tires
What can be done to prevent premature tire failure?
Overloading the tires on your RV is probably the number one leading cause of tire failure. Poor weight distribution and taking advantage of all of the storage space offered on today's RV's result in tire overloads. The only way to find out is to have the fully loaded vehicle weighed on platform scales. Load the vehicle with everything you plan to take on a trip including passengers, cargo, fuel, full fresh water and Propane tanks. If you tow something behind the RV take it to the scales with you. The problem is that it is quite possible to weigh the RV and not exceed the GVWR, GAWR or GCWR, but you could be exceeding the tire ratings. This is why you MUST weigh each axle end separately to determine if tire ratings are exceeded and if the loaded weight is properly distributed.
Under inflated tires run a close second to overloading as one of the leading causes of tire failure. The load rating for a tire is only accurate if the tire is properly inflated. Under inflated tires cause extreme heat build up that leads to tire failure. The appearance of the tire looks normal but the internal damage is not visible and can fail at any time without warning. Tires can lose up to two pounds of air pressure per month. If you don't check your tires for three or four months they could be seriously under inflated. Ideally you should check tire inflation, and adjust if required, everyday that you move or drive your RV. If you can't get into the habit of doing it on a daily basis you need to make it a point to check all tires weekly at a minimum when you're traveling. You always want to check the tires when they are cold, meaning that you don't drive or move the RV before checking inflation. Invest is an accurate inflation pressure gauge. Check all tires and adjust pressure according to the manufacturer's recommendation. Do no exceed the maximum pressure ratings found on the tires sidewall. Never check inflation pressure when the tires are hot, you will get a higher-pressure reading and if you let some air out they will be under inflated when they are cold. If you have dual wheels you will want to add extension hoses to the valve stems to make the job of checking tire inflation easier. A word of caution, if you add extension hoses you should replace the rubber valve stems with all steel valve stems. The added weight of the extension hoses can cause rubber stems to leak air resulting in under inflation.
Ozone in the air and UV rays from the sun shorten the life of your tires. It is not uncommon to see RV tires with low mileage and plenty of tread that are ruined by the damaging effects of ozone and UV rays. Ozone in the air causes tires to dry rot and deteriorate. UV rays from the sun make it happen quicker. This is especially true of the tires sidewall. Inspect your tires for checking or cracks in the sidewalls. If you notice any damage have them inspected by a professional. There are basically two ways to protect your tires from these elements. Keep them covered with covers that will block out the sunlight when not in use, or for long-term storage remove the tires and store them in a cool dry place away from the sunlight. I also recommend that you place something like a piece of wood between the ground and the tires. Be sure that whatever you use is larger then the footprint of the tire.
The age of your tires is another factor that contributes to tire failure. I learned this lesson the hard way. I bought an early model Jeep CJ7 to tow behind our motor home. After completely restoring the vehicle we were ready to try it out. The tires that were on it looked to be in excellent condition. There were no signs of damage from the sun and the tread looked as though they were used very little. We towed the Jeep from North Carolina to Florida and from there to Colorado and back to North Carolina with no problems. Shortly after that we towed it to Pennsylvania. A couple hundred miles into the trip a front tire blew out damaging the inner fender, shock absorber and an area below the door. I replaced the tire with the spare and within another 100 miles the spare blew out resulting in more damage. After getting a new tire and going back to pick the Jeep up along side the Interstate we took it to a tire store to have the remainder of the tires replaced. The technician came in and explained that the tires were nine years old and even though they looked to be in good shape they could not handle the stress put on them. He also explained that all tires manufactured in the United States have a DOT number. The DOT number on my tires was on the inside sidewalls. The last three or four digits in the DOT number identify how old the tire is. Older tires used three digits. The first two identify the week of the year that the tire was built and the third identifies the year. Newer tires use four digits. Again the first two digits are the week of the year and the last two identify the year i.e. 1008 is the 10th week of the year and 08 is the year 2008. If you question the age of your tires, especially on a used RV, and you can't find the DOT number have them inspected by a qualified tire center.
Have you ever owned a vehicle and neglected to have the tires rotated and one day you suddenly notice that the front tires are wore out but the rear tires look fine? I'm sure that this has happened to most of us until we learned the valuable and expensive lesson of not rotating our tires. If one tire shows signs of wear faster than another tire it may be a signal that something other than normal tire wear is happening and you should have it checked. But if it's just normal tire wear you can even out the wear and extend the life of your tires by having the tires rotated on a regular basis. Talk to your tire dealer about proper tire rotation intervals.
Tire failure can be extremely dangerous and can cause extensive damage to your RV. There are no guarantees, but by practicing good tire maintenance you can feel much safer and secure that the weakest link on your RV will do its job while you're out exploring this wonderful country we live in.
By Mark Polk, RV Education 101
Leaves are falling from the trees, and the grass is dormant. The petunias are dying and the pansies are in full bloom. Days are shorter and nights are colder. Winter is upon us. To me, winter has its good and bad points. It's good that I don't have to cut the grass for several months. It's bad that I have to close the pool for several months. It's good that I don't have to run the air conditioning, but bad that I have to turn the furnace on.
For the RVer in all of us, winter is a time for making decisions. Do we park the RV and prepare it for the harsh winter months ahead, or do we pack it up and flee due south? Many of these decisions are made for us, and don't require our input. What I mean is, if you already live in a warm climate then winter is not a big issue. If you can take time away from work and travel south in the winter the decision is made for you. If you have managed to save lots of money during your working years, and can afford to travel all year the decision is made. If the children are gone, and you still have money left, the decision is made. Unfortunately, for some of us, we don't live in a warm climate, we can't afford to take any more time off of work, we haven't saved a lot of money, and the kids are still here spending what money we did manage to put aside. So without much input from me, the decision to park the RV and prepare it for winter has already been made.
If the same decision was made for you, whether it's due to where you live, your job, how much discretional money you have, or where your children currently reside, not all is lost. The big decision has already been made. We're going to park the RV for the winter. Parking the RV for winter will require some preventive measures so it will be ready to use next spring. You'll also be glad you did it when you don't have costly repair bills due to the damaging results of winter. Now the question is how do you prepare it for winter, and who will be doing it? If you're like me and you enjoy performing the routine maintenance on your RV, not to mention saving a few dollars, the “who” part is answered. As for the “how” part, I have taken a checklist from my “Checklists for RVers” e-book that I feel is the easiest and most effective way to winterize and store your RV
If you would like to actually see how to winterize your RV check out my “Winterizing and Storing your RV” DVD, Video Details
Before you get started there are a few items you will need to have. These items can be found in most RV parts stores:
- Non-toxic RV antifreeze (the amount depends on the layout and length of your plumbing lines. 2 to 3 gallons will normally do).
- A water heater by-pass kit, if not already installed.
- A wand to clean out holding tanks tanks.
- A water pump Converter kit, or tubing to connect to the inlet side of the water pump.
- Basic hand tools to remove drain plugs.
Now we can winterize the RV water system to protect it from freezing. Be sure to read your owners manuals for unit specific winterizing guidelines. Follow the steps below that apply to your RV.
- If you have any inline water filters remove and bypass before starting.
- Drain the fresh water holding tank.
- Drain and flush the gray and black holding tanks. Clean the black tank with a wand. Lubricate the termination valves.
- Drain the water heater. Open the pressure relief valve and remove the drain plug. CAUTION (never drain the water heater when it is hot or under pressure).
- Open all hot and cold faucets; don't forget the toilet valve and outside shower.
- Locate and open low point drain lines. Using the water pump will help force water out, but turn it off as soon as the system is drained.
- Recap all drains and close all faucets.
- By-pass the water heater. If you do not have a by-pass kit installed the water heater will fill up with antifreeze before it goes through the water lines, wasting six gallons of antifreeze.
- Install a water pump converter kit, or disconnect the inlet side of the pump (the line coming from the fresh water holding tank) and connect tubing from the pump into a gallon of RV antifreeze.
- Turn the water pump on and pressurize the system. Starting with the closest faucet slowly open the hot and then cold valves until antifreeze appears. Replace antifreeze jug as required.
- Repeat on all faucets from the closest to farthest away. Don't forget the outside shower.
- Flush the toilet until antifreeze appears.
- Turn the water pump off and open a faucet to release the pressure. Go to the city water inlet. Remove the small screen over the inlet and push in on the valve with a small screwdriver until you see antifreeze. Replace the screen.
- Pour a cupful of antifreeze down each drain. Pour a couple of cups in the toilet and flush into the holding tank.
- If your water heater has an electric heating element turn it off. This will protect the element if the unit is plugged in while being stored.
- Make sure all faucets are closed.
- Consult your owner manuals for winterizing icemakers and washing machines.
- The unit is winterized.
Now that the unit is winterized we will want to prepare the RV for storage. The storage procedures are divided into two sections, the coach storage and the chassis storage. Follow the steps below that apply: Part 1 (Coach Storage)
- Store your unit under a covered area if possible. If not, avoid parking under trees or in areas where grass and weeds will grow.
- If you choose to buy a cover for the RV, be sure it is made of a breathable material. This will help in preventing mold and mildew.
- Chock the wheels front and rear. Leave the parking brake off. If you're storing a Pop Up angle the tongue downward to assist in snow and water run off.
- Inflate the tires to the manufacturer's recommended max cold pressure. Cover the tires to protect them from the harmful ultraviolet rays. Place something between the tires and the ground.
- If you do not remove the tires for long-term storage periodically move the vehicle to prevent flat spots on the tires.
- Close all of the window blinds to avoid sun exposure to the carpet, drapes and upholstery.
- Wash the exterior of the unit and clean the interior thoroughly.
- Make sure the Awning fabric is clean and dry before storing.
- On a Pop Up make absolutely sure the fabric is clean and dry before storing. This is a good time to check for tears, and repair the fabric.
- Inspect all roof seams, body seams and window sealant for cracks and openings. Consult your dealer for sealants compatible with these materials.
- Service all locks with a graphite spray lubricant. Lubricate all hinges and moving parts with WD 40.
- Turn all LP gas appliances off. Turn the LP gas supply valve off. If you're storing a Pop Up or travel trailer make sure the LP gas regulator is covered.
- Remove the fuse for the LP gas leak detector while the unit is in storage. This will prevent the batteries from discharging. Don't forget to replace it next spring.
- Insects are attracted to the odorant that is added to LP gas. To prevent mud dabbers and wasps from building nests in and around your gas appliances, cover the refrigerator vent, the furnace vent and the water heater vent.
- Inspect the underside of the unit thoroughly. Look for anywhere that mice or other rodents can get it, and seal as necessary.
- Strategically place mouse and ant traps in and around the unit. Avoid using mouse poison inside the RV.
- Remove all perishables and anything that can freeze.
- Leave doors, drawers and cabinets open.
- Remove all consumables that would attract mice and other rodents.
- Defrost the freezer compartment and clean the refrigerator. Leave the refrigerator doors open and place some baking soda inside to absorb odors.
- Clean the air conditioner filters, and cover the air conditioner.
- Turn off the main breaker and unplug all appliances.
- Remove dry cell batteries in clocks, flashlights and other items.
- The use of Maxx Air products will provide the airflow and ventilation required during storage while keeping the elements out.
Storing Your RV Part 2 (Chassis Storage)
- Check and fill the water levels in all batteries that are not maintenance free.
- Charge all batteries to a full charge. A discharged battery will freeze much quicker than a fully charged battery.
- Remove and clean all battery terminals and posts. Spray the terminals with terminal dressing to protect against corrosion.
- If you plan to start the unit while in storage, and to periodically plug the unit into shore power leave the batteries in the unit. Plugging it into shore power once a month for about eight hours will keep the coach batteries topped off.
- If you put the unit in long-term storage remove and store the batteries where they will not freeze. In either case keep the batteries charged.
- During short-term storage, start the unit monthly and run it with the dash air on for at least 30 minutes.
- If you don't plan on starting the unit, or won't be able to start it, buy some fogging oil from a marine supply store to protect the cylinder walls. When the unit is parked where it will be stored, spray the fogging oil into the engine intake downstream from the air filter with the engine at an idle. Complete the same steps on the generator. Follow the manufacturer's directions. DO NOT USE THIS PRODUCT IN A DIESEL ENGINE
- Fill the fuel tank prior to storage and add a fuel stabilizer. Run the engine and the generator long enough for the stabilizer to get through the system. Follow the manufacturer's directions.
- If the unit is not in long-term storage exercise the generator at least 2 hours each month. Run the generator with a minimum ½ rated load. Consult your generator set owners manual for rated loads.
- Change the oil and oil filter on the engine and the generator prior to storage. Acids accumulate in used oil and can corrode engine bearings.
- Check the engine radiator for the proper concentration of antifreeze. Consult your owner's manual for the correct type of engine antifreeze. Drain, flush and refill the system every 2 to 3 years.
- Drain the windshield washer reservoir or add the appropriate antifreeze solution to prevent it from freezing.
- Perform a full chassis lubrication prior to storage.
This completes the steps that are required to protect your investment when it's time to park it for the winter.
By Mark Polk, RV Education 101
I recently received an email from someone that was considering purchasing an RV. After explaining their interest in RVing there was one short question. “Are RV's dangerous to own and operate?” After giving this some thought I realized that this one short question covered a very large spectrum. There was no quick or easy response to this question. I responded by saying that in most cases it's not the RV that is dangerous, but the individual that is operating the RV that is dangerous. I gave some examples of unsafe acts that I have witnessed like carrying a full spare LP gas bottle inside the RV, sleeping in the RV with the generator running and never weighing the RV or checking the inflation pressure in the tires.
I told them when they begin their search for their RV the first thing to verify is that the RV manufacturer is a member of the Recreation Vehicle Industry Association (RVIA). If they are, the RV will have an oval shaped RVIA seal displayed on the exterior, usually by the entrance door. This seal means that the RV manufacturer is in compliance with more than 500 safety requirements regarding electrical, plumbing, heating, and fire and life safety. These safety requirements are established under the American National Standards Institute (ANSI) A119.2 Standard for Recreation Vehicles. This should put to rest any concerns you may have about the RV itself being safe when it is manufactured.
I explained that the next step is to educate yourself on the systems of an RV and what is required to operate the RV safely and properly. If you're going to be towing a three or four ton travel trailer, or driving a six ton plus motor home you need to understand the importance of proper hitch work, weights and driving techniques. I also explained that anytime you are dealing with petroleum products like LP gas and gasoline generators there is cause for concern, but if handled properly there is nothing to worry about. A good place to start is with our RV Safety DVD
In no particular order, I offered them the following advice concerning RV safety.
Take care of your RV's tires and they will take care of you. When you're not using your RV keep the tires covered to protect them from the damaging affects of ozone in the air and UV rays from the sun. Invest in a quality inflation pressure gauge and check the tire pressure in all tires every time you use the RV. Check and adjust the pressure when the tires are cold, before you move it. Maintain the pressure recommended by the manufacturer. Consult the owner's manual for proper tire inflation and never exceed the maximum pressure located on the tire sidewalls.
Weigh your RV and tow vehicle. The only way to know if the weight is properly distributed and that you are within the allowable weight ratings for the RV and tow vehicle is to have them weighed. Look for certified platform scales in your yellow pages under moving companies or truck stops. When you weigh your RV and tow vehicle have them fully loaded for travel to include passengers, cargo, fuel, personal belongings, and full fresh water and Propane tanks. Verify that you do not exceed any manufacturer weight ratings such as, the Gross Vehicle Weight Ratings (GVWR), Gross Combined Weight Ratings (GCWR), and Gross Axle Weight Ratings (GAWR). NEVER exceed any manufacturer weight ratings. It is quite possible to be within the weight ratings, but still exceed a tire rating. This is why you must weigh each axle end separately to insure that the load is within the capacity of the axles, wheels and tires and to see if the load is properly distributed.
Have the LP gas system inspected every spring before using the RV. Take your RV to a qualified service center and let them check the LP gas system for proper appliance operating pressure and to check the system for leaks. Familiarize yourself with the odorant added to LP gas to assist you in detecting a leak, and what to do if there is a gas leak. If you smell LP gas or the leak detector alarm goes off:
- Extinguish any open flames and pilot lights.
- Do not touch electrical switches.
- Shut off the gas supply at the tank valve(s) or gas supply connection.
- Open the doors and windows and leave the area until the odor clears.
- Have the LP gas system checked and repaired by a qualified technician before using the system again.
It is not recommended that you travel with the LP gas turned on. If you do have the gas on while traveling turn off each individual pilot light, appliance, and the main gas supply before refueling.
The onboard generator makes your RV fully self-contained. It allows you access to 120 volts when there is no shore power available, but keep in mind that carbon monoxide is deadly! NEVER sleep in the RV with the generator running! Before you start and use the generator inspect the exhaust system. Do not use it if the exhaust system is damaged. Test the carbon monoxide detector every time you use the RV. Know what the symptoms of carbon monoxide poisoning are:
- Dizziness
- Vomiting
- Nausea
- Muscular twitching
- Intense headache
- Throbbing in the temples
- Weakness and sleepiness
- Inability to think coherently
If you or anyone else experiences any of these symptoms get to fresh air immediately. If the symptoms persist seek medical attention. Shut the generator down and do not operate it until it has been inspected and repaired by a professional.
I finished my response by explaining that in my opinion these were some very real concerns that all RVers need to be aware of. I also mentioned that this is a very short list. There are many other safety issues involved in owning and operating an RV, but by practicing common sense, and through education, RV ownership is not only safe, it's lots of fun.
By Mark Polk, RV Education 101
My friends at KOA Kompass wrote me and asked, what is one of the most frequently asked questions I get from RVers? I didn't hesitate long before replying it is about towing and backing. As a matter of fact, I get asked this so much that I wrote an e-book on the topic Trailer Towing: What to Know Before You Tow and we filmed a video Trailer Towing, Weights, Hitch Work and Backing
I thought that it might be helpful to take an excerpt from my e-book that would provide some information on backing a trailer. I had to leave several sections out because this would be entirely too long for an article.
Backing Up, the Big Dilemma
If you're going to tow a trailer the day will come when you have to back it up. From the time we are children we're programmed to do everything forward. You learn to crawl, walk and run going forwards not backwards. For the most part when we drive a vehicle we are going forward, and when we did learn to back a vehicle it was not that difficult. It's like if some one tells you to turn left or turn right, you know if you turn left the vehicle will go to the left. Even when you're backing the vehicle, if you want it to back to the left you turn the steering wheel to the left. It's almost natural; you look over your shoulder, turn the steering wheel and back the direction you want to go. Not so with a trailer. First of all you can't look over your shoulder, all you will see is the front of the trailer. Second of all, if you turn the steering wheel to the left the trailer is going to go to the right. The secret to backing a trailer is to learn a technique that does not require you to go against your natural instincts. When you're not confused about turning in the opposite direction you want to go it is much easier to back a trailer.
I want to offer a couple of different options on how to back a trailer and I feel confident that you'll find one that will work for you. But, regardless of how good the method is for learning to back a trailer, the only way you will become proficient at it is to practice, practice and practice some more. It's like learning to ride a bicycle, almost everybody falls a few times but with practice you quickly get proficient at it.
Can I Learn to Back a Trailer?
I am convinced that anybody can learn to back a trailer. I will admit that some people just have a knack for it. It just seems to be easy. But for other people it is much more difficult. I feel that it is all about learning a technique that works for you. Take for example a natural born artist. They can paint a beautiful picture as though it were nothing. But somebody without that natural ability is embarrassed to even try. Now what if we went to the store and bought a paint by the numbers painting. If you follow the directions you end up with a beautiful painting. You simply found a technique to accomplish something you didn't think you could do.
Backing Techniques
I personally have two techniques that I prefer. I call them assisted and unassisted. The assisted technique should be used whenever possible. This is the technique I used when I was the sales manager at an RV dealership. I have total and complete faith in this technique when it is followed properly. If you ever attended an RV show you know what I mean. You are allocated a certain amount of space and in an effort to show as many units as possible you had to back the trailers in within inches of the walls, campers and other obstacles. I have organized many RV shows and never so much as scratched a bumper.
Assisted Technique
The assisted technique implies what it says, that you have a spotter to assist you. It is quite simple. The golden rule is for the driver to do exactly what the spotter tells you to. You may want to discuss who will drive and who will spot, because with this technique the spotter is responsible for putting the trailer where you want it. The first step is to establish hand signals that you both understand and agree on. Once this is done do a thorough inspection of the area you are backing into. It is important that you check the area immediately behind the trailer because for this technique to work effectively the spotter has to stand in front of the tow vehicle. Now you place an object (small orange traffic cones work well) on both sides of the site where you want the back of the trailer to stop at. The spotter will stand in front of the tow vehicle, in clear view of the driver, and can slowly walk from right to left checking blind spots and watching for the back of the trailer to reach the cones. You need to stop occasionally and look behind the trailer. Small children and pets can wander behind the trailer without you seeing them. The reason this technique is so effective is because neither the spotter nor the driver has to think about doing the opposite when backing the trailer. The first step is for the driver to roll the windows down and turn the radio off. The driver leaves their hand on the top of the steering wheel like you're accustomed to and because the spotter is in front of the vehicle they simply tell the driver to turn the steering wheel in the direction they want the back of the trailer to go. So, if the spotter wants the back of the trailer to go to the right they tell the driver to turn to the right. The driver slowly turns and backs in the direction the spotter tells them to. Nobody has to think about it the driver just does what the spotter says to do. The key to driving is slowly turning and backing in the direction the spotter tells you to. The two biggest mistakes made are turning the steering wheel too much and holding it in the turned position to long. If either of these mistakes occurs the result is that it will require greater correction to get straightened out, and if you continue to back while holding the wheel in that position too long the tow vehicle and trailer can jackknife. It will require some practice. The spotter will have to learn that once the trailer is into the turn its time to go the opposite direction to bring the tow vehicle and trailer back in line. Do not be concerned if you have to stop, pull forward and start again. This will happen more than once during the early stages. Try it, and with practice I guarantee that before you know it you'll be backing like pros.
Unassisted Technique
The assisted technique is the preferred method. I do not recommend backing a trailer without a spotter. Young children and pets can wander behind the trailer without you seeing them. However, you need to be prepared in the event that you have to back a trailer without assistance. If the backing maneuver is more than just backing in a straight line, and a turn is required, try to always back from the left side (drivers side). Backing from the left will allow you to see where the trailer is going. Backing from the right side (passenger's side) is your blind side and it is nearly impossible to tell where the trailer is going.
Earlier we discussed that the reason it's difficult to back a trailer is because it is the opposite of everything we have been taught. Fortunately there is a way to back a trailer unassisted without having to work against our natural instincts. This may sound a bit confusing at first, but if you think about it, it makes sense and the good thing is it works.
It is extremely important that you inspect the area behind and around where you will be backing. Look for any obstacles that may be in the way to include low hanging tree branches, picnic tables and utility hook-ups. You need to stop occasionally and inspect the area immediately behind the trailer. If children are present in the area ask somebody to watch behind the trailer. It is a good idea to place some orange traffic cones along the path you want the trailer to follow when you're backing. If you decide it's not necessary to mark a path you do need to place some type of object in your view where you want the back of the trailer to stop at.
In the assisted method we kept our hand on the top of the steering wheel and did exactly what the spotter told us to do. In the unassisted method we place our hand on the bottom of the steering wheel in the center. Now if you want the back of the trailer to go to your left you slowly turn the wheel to your left as you back. To go to your right slowly turn the wheel to your right as you back. It's that easy. By placing your hand at the bottom of the steering wheel you don't have to confuse yourself with turning it in the opposite direction. Remember the two biggest mistakes are turning the steering wheel too much and holding it in the turned position too long. If either of these mistakes happen it may be necessary to pull forward and start over. It may also be necessary to stop, get out and check your progress, especially if you're backing from the right. Take your trailer to a large open area where you can practice and before long you'll be showing off at the campground.
I hope this information is helpful to those of you that have experienced problems backing a trailer.
By Mark Polk, RV Education 101
Our motor home has been sitting idle since returning from a hunting trip to Pennsylvania after Thanksgiving. I winterized it, cleaned it and took the necessary precautions to store it for a few months, so it would be ready to go when we were ready to go. Well I have cabin fever, and I find myself searching a road atlas with my morning coffee for new destinations to visit. I am even convinced that the motor home is talking to me. “Come on, let's go, the weathers getting nice let's get outta here”. I finally succumbed to it calling me and decided to take it out of its deep winter sleep and prepare it for spring.
March is a fairly safe bet, in this part of North Carolina, that the worst of the whether is over. If by some chance it does dip down to freezing temperatures, I figure I can turn the furnace on to avoid any possibility of the water system freezing. Now that the decision is made we need to figure out what steps to take to prepare the coach and the chassis for camping and traveling. If you're like me, you want to have some type of logical sequence to follow rather then haphazardly checking the unit out. I made a simple checklist to use so that nothing is overlooked. I prefer to do the majority of spring preparation myself. If you're more comfortable having someone else do it contact a reputable RV dealer and schedule an appointment to have it done. In an attempt to keep this article at a reasonable length not all steps can be explained in great detail. This is an excerpt taken from my “Checklists for RVers”
- Depending on how your unit was winterized it will need to be de-winterized. If you used non-toxic RV antifreeze you need to run fresh water through the entire system until the antifreeze is gone. To remove it from the 12-volt water pump add water to the fresh water-holding tank, turn the pump on and open all water faucets. When antifreeze is out of the system turn the pump off and take the water heater out of the by-pass mode (if applicable). Re-install any water filter cartridges you removed for storage.
- At this point I like to sanitize the water system. Make sure all of the drains are closed and drain plugs are installed. Take a quarter cup of household bleach for every fifteen gallons of water your fresh water tank holds. Mix the bleach with water into a one-gallon container and pour it into the fresh water holding tank. Fill the fresh water holding tank completely full of water. Turn the pump on and open all faucets, run water until you smell the bleach. Close the faucets and let sit for twelve hours. Drain all of the water and re-fill the tank with fresh water. Turn the pump on and open all faucets until you no longer smell bleach. It may be necessary to repeat this process to eliminate all signs of bleach.
- With the water system under pressure Inspect for water leaks. Check the operation of the toilet
- Wash the unit thoroughly. This is a good time to inspect the roof and body seams, and window sealant for cracking that would allow water to get in. Consult a dealer for sealants compatible with these materials.
- Inspect the operation of the Awning and check the awning fabric.
- Inspect the tires for signs of dry rot. Inflate all tires to the recommended COLD tire pressure.
- Lubricate all hinges and locks with spray lubricant.
- Remove any tape or protective covering you may have put over LP gas vents to keep insects and rodents out. Check any mousetraps you may have put out. Open all doors and compartments and check for rodent intrusion and water damage.
- Inspect and clean the interior.
- Plug in any appliances that you unplugged for storage and replace any dry cell batteries you may have removed. This is a good time to put new batteries in items like smoke alarms.
- Test the operation of the carbon monoxide alarm, LP gas leak detector and smoke alarm.
- Check the fire extinguisher. Be sure it is fully charged.
- Reset any breakers you may have turned off. If you removed any fuses for storage re-install them.
- Clean or replace air conditioner filters if it wasn't done prior to storage and remove any covers that were put over air conditioners.
- Open vents and windows and air the unit out.
- If you removed the coach and chassis batteries for storage install them. Whether they were removed or not check the electrolyte levels, clean the terminals and clamps, and check the charge level in all batteries. Recharge batteries as necessary.
- Check the operation of the electric steps if applicable. Lubricate step mechanism.
- Test the operation of the hydraulic jacks if applicable. Check hydraulic fluid level.
- Test the operation of the back up camera and monitor if applicable.
- If you didn't change the oil and filters in the generator prior to storage this is a good time to do it. Inspect the generator exhaust system for damage prior to starting. Start and run the generator for two hours with a minimum half rated load on it. Consult the generators owner manual for load ratings.
- Turn the generator off and plug the unit into shore power. Turn the refrigerator on in the electric mode. Allow sufficient time to cool and check for proper operation.
- Check all 12-volt interior lights and accessories.
- Test the monitor panel panel for proper operation.
- Check the operation of slide outs if applicable.
- Check the remaining 120-volt appliances for proper operation.
- Test the Ground Fault Interrupter (GFI) for proper operation.
- Turn the refrigerator off, leave the doors open and allow sufficient time for it to get to room temperature so it can be checked in the gas mode.
- Before I use the LP gas system I have a leak test and gas operating pressure test preformed. A qualified technician with the proper equipment should do these tests.
- After this is accomplished turn the LP gas valve on and check the operation of all LP gas appliances. Be sure the water heater is full of water before testing the water heater. If a gas appliance is not operating properly have it inspected by a qualified technician. Insects are attracted to the odorant added to LP gas and build nests that can affect the appliance from operating properly.
- If your unit was in long-term storage and you didn't change the engine oil and filter prior to storage this would be a good time to do it
- Check all fluid levels in transmission, power steering, engine coolant, engine oil, windshield washer and brakes. Consult vehicle owner's manual.
- Start the engine and check for proper readings on all gauges. Check for proper operation of dash air conditioner.
- A full chassis lubrication should be preformed if it wasn't done prior to storage.
- Check the condition of windshield wiper blades replace in necessary.
- Check the operation of all chassis lights.
- Make sure the vehicle emissions / inspection sticker is up to date.
- In addition to this if you have a pop up or travel trailer the wheel bearings and brakes (if equipped) should be inspected at least once annually. Inspect any canvas for dry rot and tears; inspect all hitch work and the coupler for damage. Inspect the Breakaway Switch and pigtail for proper operation.
This list is not all-inclusive, but it seems to work for me. Now for the fun part, load your clothes, food, and personal belongings, hit the road and have fun exploring this wonderful country we live in.
For more information on how to properly maintain your RV, check out our RV Care and Maintenance DVD
By Mark Polk, RV Education 101
Somebody recently asked me what I enjoyed the most about RVing. It didn't take long for me to respond that it was the people you meet at the campground. I don't know of anywhere else that you can meet complete strangers and within a couple of hours feel as if you've known them forever. People at campgrounds are some of the friendliest most helpful people you will ever meet. I have seen it time and again when a camper pulls in and they are having problems with something and their next door neighbor, whom they never met, is right there to assist them. I have also observed and assisted several campers who were new to RVing and not really sure how to set their unit up when they arrive at the campground. While talking to these new Rvers it came up more than once how they wished that they had a checklist to follow to make things easier. I thought this was a wonderful idea, so I added a campground set-up checklist to our e-book “Checklists for RVers”
This is an excerpt from the e-book to assist new campers when they arrive at the campground.
CHECKLIST 14
Campground Set-Up Checklist: (travel trailer & Motor Home)
It would be impossible to cover everything involved with this checklist because of the vast differences between RVs. However most RVs do have many things in common and that is what we will concentrate on. The purpose of this checklist is to provide a basic system of what to do when you arrive at your site. Use only the items that apply to your RV and feel free to tailor the list to your needs. (Pop Ups see separate checklist)
- If you are in a motor home and are towing a vehicle you may want to disconnect the vehicle in the campground registration parking lot before going to your site. Have someone drive the vehicle in front of you to assist in locating your site.
- Conduct a site survey. Identify where all campground connections are and where you want the RV located to have access to all connections. Take into consideration where slide outs will be and if there is room to put the Awning out. Make sure there are no low hanging branches or other obstacles that will interfere with the RV.
- Determine if you need to back in or if it is a pull through site. Position the RV on the site and double-check all clearances and access to hook ups.
- If you have a motor home set the parking brake.
- Level RV as required.
- Chock the wheels.
- Disconnect from the tow vehicle if applicable (see unhitching checklist).
- Put stabilizer jacks down if applicable.
- If you have a motor home and there is a battery disconnect switch for the chassis battery turn it off to prevent any drain on the starting battery.
- If you have an auxiliary battery disconnect switch for the coach battery(s) it should be on.
- Put the entry steps out. If you have a switch for the steps turn it off so the steps stay out when the door is closed.
- Remove slide out travel locks. Put slide out(s) out if they won't interfere with making basic hook ups. Have someone watch for clearance and obstacles in the slide out path. Be sure the driver's seat is not in the way of the slide out.
- Test the campground electricity voltage and polarity with a voltmeter prior to plugging the unit in. Pull enough power cord from the compartment to reach the campground electrical connection. Plug into the receptacle that matches the amperage requirements of your RV. Use electrical adapters as required. If at all possible try to avoid using an extension cord. Some campgrounds have a circuit breaker in the box that must be turned on to allow electricity to the RV.
- Check the RV to make sure electricity is working. If you have a plug in voltmeter plug it into a wall outlet so you can monitor campground voltage during your stay. Any readings below 105 volts or above 135 volts can be dangerous to your appliances and electronic equipment.
- Turn the refrigerator on in the electric mode.
- If you have a water pressure regulator hook it up to the campground water supply.
- If you have an exterior water filter hook it up to the city water inlet on the RV. If you don't use a filter attach a 90-degree elbow to the city water inlet to prevent the hose from kinking.
- Attach one end of your potable RV drinking hose (white hose) to the campground water supply and the other end to the city water inlet on the RV.
- Turn the water on and check for any leaks. Make sure you have water coming into the RV.
- When you are hooked up to a city water supply do not use the 12-volt water pump. Only use this when you don't have an external water supply and need to draw water from the fresh water tank.
- Wearing gloves, remove the cap from the sewer hose valve and attach the sewer hose to the sewer drain outlet. Be sure to turn it so the locking tabs securely lock in place. Place the sewer hose donut or seal in the campground sewer connection. Attach the other end of the sewer hose in the donut. Be sure and get a good seal and connection.
- If you have a sewer hose support set it up now allowing a slope from the RV down to the sewer connection to assist in dumping the tanks.
- If you're going to be at the campground for a couple of days or more you can slightly open the Gray Water tank knife valve to allow sink and shower water to drain directly into the sewer. It is the smaller of the two valves. If your only there for the night leave it closed. NEVER leave the black tank valve open (the larger valve). You only open the black tank valve when dumping the tank. When the black tank is ¾ full or full its time to dump it. Dumping the black tank before its near full can cause problems. You will want plenty of water in the gray tank at this time to help flush the sewer hose out. To dump tanks pull the black tank valve all the way out. Let it drain completely then close the valve. Now open the gray tank valve and allow it to drain completely and flush the sewer hose out at the same time. Close the valve. Treat the black tank with holding tank chemicals every time you dump it.
- Turn the main LP gas supply valve on at the tank or bottles.
- If you want hot water at this time be sure that the water heater tank is full of water before you light it. If your water heater has a bypass kit on it make sure that it is not in the bypass mode. Open a hot water faucet and when you get a steady flow of water (no air) the water heater tank is full and you can light the water heater. Follow the instructions for the type of water heater you have. There may also be an electric mode on the water heater. It will take a little longer to heat the water but it will conserve your LP gas.
- If the campground has a cable TV hook up connect your TV coax cable from the RV to the cable connection. If they don't offer cable raise the TV antenna on the RV. Turn the TV and the power booster on. Pull down on the antenna base plate and rotate the antenna until you get the best reception. If you have cable do not use the antenna booster.
- Open the locking tabs on the outside range hood vent door if you plan to use the range exhaust fan.
- Put the outdoor carpet mat down
- Set up the lawn chairs
- Put the awning out (see awning checklist)
- Start the BBQ and have fun!!
By Mark Polk, RV Education 101
I would like to tell you a short story about Joe and Fred. Joe and Fred are neighbors and they both own RV's. As a matter of fact their RV's are the same year, make and model. Their families always plan and take trips together in their RV's. The story begins last year when their camping season was coming to an end as winter quickly approached.
One day Fred saw Joe working on his RV. Joe was winterizing and cleaning his RV, charging the batteries, changing the oil and covering the tires. Fred went back inside his house and poured another cup of coffee. He chuckled to himself thinking what a waste of time. I drained the water out of the RV it will be fine.
Soon spring arrived. Fred was walking out to get his newspaper one morning and he saw Joe working on his RV again. He was de-winterizing and cleaning it, putting the batteries back in, checking the air pressure in the tires, and testing all the appliances. Fred laughed, thinking about how Joe makes all this extra work for himself.
Their first trip of the year was in April. They planned a weekend getaway to the mountains. Both families were packed up and ready to go. Joe had to wait while Fred tried to jump start his battery. They finally hit the road. Less than one hundred miles into the trip Fred called Joe on his cell phone and told him they had a flat tire. Fred told them to keep going and as soon as he had it fixed they would meet up at the campground. When Fred finally arrived at the campground Joe had his RV hooked up and was cooking hamburgers on the grill.
Soon it was dark and Fred was hooking the water and electric up with a flashlight. Fred's wife came running out of their RV and told him that water was running all over the floor. Fred turned the water off and told his wife they could drink bottled water. Joe was enjoying a hot shower after a long days drive. The next morning, after a big breakfast, Joe was on the practice green putting some balls. Fred was trying to figure out why the burners on the range wouldn't light. Fred's wife was telling Joe's wife about all the mice that got into the food they forgot to take out of the cabinets last winter. Joe came back and relaxed under the Awning with a cold iced tea and a magazine.
That night Joe decided to cook some steaks and baked potatoes. Fred was busy taking the food out of their freezer and refrigerator that was spoiling because the refrigerator wasn't working. The next morning Joe and his wife enjoyed a leisurely walk around the campground. Fred, dirty and tired from working on the refrigerator half the night, sat at the picnic table eating tuna from a can with a plastic spoon.
That afternoon they packed up and got ready to head home. Joe waited again while Fred jump-started his battery. When they got home Fred parked his RV and went in the house to take a shower and a nap. Joe cleaned his RV inside and out.
Before they knew it June was here and in less than two weeks they would be taking their RV's to Florida for a two-week vacation. Early one morning Fred saw Joe out by his RV and walked over to see what he was doing. Joe told him that since they were going to be traveling in hot weather there was some routine and preventive maintenance he needed to do to get the RV ready. Fred saw a checklist in Joe's hand and asked him if he could look at it. It was a “Preventive Maintenance for Hot Weather” checklist from his “Checklist for RVers” e-book http://www.rveducation101.com/ebooks.htm?siteID=0 It listed items to check on the chassis and the coach. Fred told Joe that he dropped his RV off at the dealership to have a few things fixed and it would be good to go on their trip. The day finally arrived to leave on their vacation. Both families were packed and ready to go.
Joe smiled as he waited for Fred to jump-start his RV and thought to himself, at least I'll have some entertainment with Fred along.
“Preventive Maintenance for Hot Weather”
Chassis
Check your owner's manual for Routine and scheduled maintenance intervals. Service as recommended.
- Check all fluid levels: engine oil, transmission, power steering, brakes, windshield washer
- Check air filter
- Check for any leaks: Look under the RV for any indications of leaks
- Check radiator coolant: level, condition & concentration
- Check radiator hoses & clamps: worn, cracked, soft spots or brittle
- Check heater hoses & clamps: worn, cracked, soft spots or brittle
- Check belts: worn or cracked & proper tension
- Check all lights
- Check wiper blades for wear & poor operation
- Check battery state of charge, water level, cables & connections
- Check condition of tires: uneven wear, tread depth and for proper tire inflation
- Start engine, warm up & check all gauges for proper operation
- Check dash air for proper operation
- Check emergency kit to include a flashlight, extra batteries, jumper cables, first aid kit, basic hand tools, warning devices & cellular phone
Coach
- Test roof air conditioner(s) clean or replace A/C filters
- Test refrigerator in A/C & LP gas mode. Install a thermostatically controlled refrigerator vent fan.
- Strategically park your RV to take advantage of shade. This can make the refrigerator and roof A/C more efficient.
- Install Maxx Air vent covers over roof vents to allow ventilation even when it's raining.
- Check all awnings for proper operation.
- Check auxiliary battery(s) state of charge, water level, cables & connections.
- Check operation of generator under load. Check generator engine oil & all filters. It may be necessary to change oil with the manufacturers recommended oil viscosity for hot weather operation. Put the summer/winter preheat lever in the summer position (if equipped).
- Check all appliances, electric and gas, for proper operation.
- It may be necessary to add more chemicals when treating the black tank during hot weather camping.
- Check fire extinguisher, smoke alarm, carbon monoxide and LP leak detector
- Take all precautions when traveling with pets in hot weather. Never leave them inside a hot RV. Give them plenty of fresh water and ventilation.
Fred called Joe on his cell phone and told him he had a flat tire. Fred told them to keep going and as soon as he had it fixed he would meet them at the campground. Four days into their two-week vacation Fred and his wife met up with Joe and his wife at the campground. Joe just smiled.
Another good e-book is our “RV Care and Maintenance”
By Mark Polk, RV Education 101
I receive a lot of emails with questions about how to make your RV refrigerator work more efficiently. RV refrigerators, for the most part, are efficient. In many cases it is something the owner does that makes the refrigerator less efficient. Before we talk about how to improve your RV refrigerators efficiency we need to have a basic understanding of how an RV refrigerator works. The RV refrigerator is also covered in our RV Education 101 training videos and DVDs.
For starters keep in mind that your RV refrigerator is different from the one in your house. Your RV refrigerator doesn't use a compressor or any moving parts for that matter. It works off of the principle of absorption. Instead of applying cold directly the heat is drawn out, or absorbed. The theory is, when there is an absence of heat there is cold. Basically your RV refrigerator uses heat, either from an electric heating element or LP gas flame. The heat starts a chemical reaction and then through evaporation and condensation causes it to cool. It also works off of gravity, freezing the freezer compartment first and then dropping down to the refrigerator compartment.
There are several things we can do to help the refrigerator do its job more efficiently. First and foremost the RV must be fairly level for the refrigerator to operate properly. Older RV refrigerators required more precise leveling, but even the newer models need to be close to level for optimum performance. Over time a cooling unit operated out of level will be permanently damaged. Traveling with the refrigerator on will not cause problems because the liquids and gases in the cooling unit are constantly moving around. They don't collect and stay in areas of the cooling unit like they can in a stationary, out of level refrigerator.
The initial cool down process can take four to six hours. You should turn the refrigerator on the day before you plan to leave, and before you put any food in it. When you do load the refrigerator the food you put in should already be cold, and the food put in the freezer should already be frozen. Putting cold food in the refrigerator, rather than adding warm food, lets the refrigerator work less to cool down. One common mistake made is to over pack the refrigerator. There has to be space between the foods to allow for air to circulate throughout the compartment. In most situations you will have access to a store where you can buy food. A two to three day supply should be enough.
To assist with air circulation you can purchase an inexpensive, battery operated refrigerator fan. Put the batteries in and place the fan in the front of the refrigerator compartment blowing up. Cold air drops and warm air rises. The fan will improve the efficiency by circulating the air and it will reduce the initial cool down time by 50%.
The heat created by the cooling process is vented behind the refrigerator. Air enters through the outside lower refrigerator vent and helps to draft the hot air out through the roof vent. Periodically inspect the back of the refrigerator and the roof vent for any obstructions like bird nests, leaves or other debris that might prevent the heat from escaping.
To keep the refrigerator operating efficiently in the LP gas mode there is some routine maintenance you can perform. Remove the outside lower vent cover to access the back of the refrigerator. With the refrigerator turned off ensure all connections are clean and tight. Turn the refrigerator on in the LP gas mode and a look at the flame. If the flame is burning poorly, a yellow colored flame, or if the refrigerator isn't operating properly in the gas mode it's possible that the baffle inside the flue is covered with soot. Soot, rust and other debris can fall down and obstruct the burner assembly. When this happens it will be necessary to clean the flue and the burner assembly. Turn the refrigerator off again and locate the burner. Directly above the burner is the flue. The baffle is inside the flue. Wear a pair of safety glasses and use an air compressor to blow air up into the flue. After the flue is clean use the compressed air to remove any debris from the outside refrigerator compartment. Now, turn the refrigerator on in the LP gas mode to make sure it is working properly. Look for the bright blue flame. For a thorough cleaning of the flue and baffle it will be necessary to have your RV dealer do it for you. While it's there have them to do an LP gas pressure test too.
Another good idea is to install a 12 volt, thermostatically controlled refrigerator vent fan at the back of the refrigerator, or at the top of the roof vent, to assist with drafting the hot air away from the refrigerator. If you are mechanically inclined these fans are fairly easy to install, or you can have your RV dealer install one for you. Either way it's worth it. The fan removes the heat built up behind the refrigerator improving the refrigerators performance by up to 40%.
The outside temperature also affects the operation and efficiency of your RV refrigerator. When it's cold out you can lower the temperature setting and when it's hot out you can raise the setting. Some refrigerators are preset by the manufacturer. Extremely hot weather will directly affect the refrigerators efficiency. When it's really hot outside try parking your RV with the side the refrigerator is on in the shade. Periodically inspect and clean the refrigerator door gaskets. Check them for a good seal. Place a dollar bill behind the seal and close the door. It should stay there and not drop. When you try to pull it out there should be some resistance felt. Do this in several different places and have any damaged seals replaced.
Try to limit the amount of times you open the refrigerator or freezer doors and the length of time you leave the doors open. Every time the door is opened it adds a few degrees of heat. On a hot summer day it won't take long to lose all of its cooling capacity. Last but not least you should always have a thermometer in the food compartment. Food can begin to spoil at temperatures above 40 degrees.
RV absorption refrigerators do a great job for RVers. They will do an even better job, and last longer, if we apply these simple tips to make their job easier and less demanding.
By Mark Polk, RV Education 101
It doesn't matter whether you own a pop-up or a diesel pusher, when you made the decision to purchase an RV it was a major investment. Like any other major investment there are certain things we must do to protect our investment so we can enjoy it. Your RV needs to be maintained just like your house and automobiles need to be maintained. There are three basic types of maintenance for your RV, preventive maintenance, scheduled maintenance and emergency maintenance.
- Preventive Maintenance is maintenance you perform on your RV before a problem exists. These checks are designed to prevent or identify potential problems that could lead to mechanical breakdown, malfunction or failure of a component or system on your RV. Preventive maintenance consists of cleaning, inspecting, lubricating, adjusting and servicing your RV.
- Scheduled Maintenance or routine maintenance is performed in intervals normally based on time, mileage or hours. Scheduled maintenance is designed to keep your RV in top operating condition and prevent untimely breakdowns and repairs. It is absolutely essential that you read your owner's manual and warranty information in regards to who is responsible for what when it comes to scheduled maintenance. Scheduled maintenance that is required by the manufacturer and not performed can void your warranty.
- Emergency Maintenance - Maintenance and / or repairs required when you least expect it due to component, system or mechanical failure.
The lack of preventive maintenance and / or scheduled maintenance will eventually result in emergency maintenance. If you don't check the air pressure in your tires (preventive maintenance) the under-inflated tire over heats and prematurely fails resulting in emergency maintenance.
Preventive maintenance is really nothing more than common sense maintenance. If you're going to take a thousand mile trip in your automobile common sense tells us at a minimum to check all of the fluid levels, tires and lights. Too often we assume that all of the fluid levels are fine, that there are no leaks and when you look at the tires they look like they are inflated properly. In many cases this is why we have an unexpected break down, because we failed to do a little preventive maintenance.
Now consider an RV. It's larger and heavier than your automobile and its not just the chassis you need to be concerned about, it's your entire house sitting on top of the chassis. The bottom line is an RV requires more preventive maintenance than an automobile. The good news is the average RV owner can perform the required preventive maintenance and prevent untimely break downs and costly repairs (emergency maintenance).
Before you take your next trip put some time aside to perform some preventive maintenance. It could be the difference between a safe and enjoyable trip and a costly disastrous one. How does the old saying go, an ounce of prevention is worth a pound of cure! To help make the chore of checking out your RV a little easier I am including a short checklist. Start your preventive maintenance program with these checks and over time add some of your own checks and without even realizing it you will be identifying and preventing potential problems before they exist.
Vehicle Chassis Checklist:
- Always check your owner's manual for routine and scheduled maintenance intervals. Service your vehicle as recommended by the manufacturer.
- Check all fluid levels: engine oil, transmission, power steering, brakes and windshield washer fluid.
- Check the air filter. A clean air filter helps your engine perform better and improves fuel economy.
- Check for any leaks: Look under the RV and or tow vehicle for any indications of leaks. Locate the source of the leak and have it repaired. Transmission fluid leaks contribute to vehicle fires.
- Check radiator coolant: Check the level, condition & concentration of anti-freeze. Antifreeze not only protects the engine in cold temperatures, it helps the engine run cooler in hot temperatures. NEVER CHECK WHEN HOT!!
- Check radiator hoses & clamps: Look for worn, cracked, brittle or soft spots in the hoses. Replace as required.
- Check heater hoses & clamps: Look for worn, cracked, or soft spots in the hoses.
- Check all belts: Look for signs of wear and for any cracks in the belt. Check the belts for proper tension. It's a good idea to take spare belts with you on your trip.
- Check all lights.
- Check wiper blades for wear and poor operation. It's too late once it starts raining.
- Check the starting battery state of charge, water level, cables and connections. If you're not familiar with working around lead acid batteries have them checked at a qualified service center.
- Check the condition of your tires: Look for uneven wear, tread depth and check for proper tire inflation. Check the tire pressure when the tires are cold, before traveling more than one mile.
- Start the engine and allow it to warm up. Check all gauges for proper operation. Monitor your gauges while driving. If a guage is out of the normal range pull over as soon as it is safe and call for assistance.
- Check the dash air for proper operation. Whether you're pulling a pop up a travel trailer or driving a motor home try to avoid using the dash air when the engine is under a strain, such as on an upgrade.
- Check your emergency kit for a flashlight, extra batteries, jumper cables, first aid kit, basic hand tools, and warning devices.
- In addition to this if you have a pop up or travel trailer the wheel bearings and brakes (if equipped) should be inspected at least once annually. Inspect any canvas for dry rot and tears; inspect all hitch work and the coupler for damage. Inspect the Breakaway Switch switch and pigtail for proper operation.
Coach Checklist:
- Test the roof air conditioner(s). Clean or replace A/C filters. Clean filters will help the A/C work more efficiently.
- Test the refrigerator in A/C & LP gas mode. Install a thermostatically controlled refrigerator vent fan.
- In hot weather's trategically park your RV to take advantage of shade. This can
- Make the refrigerator and roof A/C more efficient.
- Install Maxx Air vent covers over roof vents to allow ventilation.
- Check the auxiliary battery(s) state of charge, water level, cables and connections. If you're not familiar with lead acid batteries have them checked by an authorized service center.
- Check operation of the generator under load. Check generator engine oil & all filters. Service the generator as recommended by the manufacturer.
- Check all appliances, electric and gas, for proper operation.
- Thoroughly flush out the holding tanks every time you dump them.
- Check all 12-volt interior lights and accessories
- Check fire extinguishers, smoke alarm, carbon monoxide and LP gas leak detector.
- Inspect the operation of the Awning and check the awning fabric.
- Check the campground electric for proper voltage and polarity before plugging the RV in.
- Drain the water out of the water system when you're not using the RV.
- Now that you performed your preventive maintenance checks go and have a good time and enjoy the fact that there is much less chance of encountering the need for any emergency maintenance during your trip.
By Mark Polk, RV Education 101
If there is a way to get in your RV, water will find it. Water leaks on an RV can cause extensive damage and can be extremely costly to repair. When I worked at an RV dealership I saw the damaging effects that water can cause to an RV time and time again. I learned the lesson the hard way. I appraised a unit that was being traded in and didn't identify the extensive water damage, which resulted in a thousand dollars worth of repairs. Hindsight is 20/20 and I quickly learned how to inspect for, and identify potential water damage on RVs.
I mention inspecting your RV for water damage in my Winterizing and Storing Your RV video and in my RV Checklists e-book My recommendation is that you inspect for potential water leaks twice a year at a minimum, once in the fall and again in the spring.
Recently we went camping over the weekend and it rained the entire time. Needless to say we spent quite a bit of the trip inside our motor home. To my surprise we noticed water dripping from around the edge of the dome over the shower. I was surprised because I inspected all of the seams on the roof earlier that spring. I am aware that everything flexes and moves on the RV when you are traveling, and that this leak could have started after my inspection, but this was not the case.
When we returned home from our trip I went up on the roof, bent over, and checked the sealant around the shower dome the same way I checked it during my bi-annual inspections. Everything looked fine so I went back in the shower to look again, wondering to myself if it was condensation that caused the drops of water. I removed the trim ring from around the dome and the entire area was saturated with water. Now, as I stood there scratching my head, I was really confused. I made another trip up the ladder unto the roof. Upon closer examination, ON MY HANDS AND KNEES, I discovered two small splits through the sealant around the dome.
This is when I realized that I wasn't really, truly inspecting for leaks, I was just going through the motions. I also realized how fortunate I was to be in the RV when it was actually leaking. If I hadn't caught it when I did I would be the one paying those costly repair bills.
Every seam on your RV and anywhere the manufacturer cut a hole in your RV has the potential to allow water in. To protect your investment and your wallet take the time to REALLY inspect all of these seams and sealants. Water damage on an RV is similar to progressive damage to a tire. The outside of the tire looks fine, but the internal damage over a long period of time causes the tire to fail without any warning. The outside of your RV looks fine but the internal damage caused by water over a long period of time can result in the entire roof, floor or wall rotting away without you knowing it. Here are a few things to look for during your inspections.
Always keep safety on your mind when you are working on the roof of your RV. You can be seriously injured from a fall! One reader suggested that you use 2 pieces of 1/2" plywood, 2 feet by 4 feet, to move around on and spread your weight out over the roof rafters.
- To stop a leak before it starts thoroughly inspect all roof and body seams. Consult with your RV dealer for sealants compatible with different types of materials.
- Look for any discoloration and feel for any soft spots on the ceiling around roof vents, air conditioners, TV antennas, plumbing vents, and any other openings that were cut in the roof.
- Look for any discoloration or wrinkles in the wallpaper, and feel for any soft spots on the walls around all windows, doors, vents, slide outs, or any other openings that were cut in the side walls.
- Identify the location of items like the water heater, furnace, outside shower, potable water fill and city water inlet on the outside of the RV and then access those areas from the inside of the RV and look for any indications of water damage around these openings.
- Open all overhead cabinets and look in the top corner where the walls meet the ceiling for any discoloration or feel for any soft spots. This would indicate a leak at the seam where the sidewall and the roof attach.
- Check in all outside storage compartments for any indications of water leaks or water damage.
- Check for any soft spots on the roof itself especially around the roof seams at the front and rear of the RV. Thoroughly inspect all sealants on the roof around every opening.
- Some Class C motor homes are notorious for leaks in the cab over bed area. Look for any signs of discoloration and feel for soft spots. Reach under the mattress and feel for water.
- Look and feel on the outside of the RV for any signs of delaminating. Delaminating is caused by water getting between the exterior fiberglass and the sidewall. When this happens the exterior fiberglass separates from the sidewall of the RV. You can stand at the front or rear of the RV and look down the side for any noticeable ripples or what looks like a bubble. You can also press on the sidewalls. If you feel the exterior fiberglass move it is delaminating. Often times delaminating starts around where an opening that was made in the sidewall.
Don't just inspect your RV for water damage; REALLY inspect your RV for water damage. If you do this on a regular basis you can locate and repair the source of any water damage before it has a chance to do a great deal of damage. I think I'll start checking our motor home more than twice a year.
By Mark Polk, RV Education 101
I love the freedom of the open road. There is nothing like exploring the back roads in your RV. You can go where you want and when you want, in your house on wheels, and because of this, often times you find yourself in a new destination everyday. Something that many RVers do not take into consideration with this freedom to roam is the weather conditions where you are traveling too or spending the night. RV's are great, but they are not safe in severe weather like lightning and thunderstorms with high winds, tornadoes and hurricanes.
When you are at home, you usually know what the weather forecast is from the newspaper, radio or television. When you travel three or four hundred miles a day in your RV the weather conditions can change several times. Many times when you stop for the night somewhere all you want to do is get some rest. The weather is the last thing on your mind. The problem with this is severe weather can occur without much warning, and if you are caught in it, it can be disastrous.
So, what do we do, what's the plan? Plan is the key word here. RVers need to have an emergency plan in case of a severe storm. For starters, have you ever heard of the National Oceanic Atmospheric Administration (NOAA) Weather Radio or NWR? The NOAA Weather Radio is a nationwide network of radio stations that broadcast continuous weather information directly from a nearby National Weather Service Office. They broadcast National Weather Service warnings, watches, forecasts and other hazard information 24 hours a day. Alerts inform people if they need to take some type of action in order to protect themselves, such as "seeking shelter" or "to evacuate an area immediately!” What does this mean to RVers? It means if you owned a battery operated weather radio Receiver you could monitor weather conditions no matter where you are!
Every RVer should own a weather radio receiver. Receivers are available at most retail stores that sell electronic equipment. Prices can range anywhere from $25 to $200 depending on the quality of the receiver and its features. We actually have two weather radio receivers. We leave one in the RV at all times. When we arrive at our destination, we set it in the "weather" position and tune in to the NOAA station with the strongest signal in that area. When an all-hazard emergency or weather alert is broadcast by NOAA, the receiver sounds an audible alert to notify us that a message is pending. We also have a hand held model that we can use when we are away from the campground. It is perfect for hiking, riding 4-wheelers, boating and many other uses. It is well worth the investment to know what type of weather to expect when traveling or camping in your RV. When we are at home, we use the weather radio receiver in the house. For more information on the NOAA Weather Radio visit our website
OK, the first step to our emergency weather plan is to get a weather radio receiver if you don't already have one, and to always monitor it when you use your RV. The next step is to develop an emergency evacuation plan, to use in the event of severe weather. When you arrive at a campground, ask at the check-in desk about an emergency plan in case of a severe storm such as a tornado, or a thunderstorm with high winds. If they don't have a plan you need to make your own. Locate a structure that is safer than your RV, like a bathhouse or the campground office. Always stay on the lowest level possible and away from doors and windows. Brief everybody with you on the emergency plan. Explain to children how to respond to different disasters and the dangers of severe weather, fires, and other emergencies. Instruct children on emergency exits. Instruct them on how and when to call 911. Make sure everybody knows exactly what his or her job is in case of severe weather. Monitor the weather radio for emergency information. Emergency weather watches and warnings are for counties and towns, so always check a map for the county or town where you are staying.
Have an emergency supply kit made up and easily accessible. The kit should contain flashlights, batteries, rain ponchos, a portable weather radio, first aid kit, non- perishable packaged or canned food and a manual can opener, blankets, prescription and non-prescription drugs, pet supplies, bottled water and any special items for infants, elderly or disabled family members.
To learn more about how to prepare for and react to different types of severe weather take a moment to visit here.
Remember, RVs are not safe in severe weather! This includes severe thunderstorms with high winds, tornadoes and hurricanes. Learn about differenttypes of weather hazards, get a weather radio if you don't have one, create a plan with your family, practice and maintain the plan. Now go RVing and have fun.
By Mark Polk, RV Education 101
What is all this confusing talk about weights? The weight issue is probably the most critical and least understood issue you will confront when purchasing a towable RV. It is critical because a mismatched tow vehicle and trailer can put you and your loved ones safety in jeopardy. It can also result in expensive repair bills for damage and premature wear to major components on your tow vehicle. It is the least understood issue because the buyer is not educated on weight concerns until it is too late.
Trying to cover everything involved on this subject in a short article is like trying to find the needle in a haystack. For a more in depth look at these topics check out our video production “Trailer Towing, Weights HitchWork & Backing”
Let's start with the tow vehicle. The vehicle manufacturer determines tow vehicle ratings. Extensive testing is done and many factors are considered such as; engine size, transmission, Axle Ratio, chassis, suspension, brakes, tires, cooling system, and tow packages. Any time a vehicle or trailer is given a rating it is based on the weakest link in the chain. For example, the axle on a trailer may be capable of supporting 5,000 pounds, but if the tires on the axle can only support 3,000 pounds the axle is rated for 3,000 pounds. This is why it is crucial that you never exceed a manufacturers rating.
You can take five ½ ton trucks with the same engine, and tow ratings can vary by 4,000 pounds. One of the major factors affecting tow ratings is the rear axle ratio. Very basically, the axle ratio is a comparison of how many times the drive shaft rotates versus the wheels. If you have a 3.73:1 axle ratio it means the drive shaft rotates 3.73 times for each rotation of the wheels. The higher the numeric value of the rear axle the better it tows, but you compromise gas mileage. The key to selecting the tow vehicle is to figure out what your requirements are and to know exactly how it is equipped so you can determine the correct tow rating. Tow ratings are extremely important, but there are other weight issues concerning the tow vehicle that are often overlooked.
There's a very simple formula we can use to determine how much we can safely tow, but first there are a couple of weight ratings you need to understand:
Gross Vehicle Weight Rating (GVWR): is the maximum permissible weight of the vehicle or trailer when fully loaded for travel. This includes the unloaded vehicle weight, all fluids, cargo, optional equipment and accessories. The tow vehicle and trailer each have a GVWR.
Gross Combined Weight Rating (GCWR): is the maximum permissible combined weight of the tow vehicle and the trailer together when they are fully loaded for travel.
Unloaded Vehicle Weight or Dry Weight (UVW) or (DW): is the actual weight of the tow vehicle or trailer as built at the factory. The UVW does not include passengers, cargo, dealer installed options, personal belongings, water, or LP gas.
Gross Vehicle Weight (GVW): is not a rating, it is the actual weight of the tow vehicle when it is fully loaded including passengers, cargo, a full fuel tank and accessories like the hitch.
Gross Trailer Weight (GTW): is not a rating, it is the actual weight of the fully loaded trailer including all options, cargo, personal belongings, food, water and LP gas.
Armed with this information, let's look at a typical buying scenario. We know for a fact that our tow vehicle is rated to tow 8,800 pounds and it has a GCWR of 15,000 pounds. When I account for the cargo in the truck, three additional passengers, and after market accessories my actual tow rating is 8,040 pounds. Keep in mind that any weight you load in or on the truck reduces the tow rating by that amount.
Tow rating for the vehicle 8,800 lbs.
Cargo in the tow vehicle - 150 lbs.
Three passengers - 450 lbs.
Dealer installed options - 160 lbs
Actual tow rating 8,040 lbs.
Now let's look at our towing formula: Tow Vehicle GCWR - Tow Vehicle GVW = the Maximum GVWR for a trailer we can purchase.
The GCWR for my truck is 15,000 pounds. Now I subtract the GVW of my truck when it's fully loaded for travel and this equals the maximum GVWR of a trailer I can consider purchasing. The only way to determine the actual GVW of the tow vehicle is to take the fully loaded vehicle to a set of scales and have it weighed. The GVWR can be found on the Safety Compliance Certification label, located on the exterior left front of the trailer.
Tow vehicle GCWR 15,000 lbs.
Tow Vehicle GVW - 6,832 lbs.
Maximum GVWR of Trailer = 8,168 lbs.
So let's say we found a trailer with a floor plan we like that has a GVWR of 8,000 lbs. The UVW or Dry Weight of the trailer is 6,350 pounds. Keep in mind we have to add any dealer installed options, cargo loaded in the trailer, any water we add to the fresh water holding tank and LP gas. This gives us a gross trailer weight of 7,075 pounds. Ask the RV dealer to show you the weight label that is inside the trailer for accurate trailer weights. Unloaded Vehicle Weights found in a manufacturer's brochure are normally for the base model of the trailer and do not include options the dealer may have ordered on the unit. In the majority of cases there is a significant difference between the GVWR and the UVW of the trailer.
UVW or DW of trailer 6,350 lbs.
Dealer installed options + 100 lbs.
Cargo in the trailer + 300 lbs.
Water 8.3 X 32 gallons + 266 lbs.
LP gas 4.23 X 14 gallons + 59 lbs.
Gross Trailer Weight 7,075 lbs.
Let's see if this will work: Remember our GCWR is 15,000 pounds. When we subtract the weight of our fully loaded tow vehicle and our fully loaded trailer we still have 1,093 pounds to spare before we exceed our GCWR.
Tow Vehicle GCWR 15,000 lbs.
Combined Weight of (fully loaded)
Tow Vehicle & Trailer - 13,907 lbs
= 1,093 lbs. to spare
This method will almost always works, unless you have the tow vehicle and the trailer loaded to their maximum GVWR, which when added together can exceed the GCWR. This is more likely to happen when the tow vehicle is a light duty vehicle like a mini van, small SUV or light duty truck. In this situation you simply add the GVWR of the tow vehicle to the GVWR of the trailer then select a tow vehicle that is rated for the combined weight.
If your original calculations are based on estimates you need to verify all weights by going to a set of scales and properly weighing the vehicle and trailer. Keep in mind this is a crash course and there are many more weight factors and considerations we did not even touch on. Gross Axle Weight Ratings (GAWR), tires, tire inflation, proper hitch work, trailer brakes and much more need to be addressed. I cover a lot of this information in my “Trailer Towing, Weights, Hitch Work & Backing” DVD. I hope this helped to clear up some of the issues concerning matching your tow vehicle and trailer to ensure a safe towing system.
By Mark Polk, RV Education 101
A motor home offers us the freedom to explore the open road. We can go where we want when we want. But what happens when we arrive at a destination where we plan to stay put for a day, a week or a month? How do explore the area, or take a quick trip to the grocery store? Well, we have our bikes with us right! Bikes are nice and we even get some much needed exercise, but are they really practical for touring the surrounding area or taking a day trip? Probably not, so what do we do?
One option is to disconnect everything from the motor home and take it. What a pain this can be just for a loaf of bread. Another option is to tow a vehicle behind the motor home. Now when we need a loaf of bread or want to take a day trip we have our transportation. This makes much more sense, but just how do we do this?How much weight can we safely tow? Do we need to use a tow dolly or can we tow it with all four wheels on the ground? If we can tow it with all four wheels on the ground do we use a vehicle mounted tow bar or a coach mounted tow bar? What about brakes? What else will I need? These are all good questions, so let’s start at the beginning.
To answer all of your towing questions check out our Towing Behind Your Motorhome DVD
How much weight can we safely tow?
Your motor home has a weight rating referred to as the Gross Combined Weight Rating (GCWR). This is the maximum combined weight of the fully loaded motor home and the fully loaded tow vehicle when weighed together. You never want to exceed this or any other weight rating. Another consideration is the amount of weight the hitch Receiver on the back of the motor home is rated for. The motor home itself might have a tow rating of 7,000 pounds, but if the receiver is only rated for 3,500 that’s the most you can tow.
Do we need to use a tow dolly, or can we tow our vehicle with all four wheels on the ground?
Some vehicles can be towed with all four wheels down with no problems while others would result in serious damage to the vehicle transmission. In some cases modifications can be made to the driveline and or transmission so you can tow the vehicle with all four wheels on the ground. You need to do your homework before attempting to tow a vehicle with all four wheels on the ground. Read your vehicle owner’s manual and check with the vehicle manufacturer. Many vehicles that can be towed with all four wheels on the ground still have restrictions like max speeds or max distances. In some situations it is best to use a tow dolly. A tow dolly is designed to lift the drive wheels off of the ground to prevent any damage to the tow vehicle. If the vehicle you want to tow requires expensive driveline modifications or has speed and distance restrictions a tow dolly may be the way to go.
If we can tow our vehicle with all four wheels on the ground do we use a vehicle mounted tow bar or a coach mounted tow bar?
If you can tow your vehicle with all four wheels down the first step will be to have tow bar mounting brackets installed on the tow vehicle. Now we can decide on which type of tow bar best suits our needs. Regardless of the type you choose make sure it is rated in excess of the fully loaded tow vehicle weight. There are two basic types of tow bars, a rigid A-frame and a collapsible. Rigid A-frame tow bars are the most basic. They are less expensive and because the arms don’t adjust or collapse they require more precise aligning to hook up.
Collapsible tow bars are more common among RVers. They are self aligning and much easier to hook up and use. The arms extend, self-center and lock in place automatically when you drive away. There are two types of collapsible tow bars, car-mounted and motor home-mounted. Car-mounted tow bars are a little easier to use and fold away on the front of the vehicle when you are finished using it. Motor home-mounted tow bars fold away on the rear of the motor home and never have to be lifted or removed from the front of the vehicle.
What about brakes?
Most U.S. States and Canadian Provinces have their own laws on the requirement for brakes on a towed trailer or vehicle being towed behind a motor home. The brakes on a motor home are designed by the vehicle manufacturer to stop the weight of that particular vehicle, not the additional weight being towed behind it. This additional weight adds a substantial increase to the distance required to stop safely. You need to have some type of braking system on the towed vehicle to SAFELY reduce the stopping distance and to protect you, your loved ones and the safety of others.
What else will I need?
You will need safety cables and lights for the towed vehicle. You need safety cables in the event the towed vehicle is ever separated from the motor home. One end of the cables is attached to the tow vehicle tow brackets and the other end to the receiver on the motor home.
You need to have running lights, tail lights, brake lights and turn signals on the towed vehicle that work in conjunction with the motor home lights. If you don’t tow your vehicle that often you may want to purchase a light accessory kit that can be strapped to the tow vehicle or uses magnets. These kits have a wiring harness that is plugged into the motor homes wiring harness plug. If you tow your vehicle frequently you will probably want to use a more permanent method where tow vehicle lights are wired directly to the motor home lights. Once this is done you just plug the tow vehicle wiring harness plug in to the motor home wiring harness plug.
The only thing left to do is hook up your tow vehicle and head down the road. Try to get in the habit of making the following checks before you leave and every time you stop. Check the tow bar, base-plate, safety cables and light plug to make sure everything is properly attached. When you stop check the tires of the towed vehicle to make sure they are not to hot or losing air. If you are using a dolly or trailer, check the wheels to make sure they are not hot to the touch. If the wheels are hot, it may indicate a brake or bearing problem. Check all of the lights everyday before towing.
Check out our instant download Dinghy Towing e-book
By Mark Polk, RV Education 101
Forty thousand people in the United States die each year on the road! With the peak RV travel season quickly approaching I thought this would be a good time to discuss getting to your RV travel destination safely. Getting there can be half the fun, as the saying goes, if you take a few precautions to make your trip safe.
The first step is to plan the trip you are taking. Travel guides, magazines, state tourism boards and Internet sites offer valuable information to help you plan your trip. Route your trip on a map or from an Internet trip planning site. Always keep an atlas or maps in the RV or tow vehicle. Driving a motor home or pulling a trailer can be stressful, especially if you don't know the route you will be traveling. Using a GPS system can make traveling much less stressful.
Complete a “Pre-Trip Checklist” before you head out on the road. Simple checks like checking your tires, lights, hitch work and other items all contribute to a safer trip. You should make these checks everyday before traveling. Our “Checklist for RVers” e-book available a “Pre-Trip Checklist” along with 30 other convenient checklists for RVers.
Take plenty of breaks when you're traveling. Stopping, stretching out and taking brief walks can revitalize you. Do not rush to get to your vacation destination. Driving too fast and for long periods of time can result in fatigue and falling asleep at the wheel. If you feel tired you should pull over and rest or change drivers. It's a good idea to switch drivers every few hours. Keep a window cracked open to help you stay alert, and only eat light meals when you stop to eat.
Avoid driving or pulling your RV during bad weather and high winds. Because of the size and mass of RV's it can be extremely dangerous to travel during periods of high winds. It's better to get to your destination one day later, than to risk traveling in bad weather.
Limit your driving time to 5 or 6 hours a day (300 to 350 miles). Not only will you be more alert, but you will arrive at the campground with plenty of day light to get set up and settled in before it gets dark outside. This gives you a chance to unwind and get rested for another day of travel, and to enjoy some of the amenities the campground has to offer.
Drive defensively! Stay alert and monitor what is going on around you at all times. Use your mirrors. For increased visibility, purchase some convex mirrors that you can stick on your side view mirrors. These mirrors are inexpensive and are available in auto parts stores. They come in different sizes and will improve your visibility a great deal, especially along the sides of the RV and in blind spots. If you're pulling a trailer it may be necessary to add mirror extensions so you can see along the sides of the trailer.
Eventually you will have to pass another vehicle in your RV. It's not difficult to pass but with a large RV it requires more space and time than the average automobile. Make sure you have plenty of room and use your turn signals to change lanes. Accelerate until you are past the other vehicle and you can see both of their headlights in your mirror. Signal again to return to the other lane and pull back in. Maintain your speed ahead of the vehicle you just passed.
Always leave plenty of room between you and the vehicle in front of you. RV's are much heavier than your automobile and require a longer braking distance to come to a stop. This alone will prevent accidents, especially during emergency braking. Driving at a safe speed also lowers your braking distance. Always use a supplemental braking system on the vehicle you are towing too.
Cell phones are nice to have for emergencies, but they can distract the driver. Do not use a cell phone if you are driving. If you must make a call, have someone that is not driving do it for you.
Never drink and drive!
In a recent study these dates, ranked in order, were identified as the 10 deadliest days of the year to drive. Mark these on your calendar and stay put on these dates. One more day at the campground or getting to your destination one day later can't hurt you, but driving on these dates could do much worse. As you can see most of the dates are close to, or on a major holiday. The reason for the August dates is because August is the busiest traveled month of the year.
- 1.- July 4
- 2.- July 3
- 3.- December 23
- 4.- August 3
- 5.- January 1
- 6.- August 6
- 7.- August 4
- 8.- August 12
- 9.- July 2
- 10.- September 2
Plan your trip, travel safe and smart and enjoy your RV experiences. Remember, getting there is half the fun!
By Mark Polk, RV Education 101
LP gas is a camper's best friend. It provides us with warmth on a chilly day, hot water to shower with, cold food in the fridge and the capability to cook on the road the same way you do when you're at home. When we need it it's there, instantly providing us with all of the amenities and creature comforts we are accustomed to. We don't really even think about it, it's taken for granted that when you push that button, almost like magic it responds to your demands.
But what is LP gas? Should we be afraid of it, or just continue to take it for granted? Liquid Propane, more commonly known as LP gas gets its name because it is stored in a liquid state. When LP gas is manufactured it is compressed and stored under pressure, which causes it to liquefy. When the pressure is released the liquid turns back into a vapor. LP gas is odorless, colorless and tasteless. To assist you in detecting a leak an odorant is added to it when it is manufactured. If you are not familiar with the odor of LP gas, the next time you go to a qualified fill station ask the attendant to let you smell it. Most people describe the smell as being similar to rotten eggs, or as having a garlic odor.
We'll get back to more characteristics of LP gas in a minute, but first let's address the second question. Should you be afraid of it? You should respect LP gas, because all gases have dangerous characteristics. If you check for gas leaks using an open flame you are certain to be in danger. I guess what I am trying to say is that LP gas is one of the safest of petroleum products if it is handled properly. More times than not, when there is an accident involving LP gas it is due to negligence or improper handling.
LP gas is portable, safe when handled properly and it's very efficient, so it only makes sense that it is used in RVs. I mentioned a moment ago that LP gas is compressed in a liquid state and stored in containers. Because of the amount of pressure involved the containers are manufactured under very stringent codes. There are two basic types of containers, Department of Transportation (DOT), and American Society of Mechanical Engineers (ASME). The DOT containers, more commonly called cylinders are the upright type that you see on Pop Up's, travel trailers, or your BBQ grill. The ASME cylinders are referred to as tanks and are mounted horizontally like the type you would see on a motor home.
Regardless of the type, all LP gas containers are only filled to 80% of their capacity to allow for expansion when the temperature around the container rises. LP gas cylinders are equipped with Overfill Protection Devices or OPD valves to prevent them from being overfilled.
LP gas can be measured in weight or in gallons. You may have heard somebody say that the gas cylinders on their travel trailer are 30 lb. cylinders, or they may say their cylinders hold 7 gallons apiece. One gallon of LP gas weighs 4.26 pounds. The typical BBQ grill uses a 20 lb. cylinder, and at 80% full it would hold 4.7 gallons of LP gas.
When you open the valve to the gas cylinder the liquid gas turns back into a vapor and goes into a two stage regulator. In the first stage the pressure coming out of the cylinder is reduced significantly close to the proper burning range for the LP gas appliances. The second stage reduces it to the required 11 inches of water column needed to run the appliances properly.
There is also an LP gas leak detector inside the RV that will set off an alarm to alert you if there is a gas leak. It's normally located close to floor level because LP gas is heavier than air and it will settle towards the floor. If you ever smell LP gas when you're camping, or if the LP gas leak detector goes off you could have a leak somewhere in the system. If this happens you should:
- Extinguish any open flames, pilot lights and do not smoke, or touch electrical switches.
- Evacuate the RV and turn off the main gas supply valve.
- Leave the door open and do not return to the area until the odor clears.
- Have the system checked out by a qualified technician before using it again.
- False alarms can be caused by hair spray, perfume, cleaning solvents and low battery voltage.
Let's take a moment and discuss some dos and don'ts concerning LP gas.
- Do remember to turn the main gas supply on when you're ready to use a gas appliance.
- Do have the system checked if you suspect a leak, disturb the gas system, or at least once annually.
- Do take the proper steps to safely transport, store and use LP gas cylinders.
- Do review all cautions and warnings on the LP gas system and appliances in your owner's manual.
- Do not use an open flame to check for leaks.
- Do not use the range burners or oven as a source of heat; it is not vented outside and depleted oxygen can cause asphyxiation.
- Do not go to a gas station to refuel unless you extinguish any open flames and, or pilot lights and turn LP gas appliances off.
- Do not transport LP gas cylinders inside a vehicle.
- Do not be afraid of LP gas, but do respect it and handle it properly.
All of our RV walk-through videos and DVDs available at www.rveducation101.com cover information on RV Glossary Link holding tanks, the water system, LP gas system, electrical system and more.
By Mark Polk, RV Education 101
Our motor home has been sitting idle for most of the winter. I went out last week to take a look at it and make sure there were no obvious problems. I started the generator to exercise it for a while. I sat there mesmerized by the quiet purring sound of the generator when suddenly the steady purr was interrupted by a surging sound. I quickly turned the appliances off that I had on and listened closely to the generator RPM's increasing and decreasing. Within a few seconds it smoothed back out to a nice, steady purr again.
When I worked at a RV dealership, every spring our service department was booked with appointments for generators that either wouldn't start, or if they did start they had that all too familiar surging sound. This was a result of letting the generator sit for periods of time without starting and exercising it. Lack of use is one of the biggest problems with generators. In gasoline generators the fuel breaks down and gums up causing hard starting and surging problems. This can happen in as short a period of time as one month.
I need to slow down; I'm getting too far ahead of myself. Running and exercising a generator is just one small aspect of owning and using a generator. Let's start from the beginning. RV generators are what truly make your RV fully self-contained. What a feature, instant electricity at the push of a button. We take electricity for granted in our homes because we don't have to do anything to get it, with the exception of paying our monthly electric bill. This is part of the problem with RV generators, we expect the electricity to be there when we need or want it just like in our house. The problem is this magical source of electricity requires a certain amount of care and maintenance from the owner.
Safety first! Always keep in mind when you use a generator there is carbon monoxide. You should always inspect the exhaust system on the generator set before using it. Do not operate a generator with a damaged exhaust system. If you're using a portable generator set make sure the exhaust is directed away from the camping area. Test your carbon monoxide detector for proper operation prior to using the generator. Never run a generator when you or anyone else is sleeping. Observe campground etiquette. Do not run your generator after quiet hours.
A generator that comes equipped on an RV gets its fuel supply from the same fuel tank the engine uses. When the fuel tank reaches a ¼ tank of fuel the generator will shut down to prevent you from possibly using all of the fuel without realizing it. The generator will either have an automatic transfer switch to sense whether you are using shore power or the generator, or you will need to plug the RV power cord into a generator receptacle to use the generator. It is perfectly okay to use the generator while you are traveling.
This is one of the reasons you have a generator in the first place. It is actually more fuel efficient to run the generator with the roof mounted air conditioner on, than to use the dash air.
Generators are rated in kilowatts (KW). One kilowatt equals 1,000 watts. So a 4 KW generator would be a 4,000-watt generator. RVs have either 30 amp or 50 amp electrical systems. If you have a 30 amp electrical system and you're plugged into a 30 amp, 120- volt electrical source you can basically use 3,600 watts before you exceed the RVs electrical system. 30 amps X 120-volts = 3,600 watts. This is why a large majority of RV's with 30 amp electrical systems come equipped with 4,000-watt generators. This of course is also why RVs with 50 amp electrical systems come equipped with larger generators.
RV generators are extremely dependable and in many cases will out last the RV if they are properly maintained and cared for. They do not require your constant attention, just some basic maintenance. The first thing you need to understand about maintaining your generator is that they need to be exercised on a regular basis. This applies to gas and diesel generators. I mentioned earlier that gasoline generators could have fuel related problems in as little as one month of sitting idle. This is one of the biggest problems, but it can easily be prevented if you get in a habit of exercising the generator on a monthly basis.
I used to think that I could avoid this by adding a fuel preservative to the fuel tank and then running the generator long enough to get the preservative through the generator set. You definitely should use a fuel preservative whenever the unit will be in storage, but there are many other reasons to start and exercise the generator on a regular basis. Moisture build up can cause damage to your generator. When you exercise your generator it heats up the generator windings and eliminates this moisture build up. This monthly exercise regime also lubricates all of the engine seals and components and helps to prevent carbon build up.
So, what exactly do I mean when I say exercise your generator? For a gasoline generator I mean that you start and run the generator with at least a 50 percent load for at least two hours every month. It is extremely important that you run it with this minimum rated load. Generators are designed to run with a load placed on them. Our motor home has a 4,000 watt generator so I can either turn the roof air conditioner on in the summer time, which is about 2,000 watts or I can use a couple of small portable electric heaters if it's cold out. It's always better to let your generator run for longer periods than it is for short periods. Check your generator owner's manual for load ratings specific to your unit.
Other maintenance intervals for generators are based on usage. Your generator set will have an hour meter so you can monitor the usage. Consult your owner's manual for maintenance intervals.
Changing the oil and filters on a regular scheduled basis and for seasonal changes is just as important for your generator as it is for your automobile. For extended storage requirements consult your generator owner's manual. If you have an Onan generator and you prefer to do some of your own generator maintenance here is an Onan tune-up checklist to follow.
The bottom line is don't hesitate to use your generator and when you do use it put a load on it. A little exercise and preventive maintenance will keep you generator in top operating condition and provide many years of faithful service.
Check out our instant download RV Care and Maintenance e-book
By Mark Polk, RV Education 101
Today we're going to talk about RV holding tanks. To start with I wanted to mention something about RV holding tanks that I don't think a lot of RVers are aware of. Many of the free dump stations available to RVers are closing because of chemicals that are harmful to septic systems and because RVers are abusing these dump stations. If we want to have access to these dump stations it is absolutely essential that we use septic safe chemicals (no formaldehyde), and that we clean up after ourselves and do not abuse dump stations.
Your RV has what is referred to as a Gray Water holding tank and a Black Water holding tank. The gray water holding tank collects dirty water from the kitchen sink, bathroom sink and shower. The black water holding tank is for the toilet. These tanks terminate into one main outlet used to empty the holding tanks. This is where we connect our sewer hose.
Make sure you have the required couplings and connectors. It may be necessary to attach two hoses together to reach the sewer connection. I recommend you only use heavy duty sewer hoses. They're not that expensive and they hold up much better. Keep a 10 foot hose and a 20 foot hose available. Do not pull or drag the sewer hose on the ground. This will cause it to tear or get pin holes in it.
To hook up the sewer hose make sure both valves are closed and remove the sewer cap. Make the connection by putting the hose adapter over the outlet and turn it clockwise until it locks securely in place. Take the other end of the hose over to the campground sewer connection. Use the necessary adapters to make the connection and get a good seal. It's a good idea to place some weight over the hose so it doesn't jump back out when you drain the tanks. It may be necessary to use some type of sewer hose support to get a good angle from the RV to the campground sewer connection so the tanks drain properly when you empty them. The small valve is for the gray water tank and the large valve is for the black water tank.
One golden rule for RV holding tanks is to never dump the black water tank until it is at least two thirds full. You want the tank nearly full so the weight and the gravity will force the contents of the tank to drain properly. Another golden rule is to never leave the black tank valve open at the campground and expect the toilet to drain or flush like the toilet in your home. It won't work.
When the tanks are full, or nearly full always dump the black tank first, followed by the gray tank. The gray water tank should also be at least two thirds full. Dumping the gray water tank last will help to flush the sewer hose out.
When you're at the campground for an extended period of time you can leave the gray tank valve partially open so it drains as you use it, but remember to NEVER do this with the black tank. If it's time to leave the campground and your holding tanks aren't full you can finish filling them with water and then dump them. Never use your drinking water hose for holding tank maintenance or cleaning purposes. RV drinking hoses are normally white. Take a different color hose for others uses so you can distinguish the difference.
After you dump the tanks you need to thoroughly flush the tanks out. Some RVs have a built in system for flushing the tanks out. If not there are other ways to do it. You can use a tank wand designed for cleaning and flushing the black tank. The only problem is you don't know when or if the black tank is really clean and you can't rinse or clean the gray tank with a wand.
I use a product called the Flush King. It's a reverse flush valve that connects directly to your sewer outlet and rinses and cleans both holding tanks in one simple operation. It's easy to use and it has a see through barrel so you know when the tanks are really clean.
Every time you dump the black tank you need to treat it with holding tank chemicals to assist in controlling odors and to break down solids. You should always use environmentally safe chemicals. Enzyme based chemicals use the good bacteria to digest waste and control odors. Formaldehyde based chemicals destroy the bacteria that's needed to break down waste and they can be dangerous to humans and pets. The first step is to add enough water to completely cover the bottom of the tank. Four or five toilet bowls full should be enough depending on the size of your black tank. Water will assist a great deal with controlling holding tank odors. You always want the contents of the tank to be covered by water. Next, fill the toilet bowl and add the proper amount of holding tank chemicals, usually four ounces for every forty gallons the tank holds. Flush the toilet. Repeat this procedure every time you empty the black water holding tank. Some holding tank chemicals like RV Trine also contains valve lubricants to keep the valves operating properly and extend the valve seals life.
You should always use toilet paper designed for use in RVs. This toilet paper breaks down and dissolves in the holding tank chemicals preventing potential problems with the holding tank, the RV sewer system and the dump station septic system.
False holding tank readings on your Monitor Panel are caused by the holding tank probes being covered by toilet tissue or other debris. If flushing the tank doesn't solve the problem add some water and a couple bags of ice cubes to the empty holding tank. Drive or pull the trailer so the ice cubes can scrub the sides of the tank. Proper holding tank chemicals will also keep the holding tank probes clean.
Over time grease and residue builds up in the gray tank and it causes a foul odor, not to mention how it is affecting the tank and valve assembly. Periodically treat the gray tank with environmentally safe holding tank chemicals to avoid odors from the tank. When the tank is empty you can also add some dishwashing liquid down the drains to help break down grease and residue build up.
Following these simple holding tank tips can prevent problems and provide you with long lasting trouble free holding tanks. This is one problem we can all do without! All of our RV walk-through videos at www.rveducation101.com cover information on RV holding tanks, the water system, LP gas system, electrical system and more. Check out our new “RV Essential Items” DVD to show you what items you will want for your RV to make all of your RV experiences more enjoyable.
By Mark Polk, RV Education 101
Do you know what two of the most common repairs made on RVs are? They are repairs to the steps and the TV antenna. Damage to RV steps and TV antennas occur frequently and can be costly to repair. The main reason for these frequent repairs is because you forget to do a walk around of the unit before leaving on a trip or leaving the campground. The good news is both of these common repairs can be avoided by following a simple “Pre-Trip Checklist” before heading out in your RV.
Regardless of the type of RV you have you need get in a habit of making these pre-trip checks every time you use your RV. Taking a few minutes to complete these simple checks can save you time and money for unnecessary repairs to your RV. This is a pre-trip checklist from my “Checklists for RVers” e-book available
Let's start with the outside of the RV.
- Check and adjust the air pressure in all tires. Always check the tires when they are cold, before traveling more than one mile.
- Check the lug nuts on the wheels. Discoloration and stains around lug nuts indicate they may be loose.
- Make sure all items in the storage compartments are secure. Lock all outside compartments.
- Check the bike rack and bikes for secure mounting if applicable.
- Make sure the power cord and water hose, and the sewer hose are disconnected and properly stored.
- Make sure all slide outs are in and slide out travel locks are securely in place.
- Make sure the TV antenna and / or satellite are down and stowed in the proper position for traveling.
- Check the Awning. Make sure that it is securely stored and all travel locks and knobs are tight and locked.
- Raise all stabilizer jacks or hydraulic leveling jacks.
- Look under the RV for any indications of leaks (motorized) or anything out of the ordinary.
- Stow or retract the steps.
- Fill the fresh water holding tank with enough potable water to get to your destination.
- Check and secure the cap on the sewer outlet.
- Turn all LP gas appliances off and turn the gas supply off at the tank or bottles.
- Double check all hitch work on towable RV's and on vehicles being towed behind motor homes.
- Check all fluid levels for motorized RV's and tow vehicles.
- Remove and store wheel chocks and any type of leveling blocks.
- Check all running lights, turn signals, brake lights and headlights on the RV and tow vehicle.
- Check for an up to date inspection or emission sticker and license plates.
- Check trailer brakes for proper operation.
- Make one last walk around the outside and check for anything you may have overlooked.
Don't forget about the inside of your RV.
- Walk through the entire RV and secure all loose items that could move, fall or get damaged while traveling.
- Turn off all appliances gas & electric. Turn off all pilot lights.
- Close all doors, drawers and cabinets
- Check for anything in the refrigerator that could spill. Lock the refrigerator and freezer doors.
- Turn off the 12-volt water pump.
- Turn off all 12-volt lights and accessories that could drain the auxiliary battery. Don't forget the TV antenna booster.
- Close the windows and secure blinds.
- Secure any large items such as TVs and computers that might move or fall while traveling.
- All weight in the RV should be distributed evenly. Adjust your mirrors and seat and hit the road.
This checklist may not be all-inclusive, but it's a good start. You can add to this list and tailor it to your specific type of RV. The most important thing to remember is to use this checklist every time you use your RV. It's easy to forget something without a reminder. I always do one last walk around of the RV just before pulling out. You'll be amazed at what you may have missed the first time around.
By Mark Polk, RV Education 101
One of the most neglected areas on your RV is the roof, out of site out of mind. The problem is if you don't keep the roof clean and inspect the roof seams on a regular basis you could end up with water damage. Many RVs today use a rubber roofing material. If you want to get a long life out of your RV roof here are some things you can do.
Safety first! Be extremely careful whenever you are working on your RV roof. You can be seriously injured from a fall. You have to get on the roof of your RV to properly clean and inspect it for any damage or potential water leaks. The first step is the ladder you use to get up on the roof. If your RV does not have a ladder on the back to access the roof it probably is not designed to be walked on. In this situation it may be necessary to use a couple pieces of plywood or particle board to help distribute your weight. In many cases RV manufacturers offer an option called roof rack and ladder ready. If the RV dealer orders this option the roof is built with a heavier roof decking. Even so you need to walk lightly when you're on the roof.
Rubber roofing on an RV is a great product, but like everything else without routine preventive maintenance it will not last as long as it could. First of all there are different types of rubber roofs. Different manufacturers provide different instructions with their product. What we want to concentrate on today is what applies to all rubber roofs used on RVs.
Caution: There are other types of RV roofing material used like fiberglass, aluminum and vinyl. READ your roof manufacturers instructions for proper cleaning and sealing techniques to prevent damage to your roof and possibly void your warranty.
Rubber roofs should be cleaned three to four times a year and depending on where you park or store your RV it may need to be cleaned more often. Regardless of the type of rubber roof you have NEVER use any cleaners or conditioners that contain petroleum solvents, harsh abrasives, or citrus ingredients. These types of cleaners can cause permanent damage to any rubber or vinyl surface. Most manufacturers of rubber roofs recommend you use a medium bristle brush and a non-abrasive cleaner. For light cleaning you can use warm water and a mild detergent like Dawn dish washing liquid. To clean, condition and protect the roof I use B.E.S.T Rubber Roof cleaner and protectant. Hard to clean areas like stubborn stains caused by leaves, sap, mold or mildew may require a second treatment. Use caution to prevent the cleaners from getting on the sides of the RV. ALWAYS rinse the sides, front and back of your RV before rinsing the roof to prevent streaking or damage to the finish on your RV.
Cleaning the roof is only part of maintaining it. Every time you clean the roof you need to inspect the sealants around all of the openings and the seams on the roof. Water will take the path of least resistance and if there is the smallest opening it will find it. You need to thoroughly inspect the roof sealants for potential leaks and reseal any areas of the roof seams and around openings where you suspect a leak. Check with your RV dealer for sealants that are compatible with your roofing material.
Cleaning, inspecting and sealing your RV roof can add years to the life of the roof and help prevent costly repairs caused by water damage. For a complete guide to preventive maintenance for you RV check out my RV Care and Maintenance DVD
By Mark Polk, RV Education 101
Today we're going to discuss one of the most important components of your RV and probably the most neglected, your RV tires. We all tend to take tires for granted. You know what I mean, when was the last time you checked the inflation pressure in your tires? Especially the inner duals if you have a motor home. Better yet, when was the last time you had your RV weighed? Overweight RVs and under inflated tires are both unsafe, send operating and repair costs sky high and can cause unexpected downtime. Much of the reason for neglecting our tires is because we don't really understand what is required to properly maintain them.
Did you know that nearly a quarter of the RVs weighed by the Recreation Vehicle Safety Education Foundation had loads that exceeded the capacity of the tires on the RVs? On average, these RVs were overloaded by over 900 pounds based on manufacturer specifications. In a separate survey conducted by Bridgestone / Firestone, 4 out of 5 RVs had at least one under inflated tire, a third of which were dangerously under inflated and at risk of failure. An under inflated tire can't carry the load of a properly inflated tire and the extra weight causes greater heat build up in the tire, which can lead to tire failure. 40% of all rear tires were overloaded. Improper weight distribution resulted in 28% of all motor homes being out of balance by 400 pounds or more from one axle end to the other.
With multiple slide out rooms, amenities like washers and dryers, holding tank capacities and the ample amount of storage space available on today's RVs it's easy to see why so many RVs are overloaded. We have a tendency to fill every nook and cranny of available space. Another problem is out of balance loads. Properly distributing the load can be difficult to determine when you're loading the RV. You can within an axle or tire's load capacity on one end of an axle, and over capacity on the other axle end. The bottom line is overloaded RVs and under inflated tires are extremely dangerous. Our goal today is to keep you from becoming a statistic in relationship to overloaded RVs and under inflated tires. What do you say we get started.
The best place to start is with weight ratings. Weight ratings are established by the manufacturer and are based on the weakest link in the chain. The suspension system, tires, wheels, brakes, axles, and the RV itself all have weight ratings. When you exceed a weight rating you are overloading one or more components on the RV and risk wearing the component out prematurely or complete failure of the component. In many cases the tires on your RV are the weakest link.
If you've been RVing for a while I'm sure you heard stories about tire failures and blowouts. I can't begin to tell you how many times I've heard people say that the tires on their RV were defective, or my tires only had 12,000 miles on them when I had a blowout. In the majority of cases the truth of the matter is that tire maintenance has been neglected or the RV was overloaded. The only thing between your RV and the road surface is your tires and the air that is in them. This is the weakest link.
A federal data plate is required by law on all vehicles. It lists the Gross Vehicle Weight Rating and the Gross axle weight rating for the vehicle. The Gross Vehicle Weight Rating or GVWR is one of the most crucial safety factors of your RV. The Gross Vehicle Weight Rating (GVWR) is the maximum allowable weight of the vehicle when fully loaded for travel including, all passengers, all cargo, fluids, and aftermarket accessories. You must not exceed the total GVWR for your vehicle. The Gross Axle Weight Ratings or GAWR is the maximum weight that should ever be placed on a given axle. The GAWR divided by two is the maximum axle rating for each end of the axle. You must not exceed this weight on either end of the axle, even if the total doesn't exceed the GAWR.
In addition to the federal data plate all members of the Recreation Vehicle Industry association RVIA are required to have an additional label on the vehicles they manufacture. This label lists additional information not available on the federal data plate and supersedes the federal data plate. There are two versions of the RVIA label depending on whether the vehicle was manufactured from September 1996 through August 2000, or after September 1, 2000. There are also separate versions for motor homes and for trailers, including 5th wheel trailers. Some of the weight terms on this label that we are concerned with are:
Unloaded Vehicle Weight or Dry Weight (UVW): The actual weight of the trailer or truck as built at the factory. The UVW does not include passengers, cargo, fresh water, LP gas, or after market accessories.
Cargo Carrying Capacity (CCC): is the maximum permissible weight of personal belongings that can be added. CCC is equal or less than GVWR minus UVW, full fresh water weight, full LP gas weight, tongue weight of any towed vehicle and after market accessories.
Gross Combined Weight Rating (GCWR): The maximum permissible weight of the tow vehicle and trailer combined when both are fully loaded for travel. GCWR also applies to a motor home towing a vehicle or trailer behind it. GCWR minus GVWR represents the allowable weight for the towed vehicle.
Note: The hitch Receiver mounted on the towing vehicle must be rated for this amount of weight. If it is rated for less that is the maximum amount you can tow.
Hitch Weight or Tongue Weight (TW): is the amount of weight pressing down on the vehicle's hitch or 5th wheel connection when the trailer is fully loaded for travel.
The only way to know if you are exceeding any of these weight ratings is to take your RV to the scales and have it weighed. The first step is to find scales where you can weigh your RV. This shouldn't be a problem. You can look in the Yellow Pages under moving and storage companies, farm suppliers, gravel pits and commercial truck stops. There are several different kinds of scales. What's important is to find scales where you can weigh individual wheel positions in addition to the overall weight, and the axle weights. Remember we said earlier it's quite possible to weigh an axle and be with in the Gross Axle Weight Rating, but you can exceed the tire rating on one axle end or the other. Call the number where the scales are located and ask them if it is possible to weigh your RV in these configurations.
The next step is to weigh everything! The day you head to the scales have the RV fully loaded for travel. If you tow a vehicle or trailer behind the motor home take the loaded vehicle with you. If you are weighing a travel trailer or 5th wheel, have the trailer and the tow vehicle loaded as if you were leaving on a camping trip. Be sure to include all passengers, cargo, food, clothing, fuel, water, and Propane . Wate, fuel and propane alone can exceed 750 pounds.
The actual process of weighing your RV is not that difficult. It may take a little time at the scales, but it is well worth it knowing that you're traveling safely within all of the manufacturer's weight ratings. You can download a free copy of a detailed guide, with worksheets to take with you on how to weigh your Travel Trailer.
Before you go to the scales identify the Gross Vehicle Weight Rating (GVWR), Gross Axle Weight Rating (GAWR) for each axle, and the information about the correct tire and rim sizes and recommended cold tire inflation pressures for all vehicles and / or trailers you are going to weigh. Get this information from the Federal Data plate and RVIA Data plates we discussed earlier. Take this guide on how to weigh your travel trailer or RV with you and simply follow the steps in the charts that pertain to your configuration and fill in the blanks.
If any overload condition exists it must be resolved immediately. In some cases it might be possible to redistribute the weight and then weigh it again. If the overload condition still exists you'll need to remove some weight from the RV.
Just like the axles your tires and wheels have load ratings too. The maximum ratings are molded into the side of the tires. Keep in mind these are maximum ratings. The sidewall of the tire shows the maximum load and the minimum inflation pressure for that load. Never set the inflation pressures below the recommendations you find on the vehicle manufacturers placard and do not exceed the maximum inflation pressure ratings found on the tires sidewall.
The actual permissible load for a tire depends on the tire size and load range. The maximum load amount is molded into the side wall of the tire. You could increase your load capacity by changing to a higher load rated tire of the same size at a higher pressure, but keep in mind you still must not exceed the gross axle weight rating of the vehicle and you can't exceed the maximum tire inflation for the wheels. It's also possible in some cases to increase tire load capacity by increasing the inflation pressure in your tires, but you cannot exceed the maximum pressure specified for that tire. Consult your tire dealer for load and inflation tables.
It's also important that you use the same inflation pressure on both ends of each axle. If you weigh the RV and axle end loads differ enough that the tables specify different inflation pressures for each axle end, the axle is out of balance and you need to redistribute the load. If for some reason you cannot redistribute the load you must inflate the tires on both ends to the pressure required for the axle end with the heavier load.
Never operate your vehicle with tires inflated to less pressure than required for the load. Never operate your vehicle with tires inflated to less pressure than specified on the vehicle placard, no matter what the load. Never inflate your tires above the maximum pressure shown on their sidewalls
This would be a good time to discuss some of the leading causes of premature tire failure?
- Overloading the tires
- Under inflated tires
- Ozone and UV rays
- Age of the tires
- Rotating tires
The tires on your RV are the most vulnerable component affected by overloading the RV. There are numerous reasons for this. First and foremost is when the tires are not inflated properly for the load. Failure to maintain correct tire pressure can result in fast tread wear, uneven wear, poor handling, and excessive heat build up, which can lead to tire failure. Another problem is when you weigh your RV the total weight of the axles may be within the axles weight rating but it may be overloaded on one side of the axle or the other. This is a common problem with RVs and many times the cause is poor weight distribution and / or improper loading of the RV. When this happens the tire or tires on the end of the axle that is overloaded are subject to tire failure. When a tire fails many RVers contribute it to a defect in the tire, but that is rarely the reason. The only way to avoid this is to weigh each axle end separately to determine if a tire overload condition exists. The maximum load on each axle end is half the GAWR for that axle. If an axle end has dual tires, the load on each tire is half the load on the axle end. Never exceed the maximum tire load rating that is molded into the tires sidewall (along with the inflation pressure for that load).
Another leading cause of tire failure is under inflated tires. The load rating for a tire is only accurate if the tire is properly inflated. Under inflated tires cause extreme heat build up that leads to tire failure. The appearance of the tire can look normal but the internal damage is not visible and the tire can fail at any time without warning. If you find any tire 20 percent or more below the correct inflation pressure have it removed, demounted and inspected. Driving on a tire that is 20 percent or more under inflated can cause serious, permanent damage to the tire that may not be visible. Tires with internal damage from under inflation can fail catastrophically without warning.
Tires can lose up to two pounds of air pressure per month. If you don't check your tires for three or four months they could be seriously under inflated. Ideally you should check tire inflation, and adjust it if required, everyday that you move or drive your RV. If you can't get into the habit of doing it on a daily basis you need to make it a point to check all tires weekly at a minimum when you're traveling. You always want to check the tires when they are cold, meaning that you don't drive or move the RV before checking inflation pressure.
The only way to correctly measure the inflation pressure in your tires is with a quality inflation pressure gauge. Using your boot, a billie club or a hammer is not a quality pressure gauge, and don't ever depend on your eyes to check tire inflation. There can be as much as 20 PSI difference between tires that look the same. You need to invest in an accurate inflation pressure gauge. You should get one with a double, angled foot. This makes it much easier to check the outer tire of a dual set.
Wipe off the valve stem before you remove cap. The valve stem caps should be metal with an inner rubber gasket. A good cap will provide a seal even when the valve doesn't. Plastic caps may not provide a good seal at higher inflation pressures used on RV tires. Check all of your tires and adjust the pressure according to the manufacturer's recommendation. Never set the inflation pressures below the recommendations you find on the vehicle manufacturers placard and do not exceed the maximum inflation pressure ratings found on the tires sidewall. Over inflated tires are more likely to be cut, punctured or broken by sudden impact if they hit an obstacle, like a pothole, at high speeds.
Never check inflation pressure when the tires are hot. You'll get a higher-pressure reading and if you let some air out they'll be under inflated when they are cold. If you have dual wheels you'll want to add extension hoses to the valve stems to make the job of checking tire inflation easier. It can be nearly impossible to check the inner dual without extension hoses. The best extension hoses will have stainless steel reinforcement and external braiding for long trouble-free life. Make sure the ends of the hoses are securely attached to the wheels. If you add extension hoses you need to replace the rubber valve stems with all steel valve stems. The added weight of the extension hoses can cause rubber stems to leak air resulting in under inflation.
Ozone in the air and UV rays from the sun shorten the life of your tires. It's not uncommon to see RV tires with low mileage and plenty of tread that are ruined by the damaging effects of ozone and UV rays. Ozone in the air causes tires to dry rot and deteriorate. UV rays from the sun make it happen quicker. This is especially true of the tires sidewall. Inspect your tires for checking or cracks in the sidewalls. If you notice any damage have the tires inspected by a professional. There are basically two ways to protect your tires from these elements. Keep the tires covered with covers that will block out the sunlight when not in use. For long-term storage remove the tires and store them in a cool dry place away from the sunlight, and away from grease, oil, and fuel. I also recommend that you place something like a piece of wood between the ground and the tires. Be sure that whatever you use is larger then the footprint of the tire. No portion of the tire should hang over the edge of the tire block. This can cause internal damage to the tire.
The age of your tires is another factor that contributes to tire failure. I learned this lesson the hard way. I bought an early model Jeep CJ7 to tow behind our motor home. After completely restoring it we were ready to try it out. The tires on the Jeep looked new. There were no visible signs of damage from the sun and the tread looked as though they were used very little. We towed the Jeep from North Carolina to Florida and from there to Colorado and back to North Carolina with no problems. Shortly after that we towed it to Pennsylvania. Two hundred miles into the trip a front tire blew out, damaging the inner fender, shock absorber and an area below the door. I replaced the tire with the spare and within another 100 miles the spare blew out resulting in more damage. After getting a new tire and going back to pick the Jeep up along side the Interstate we took it to a tire store to have the remainder of the tires replaced. The technician came in and explained that the tires were nine years old and even though they looked to be in good shape they could not handle the stress put on them. He also explained that all tires manufactured in the United States have a DOT number. The DOT number on my tires was on the inside sidewalls. The last three or four digits in the DOT number identify how old the tire is. Older tires used three digits. The first two identify the week of the year that the tire was built and the third identifies the year. Newer tires use four digits. Again the first two digits are the week of the year and the last two identify the year. For example 3204 is the 32nd week of the year and 04 is the year 2004. If you question the age of your tires, especially on a used RV, and you can't find the DOT number have them inspected by a qualified tire center.
Have you ever owned a vehicle and neglected to have the tires rotated and one day you suddenly notice that the front tires are wore out but the rear tires look fine? I'm sure that this has happened to most of us until we learned the valuable and expensive lesson of not rotating our tires. If one tire shows signs of wear faster than another tire it may be a signal that something other than normal tire wear is happening and you should have it checked. But if it's just normal tire wear you can even out the wear and extend the life of your tires by having the tires rotated on a regular basis. Talk to your tire dealer about proper tire rotation intervals.
Occasionally washing your tires with soap and water is OK, but anything beyond that can actually shorten the life of your tires. Sidewall rubber contains antioxidants and anti-ozones that are designed to work their way to the surface of the rubber to protect it. Washing tires excessively removes these protective compounds and can age tire prematurely. The same is true of most tire dressing designed to make your tires shine.
Always keep in mind that weighing your RV is a snapshot in time. Weights can and do change according to how you load and distribute the weight in your RV and on many other factors. You should get in the practice of weighing your RV periodically to stay within all weight ratings, and remember, whenever an overload condition exists resolve the problem before using your RV.
Tire failure can be extremely dangerous and can cause extensive damage to your RV. There are no guarantees, but by practicing good tire maintenance and weighing your RV you can feel much safer and secure that the weakest link on your RV will do its job while you're out exploring this wonderful country we live in.
By Mark Polk, RV Education 101
It's prime RV travel season and I thought this would be a good time to discuss traveling with pets in your RV. Pets and RV's just seem to go together. One of the really great things about traveling in an RV is that you can take your pets with you. In many cases the main reason people buy an RV is so their pets can travel with them. Both of our dogs have been traveling with us in our RV since they were puppies. They both get extremely excited when they see us loading the RV for another trip.
It's fun and convenient to be able to take your pets along with you, but I realized a long time ago that certain precautions must be taken when you travel with pets. There were a lot of things to remember about traveling with our pets, so to make it easier I included this checklist in my “Checklists for RVers” e-book available
This checklist does not cover everything that you need to be concerned with when traveling with pets in your RV, but it's a good start. You can add to this list and tailor it to your specific type of pet or your pet's needs and refer back to it before a trip so you don't forget anything.
- First and foremost always keep in mind that an RV gets extremely hot and / or cold inside depending on the outside temperature. Always make sure there is some type of ventilation and / or heat and air available when pets are left in the RV.
- Never leave your pets in an RV for long periods of time without somebody checking on them periodically. If you will be away from your pets and the RV for an extended period of time leave a key with someone you can trust to check on the pets and in case of an emergency.
- Always have fresh water available for your pets. You never know the quality of the drinking water when you are traveling so it's a good idea to take a container of water from your home that your pets are accustomed to, or use bottled water.
- Pets should always travel in a pet carrier or crate for their personal safety.
- Get a current health certificate from your veterinarian before traveling.
- Always take the pets medical records along with you.
- Take a recent color photograph of your pets with you in the event that they should get lost.
- Update all vaccinations before leaving on your trip.
- Take a proof of rabies vaccination.
- Take flea, tick, and heartworm medications.
- Take a pet first aid kit and know what dosages of medication to give your pets.
- Take your veterinarians regular phone number and emergency phone numbers with you.
- Get the phone number for a local veterinarian when you arrive at your destination.
- Don't forget to take the brand of pet food your pet is used to and take a food and water travel bowl.
- Take a walking leash.
- Your pet's collar should include identification along with basic information such as your name, address and a cell phone number. You can even include an e-mail address.
- Take a harness, tie out anchor and a leash or chain. Give your pet plenty of room to move, but be cautious of traffic and obstacles that they can get hung or caught on. We use portable exercise pens.
- Take grooming tools, pet toys and treats.
- Take extra cat litter and the cat box.
- Take some plastic bags for pet clean up.
- Take your pet's favorite bedding or crate.
- Take some old towels just in case you need them
- Traveling can be stressful on pets especially if they are not used to it. When your pet is away from home and off of their regular schedule it can affect their health. Perform a daily health check on your pet. Look for anything out of the ordinary.
- Stop often when you're traveling and allow your pet's to exercise and to relieve themselves.
- When making campground reservations be sure and ask about pets. Some campgrounds offer kennels and boarding for pets. If your travel plans include day trips or extended travel away from the campsite inquire about these services.
By Mark Polk, RV Education 101
Today I would like to offer 10 quick tips to help extend the life of your RV and automobile lead acid batteries. Battery maintenance is not that difficult but always keep safety in mind when you work around batteries. Lead acid batteries contain sulfuric acid which is extremely corrosive and can cause severe burns or even blindness. The hydrogen gas that batteries produce when they’re charging is very explosive. When you work around batteries you need to wear goggles and gloves, remove all jewelry and do not smoke or use any open flames.
Tip #1
Routine maintenance and recharging a discharged battery as soon as possible will extend the life of the battery.
Tip #2
Sulfation will occur when a battery’s state of charge drops below 80 %, or 12.4 volts. Recharging a battery at an 80% state of charge will prevent battery sulfation.
Tip #3
Never let a battery discharge below 10.5 volts. You can measure the voltage with a digital voltmeter. Measuring the voltage gives you a quick picture of the batteries depth of discharge so you know when they need to be recharged. Set the voltmeter on DC voltage and put the red lead on the positive terminal and the black lead on the negative terminal.
Tip #4
Reducing the battery’s depth of discharge will increase the life of the battery. A battery discharged to 50 % everyday will last twice as long as it would if it’s cycled to 80%.
Tip #5
RV’s have parasitic loads that will discharge the battery over time. Some but not all of these loads are LP gas leak detectors, the TV antenna power booster, clocks, stereos and appliance circuit boards. If your RV is equipped with a battery disconnect switch make sure it is in the OFF position when you are not using the RV or when it is in storage. If your RV is not equipped with a battery disconnect switch you can purchase a battery disconnect that installs directly to the battery.
Tip #6
Hot temperatures and overcharging kill batteries. During hot weather or during high usage check the batteries frequently. Checking the electrolyte levels and adding distilled water as required can save your lead acid batteries.
Tip #7
When you add water to a battery, use mineral free water. Distilled water is best. Regular tap water can cause calcium sulfation.
Tip #8
Properly charging your batteries needs to be done in stages. A bulk charge should be performed to return the battery to 90% of a full charge in the first few hours. An absorption charge is used for the remaining 10 percent to prevent any battery gassing and loss of water, and then a float charge to keep the battery fully charged.
Tip #9
Batteries should only be watered after charging unless the plates are exposed prior to charging.
Tip #10
To prevent water loss from bubbling and gassing leave the vent caps on batteries while charging.
Note:
The lead and plastic used to construct batteries can be recycled. More than 97% of all battery lead is recycled. Be sure and recycle your old batteries.